
Making a website for a small business isn't rocket science.
In fact, it's easier than you think.
This guide will walk you through the process—step by step.
1. Choose the Right Platform for Your Site
When starting a website for your small business, you need to pick the right website platform. Which is software that allows you to easily create, manage, and modify your website.
Before you choose a platform, think about what you need.
Do you want to sell products directly from your website? Or do you need a simple site that just provides information about your business? Knowing this will guide your decision.
For example, if you want to sell products online, an ecommerce platform like Shopify could be ideal.
Here are some popular website platforms:
- WordPress: A free, open-source platform that offers flexibility, scalability, and extensive customization options. It's ideal for blogs, business sites, and complex websites.
- Wix: A user-friendly drag-and-drop website builder highly suitable for simple sites. It offers less customization than WordPress but is great for small businesses.
- Squarespace: Another drag-and-drop website builder that provides beautiful templates and ease of use. It's good for creative professionals and small businesses.
- Shopify: Designed specifically for ecommerce, this platform offers robust tools for online stores. It's a solid choice for businesses focused on selling products online.
Take time to research and compare different options before making your decision. Because the right platform will make building and maintaining your website easier.
2. Pick a Domain Name
A domain name is the web address where users can find your website. Like “www.yourbusiness.com.”
And selecting an appropriate option ensures consistent branding and makes it more memorable.
Start by brainstorming domain name ideas that mention your business name. And then narrow your options.
Here are some tips for selecting a domain name:
- Keep it short and simple. A shorter domain is easier to remember and type.
- Ensure it's easy to spell and pronounce. This reduces the chance of errors when customers search for your site.
- Avoid abbreviations and acronyms. Instead of “www.abcinc.com,” use “www.abccorporation.com.” Because the meaning is clearer.
- Consider future growth. Choose a name that won't limit your business as it expands. For example, it may be better to go with something less specific like “annasdesserts.com” over “annascupcakes.com.”
- Go with a common top-level domain (TLD) extension. Choose something users are familiar with. For example, “www.yourbusiness.com.”

Once you have some ideas, use a domain registrar like GoDaddy or Namecheap to check whether the domain name is available.
If your first choice isn't available, try variations. Or consider using a different extension like “.net” or “.io.”
Before finalizing your choice, make sure it's not trademarked by another company to avoid legal issues.
After finding an available domain name you like, register it promptly. And consider registering it for multiple years or setting up auto-renewal to ensure you don't lose it.
3. Sign Up for Hosting
After you've registered your domain name, you’ll need to sign up for website hosting. Which is a service that makes your website accessible on the internet.
Most domain registrars (including the ones mentioned in the previous section) also offer hosting services.
There are several types of hosting to choose from, depending on your needs:
- Shared hosting: This is the most affordable option. And is good for small websites with low traffic volumes.
- Virtual private server (VPS): This offers more resources and control. And is suitable for growing businesses.
- Dedicated hosting: This offers the highest performance. And is best for large, high-traffic websites.
For most small businesses that are starting out, shared hosting is usually sufficient.
Many hosting providers offer easy installation to quickly get you up and running. And they have dedicated support teams if you need any help.
4. Create Your Site
Next, it's time to bring your website to life. And depending on the platform you’re using, the process will vary.
As an example, we’ll show you how you can design a website in Wix.
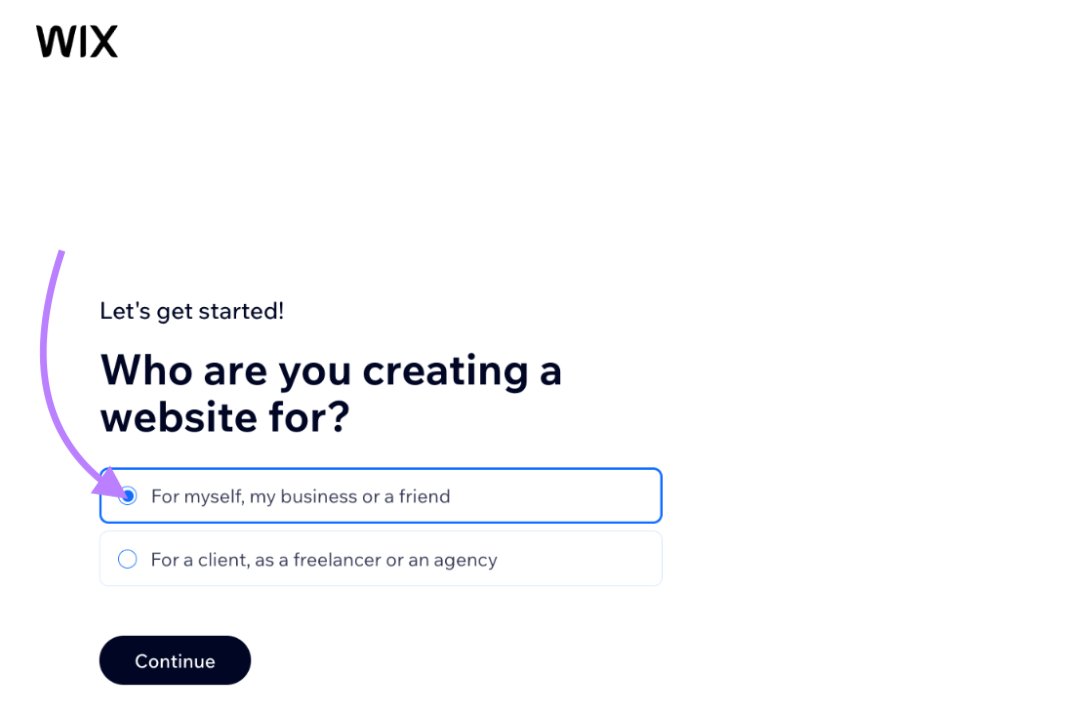
First, go to the Wix site and follow the prompts to create your account.
Then select the circle to indicate the site is for your business. And click “Continue.”
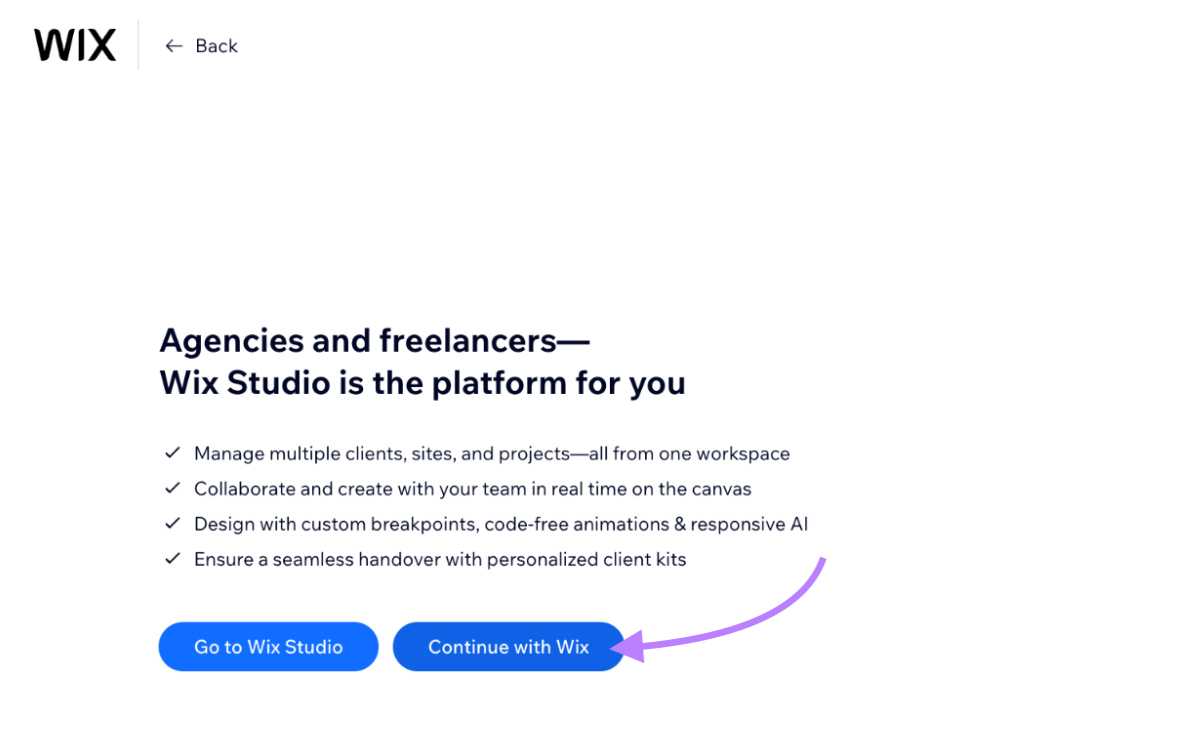
In the next screen, select “Continue with Wix.”
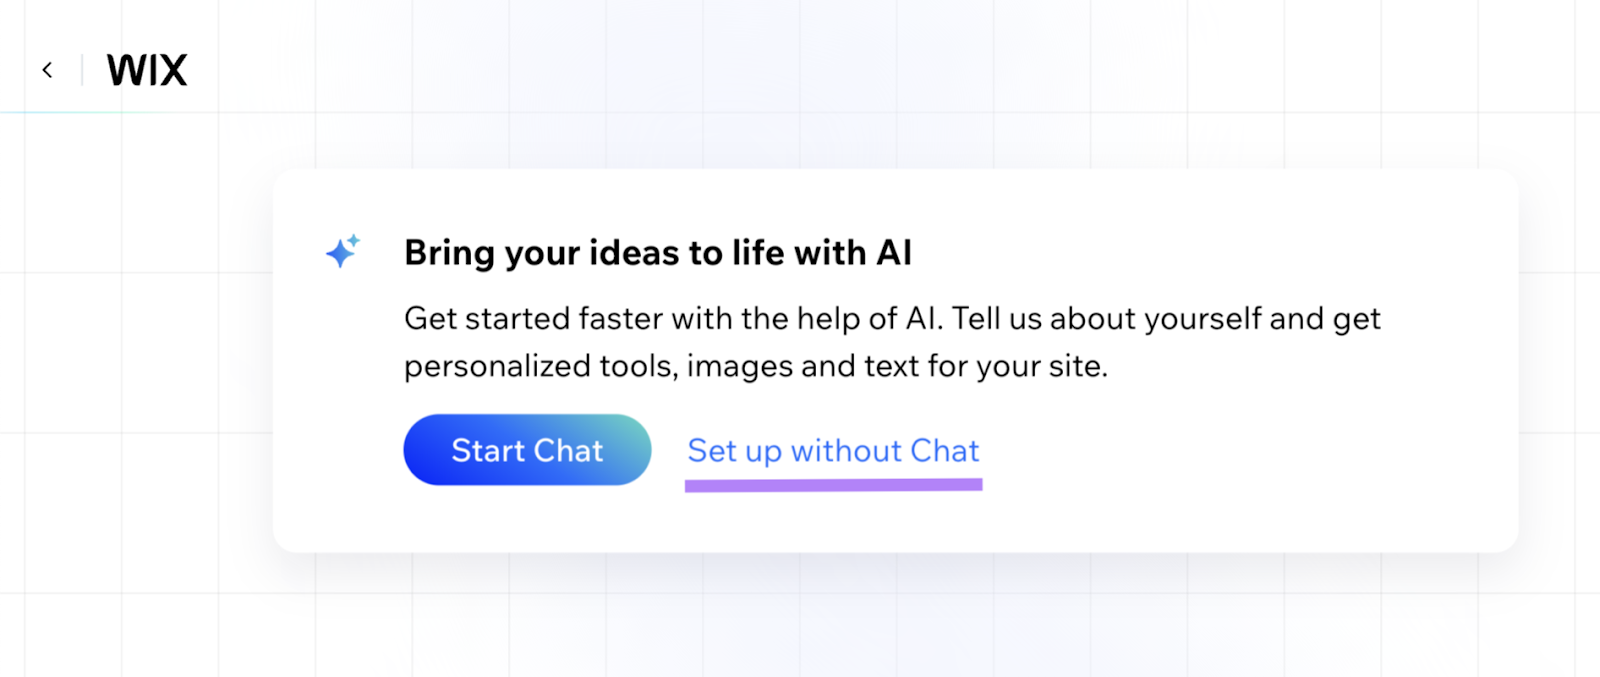
You can use the AI feature to speed things up. Otherwise, select “Set up without Chat.”
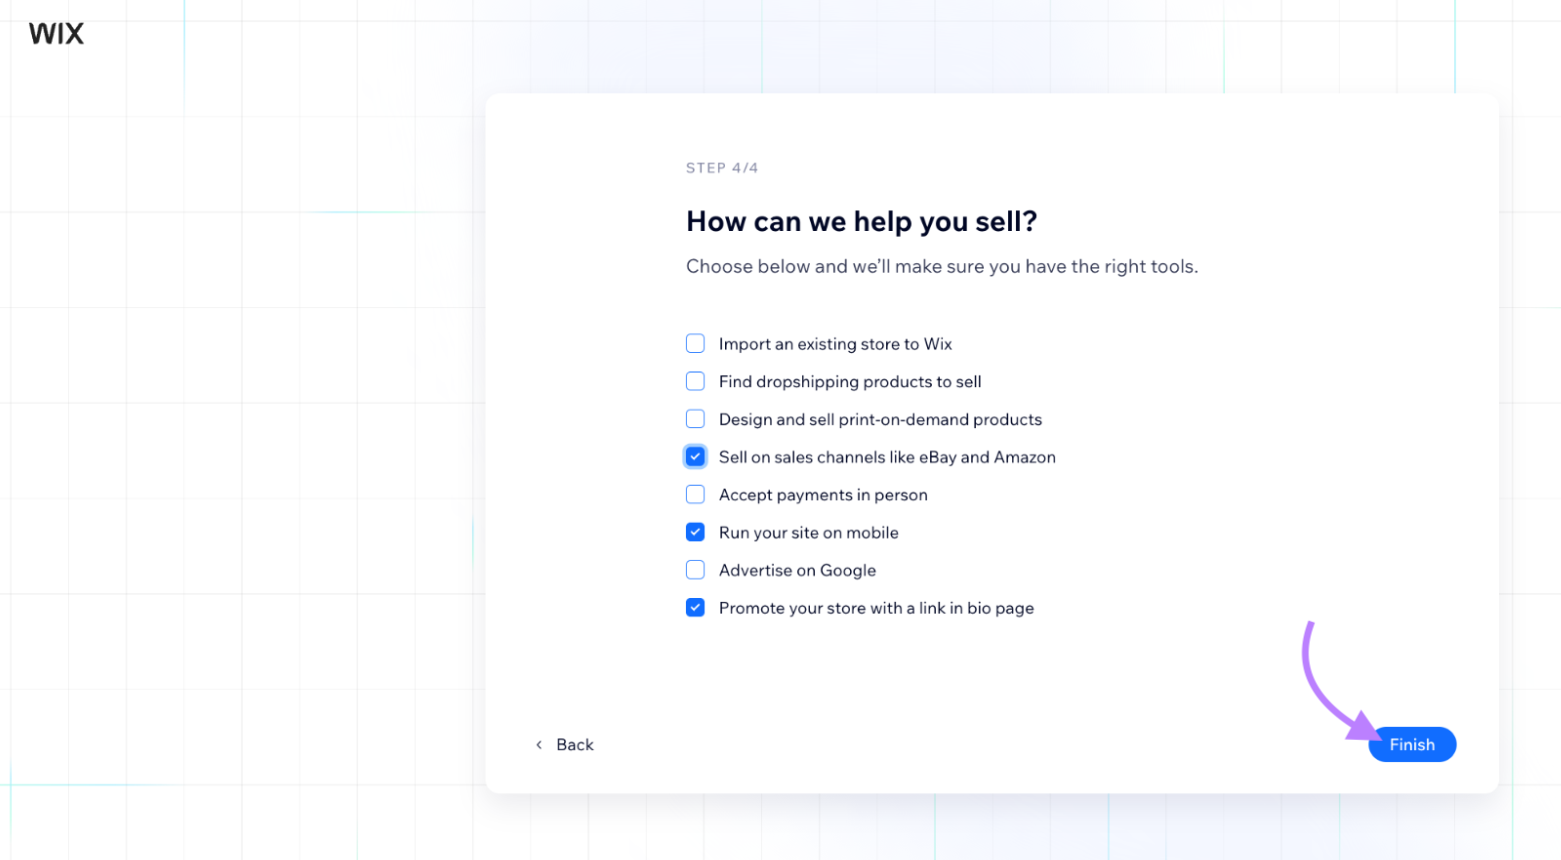
Next, you’ll go through a few screens detailing information about your business.
When you’re done with those steps, click “Finish.”
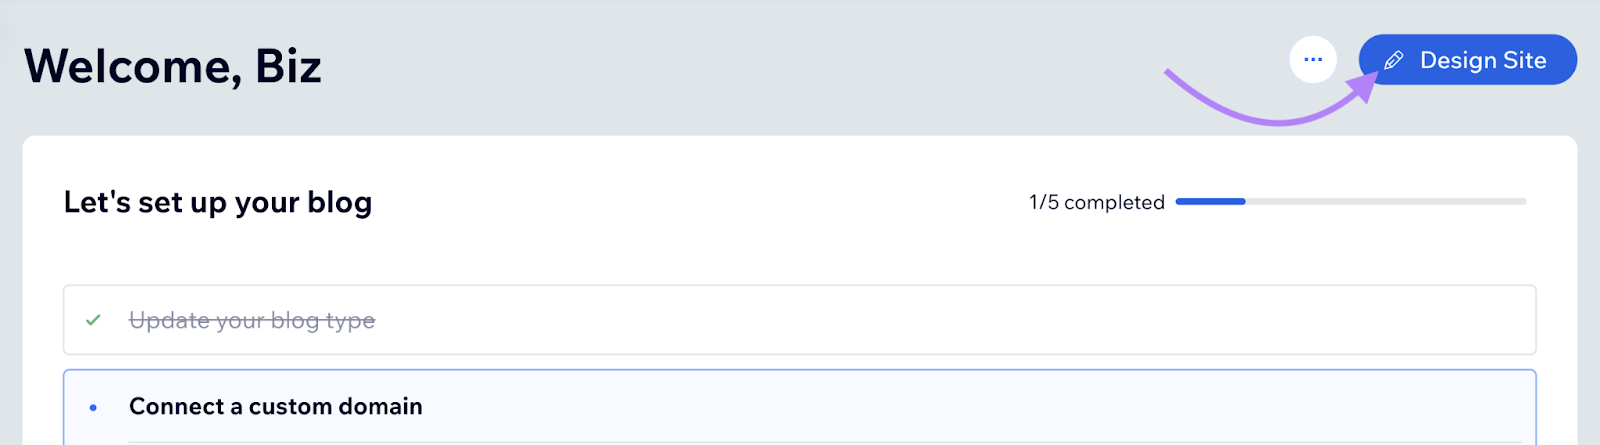
When you get to your dashboard, click the “Design Site” option near the top.
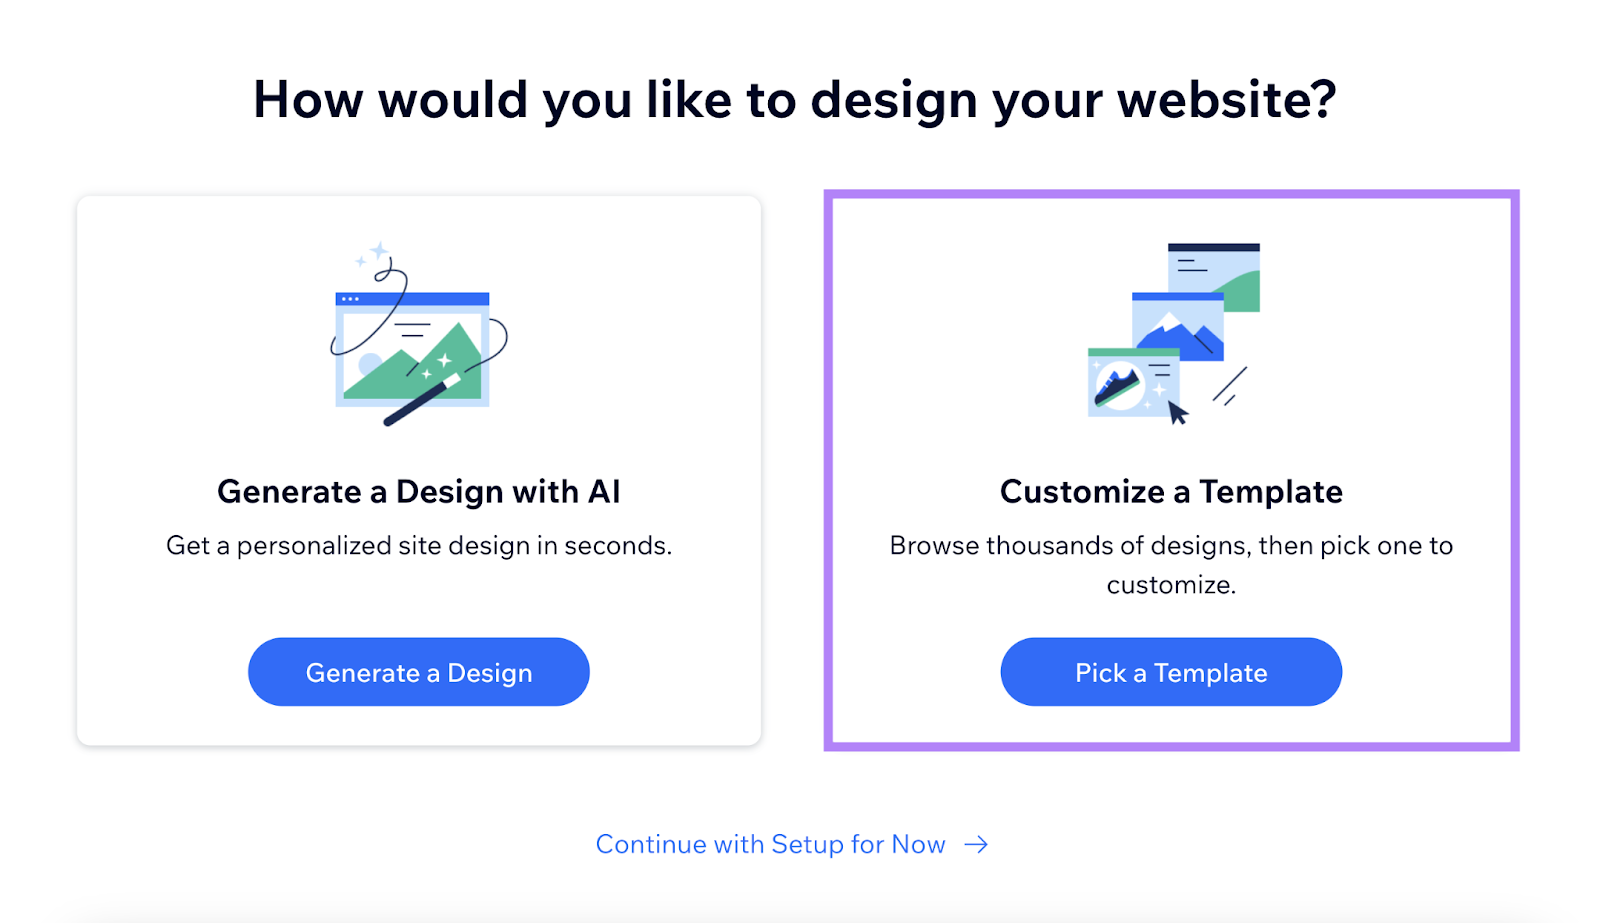
Next, click “Pick a Template” under “Customize a Template.”
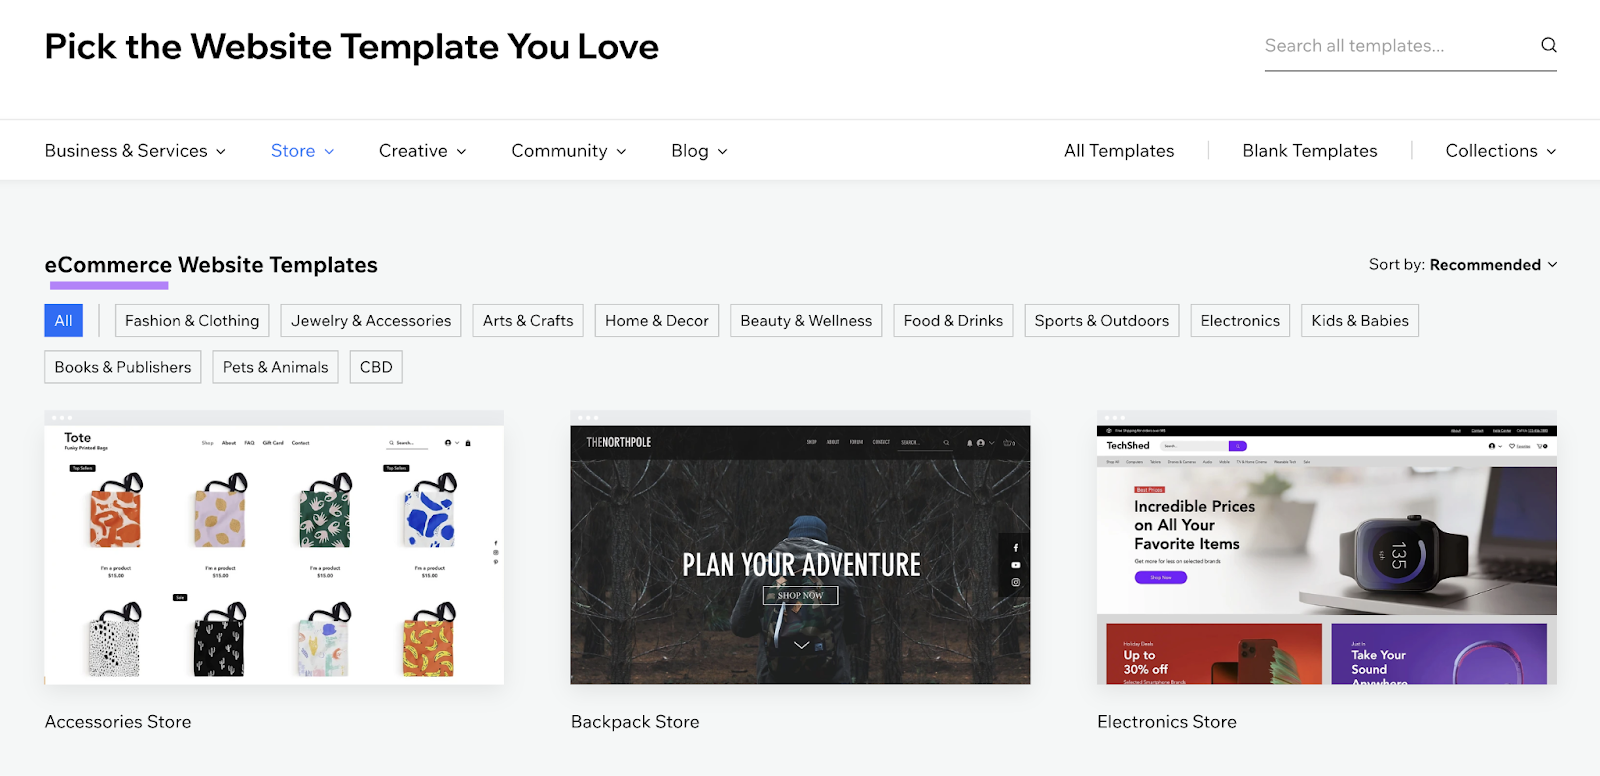
On the next screen, you’ll see a wide range of templates for your specified industry to choose from.
You can choose the template that fits your needs and then customize it. To do so, hover over the template and click “Edit.”
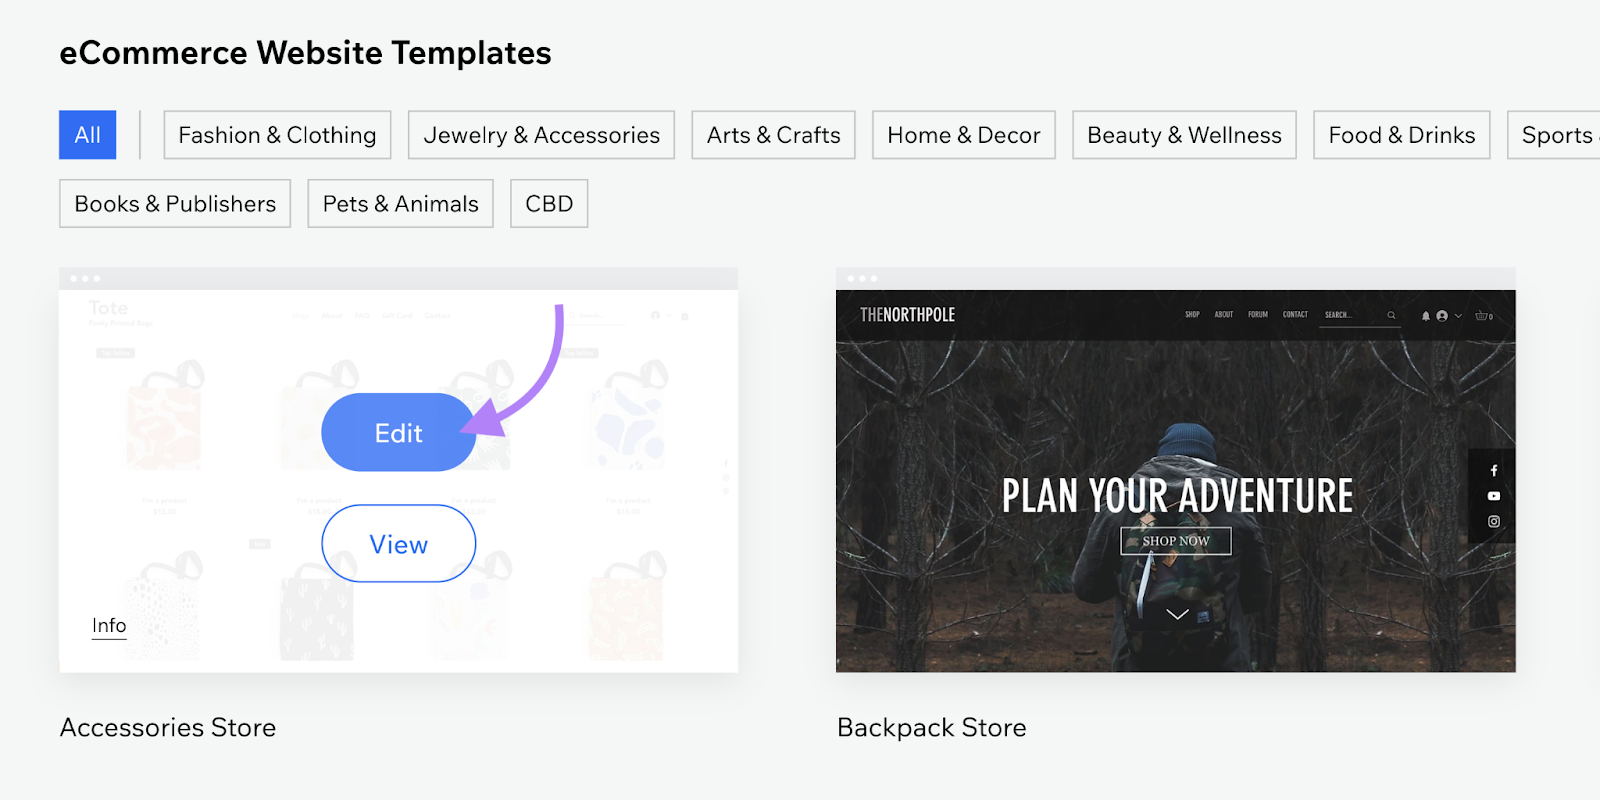
This will open that template in an easy-to-use editor.
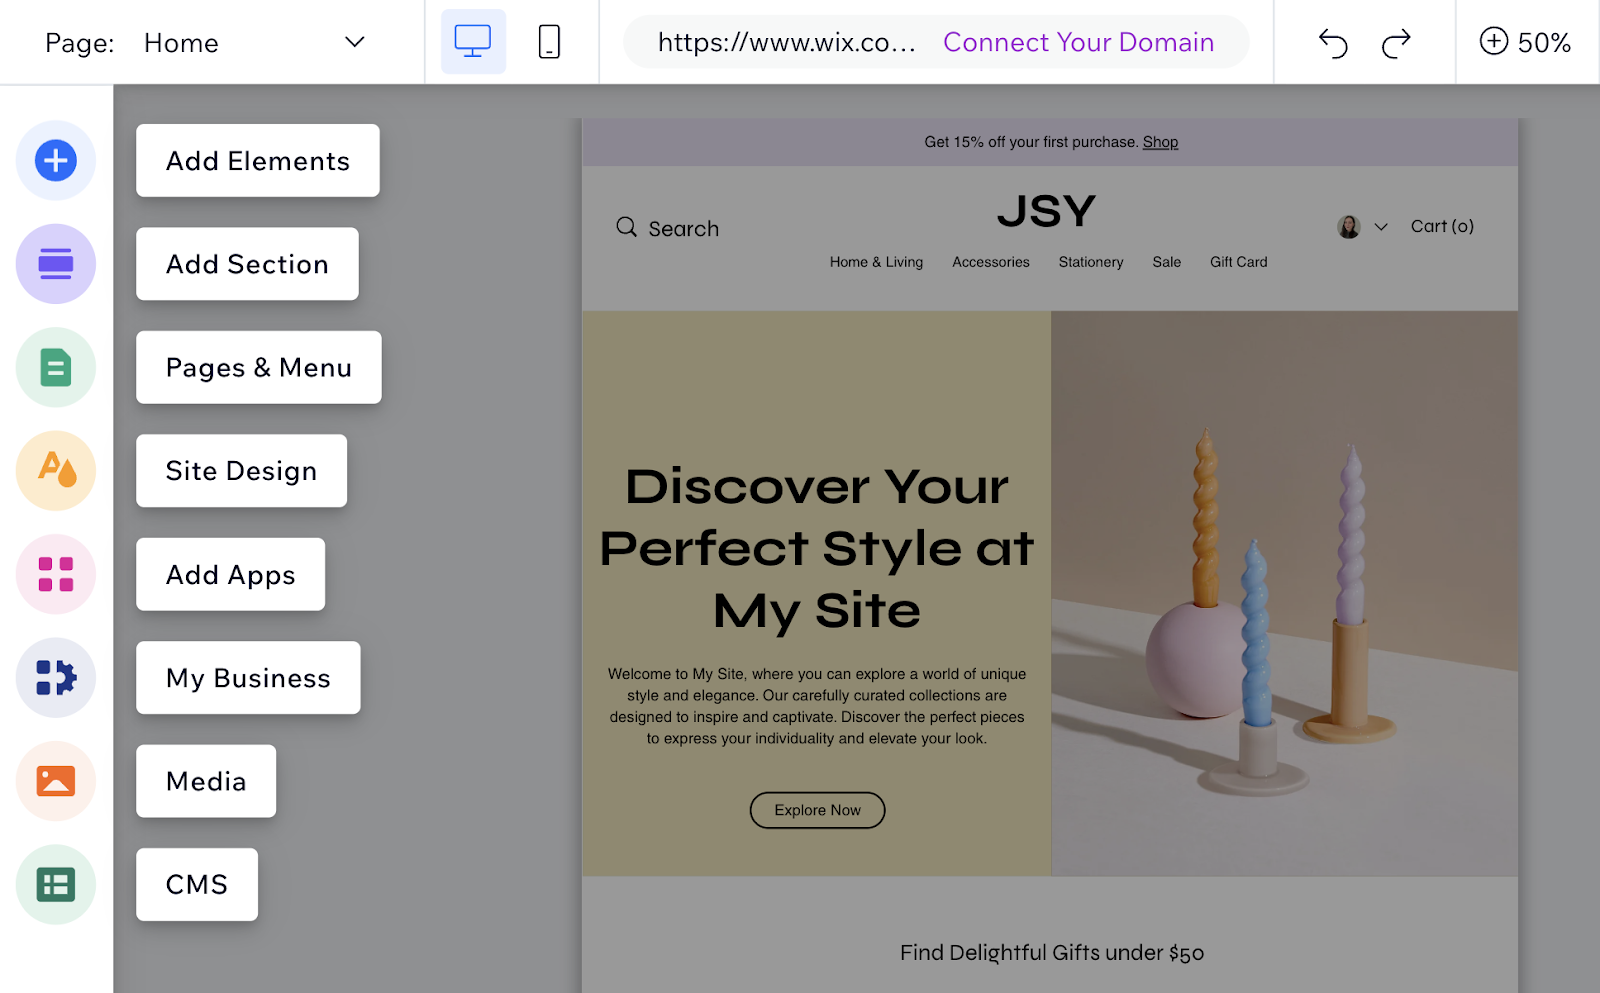
Click on any element to edit it. You can change text, add your logo, replace images, add new sections, and more.
Don’t get too caught up in the details just yet. Because you’ll spend more time going through individual pages later.
Once you’re done with the design basics, go back to your dashboard. And complete the rest of the setup.

5. Add the Plugins, Extensions, or Apps You Need
Plugins, extensions, and apps are tools that can help you add new features to your site. Without requiring extensive coding knowledge.
For example, Wix has a dedicated app marketplace where you can find and install various apps to enhance your website's functionality.
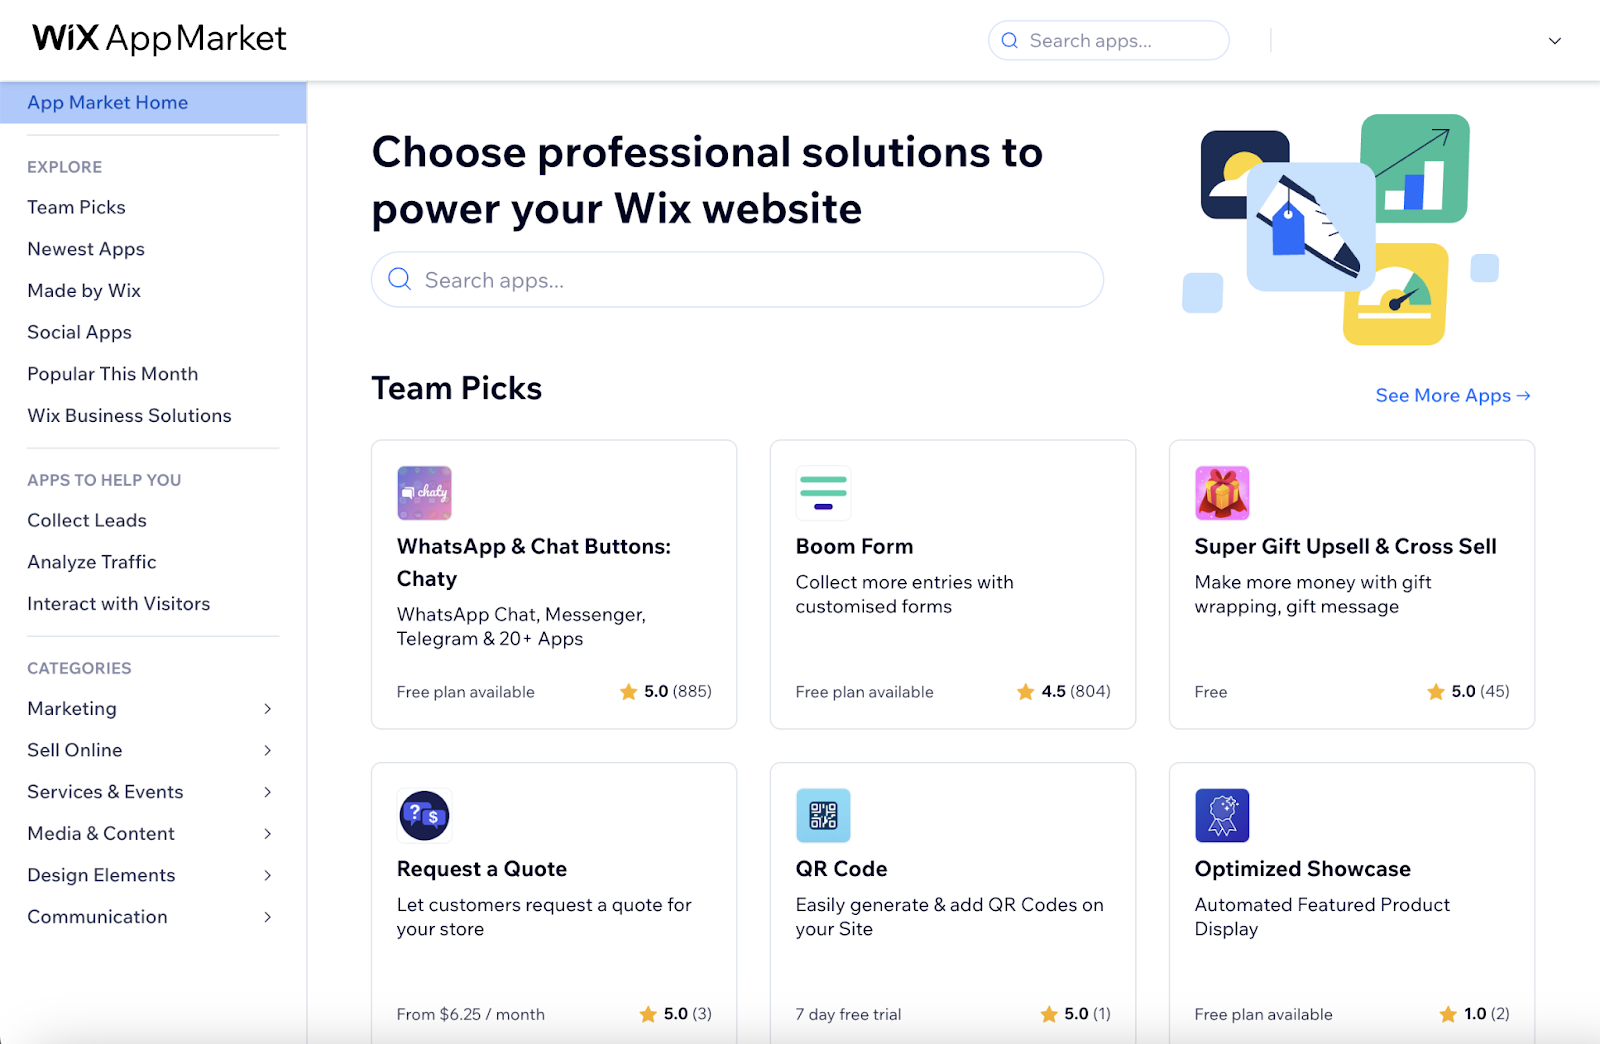
If you run an online store, you might want to choose options related to shipping and delivery. To streamline those processes.
When adding any of these tools, keep these tips in mind:
- Only add what you need. Too many additional tools can slow down your site.
- Regularly update your plugins, extensions, and/or apps to maintain security and performance
- Read reviews and check ratings before installing any new plugin, extension, or app
6. Set Up Your Main Pages
Your main pages are those that form the core structure of your website and provide essential information to your visitors. So, they deserve a lot of attention.
Every small business website should typically have the following key pages:
- Homepage: Serves as the main landing page that offers an overview of your business
- About us: Tells your company's story and introduces you
- Products/services: Provides information about what you offer
- Contact us: Provides your business contact information and communication channels
The template that you've chosen should already include these main pages. But you'll need to customize them with your own content. Here's how to do that:
Click on the “Pages” icon in the left sidebar. And select the page you want to customize.
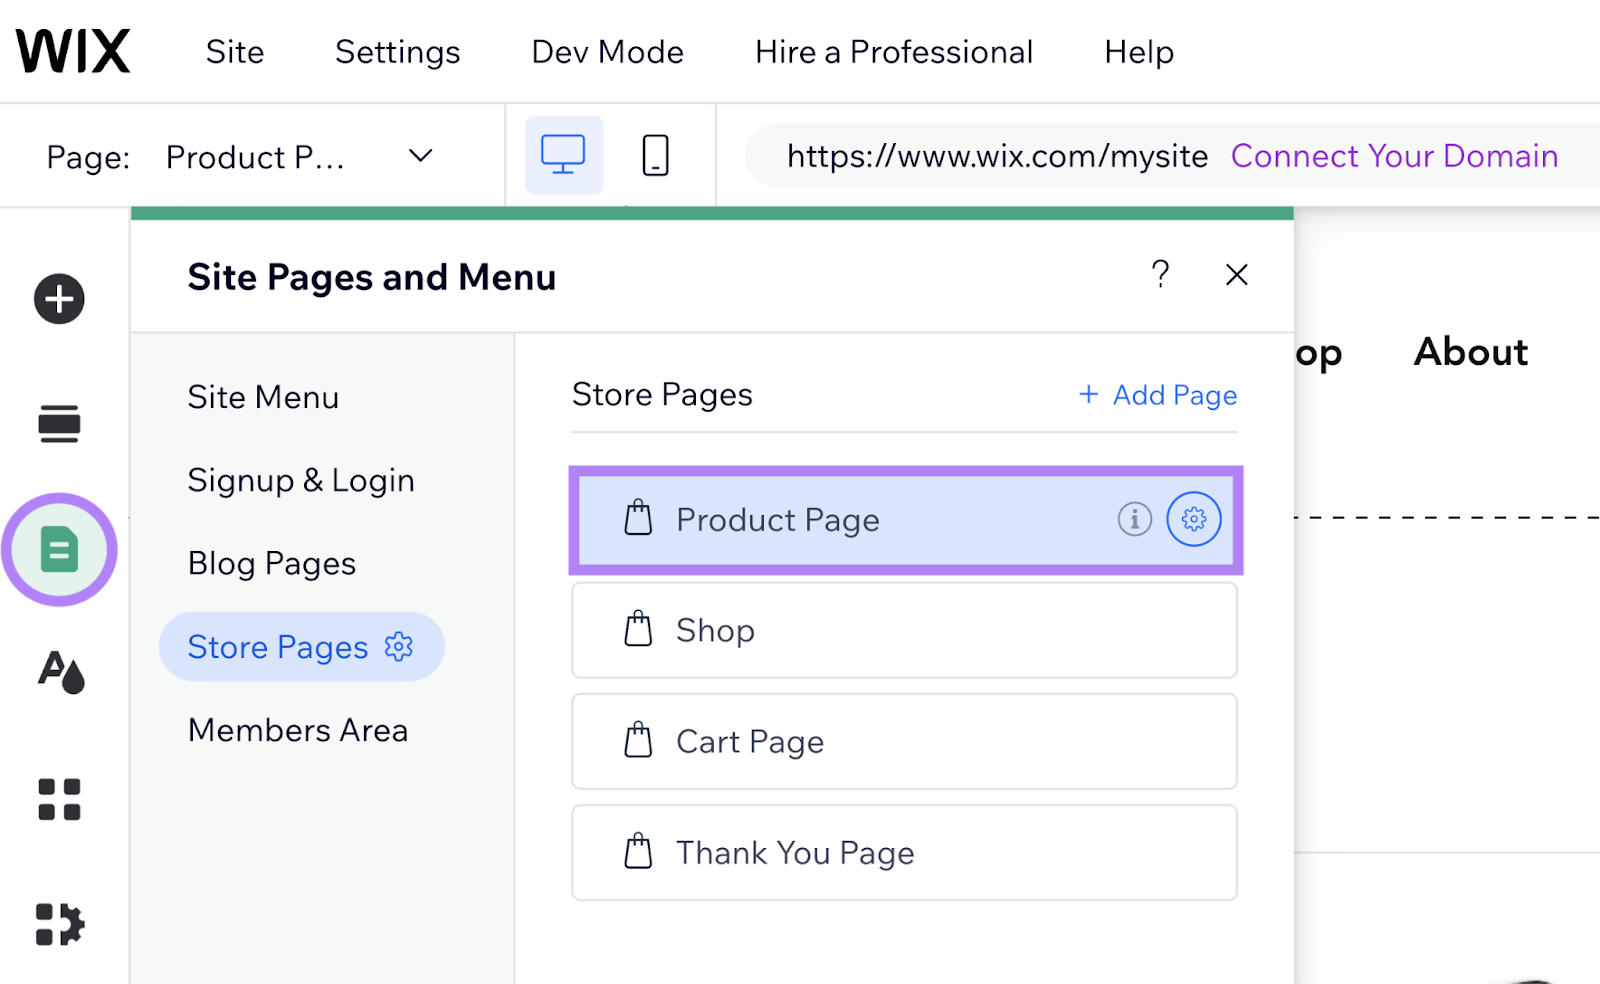
That page will open up inside the Wix editor.
Now, replace the placeholder text with your own information. And update the images to reflect your business.
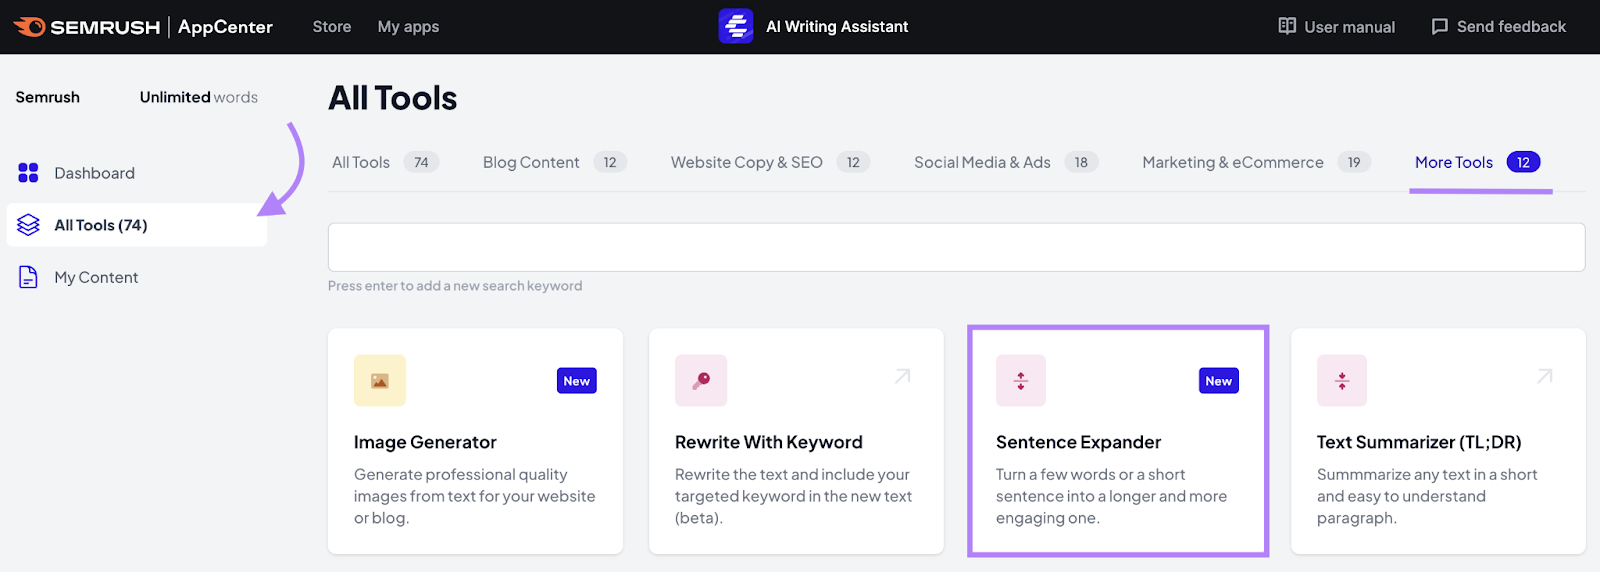
Use Semrush's AI Writing Assistant to help you create compelling content for your pages.
Open the tool and go to “All Tools” > “More Tools.” Then, select the “Sentence Expander” option.
Write a sentence or two describing your business in the given box. And click "Generate."
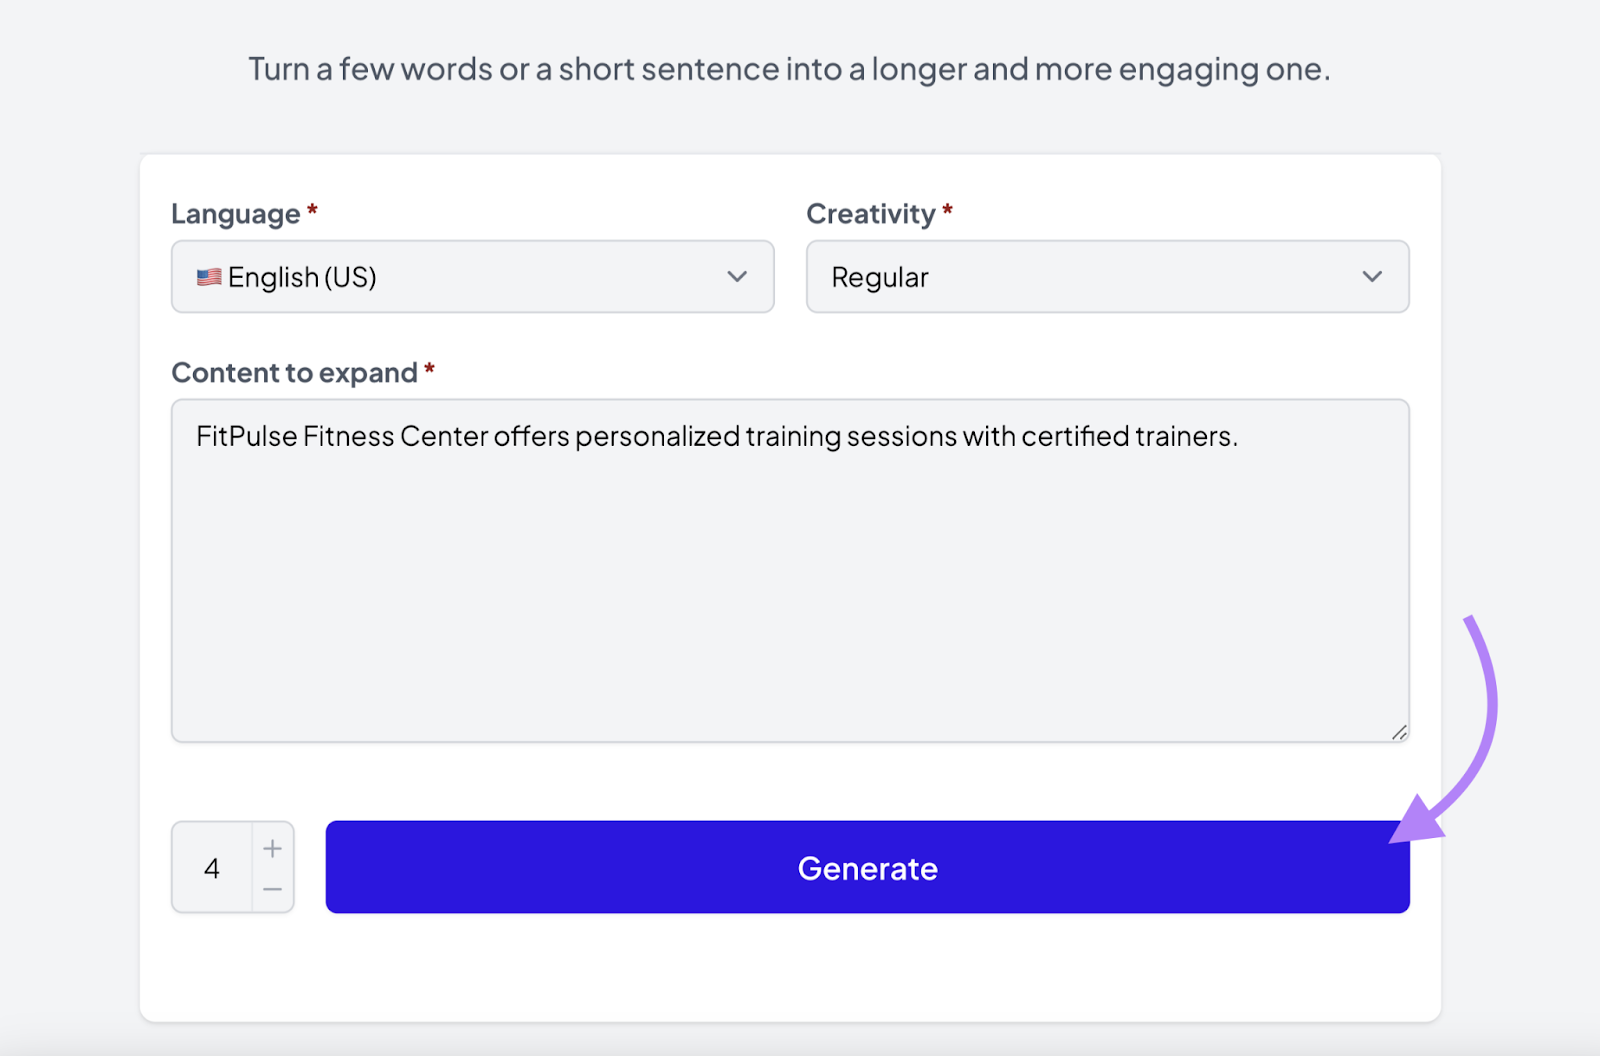
You’ll see expanded content sections that you can use on your pages.
7. Optimize Your Site for SEO
Search engine optimization (SEO) is the practice of optimizing your website to rank higher in search engines’ organic (unpaid) search results. Which can lead to more traffic and potentially more customers for your business.
There are a lot of tactics involved in SEO.
We won't cover all of them here, but take a look at our SEO checklist for a more comprehensive overview of SEO best practices.
For now, here are some simple steps you can take to start optimizing your site:
- Add relevant keywords to your page titles, headings, and content. Don't overuse them—keep it natural.
- Write unique and descriptive title tags and meta descriptions for each page. These can appear in search results and entice searchers to click.
- Add alt text to your images to help search engines and visitors using screen readers understand what they're about
- Regularly publish quality content
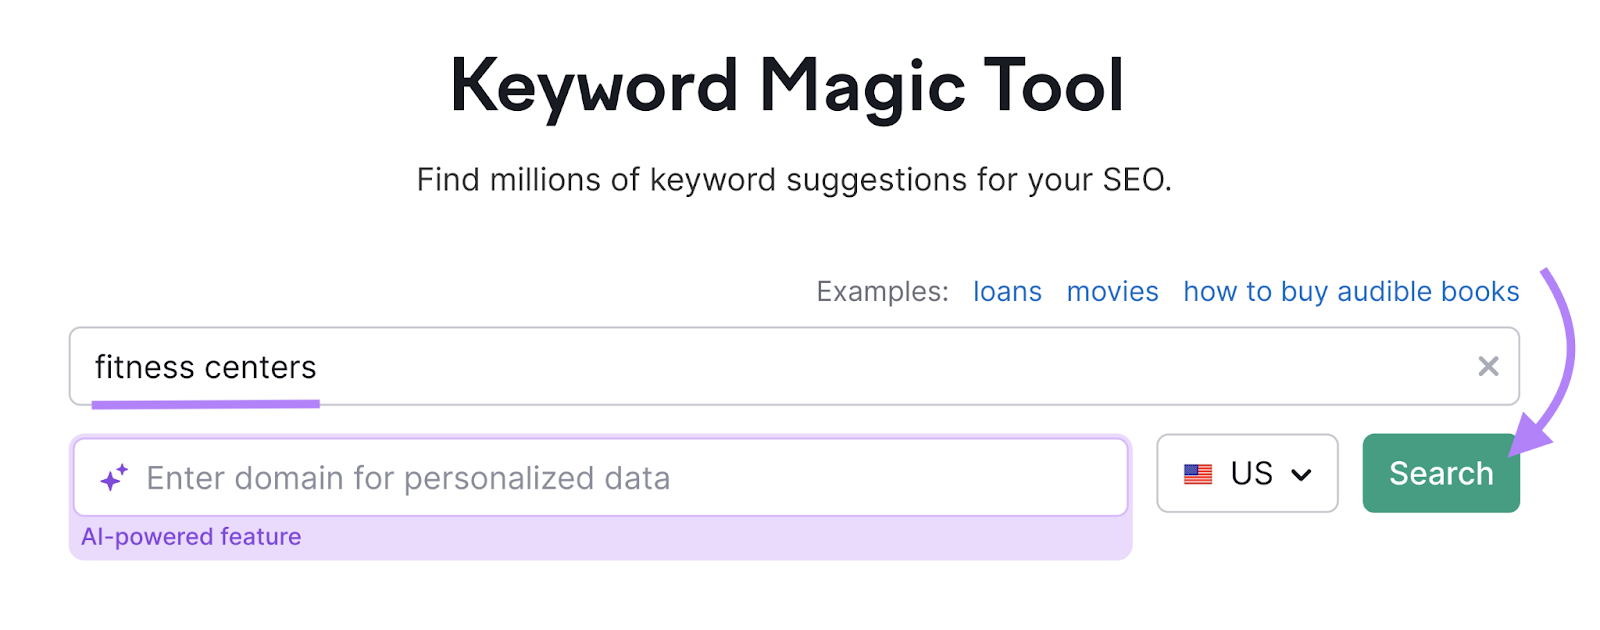
If you need help finding relevant keywords for your business, use Semrush's Keyword Magic Tool.
Open the tool, enter a broad term related to your business, and click "Search."
You'll see a list of related keywords, along with their search volumes (how often they're searched each month) and keyword difficulty (how hard it is to rank for them).
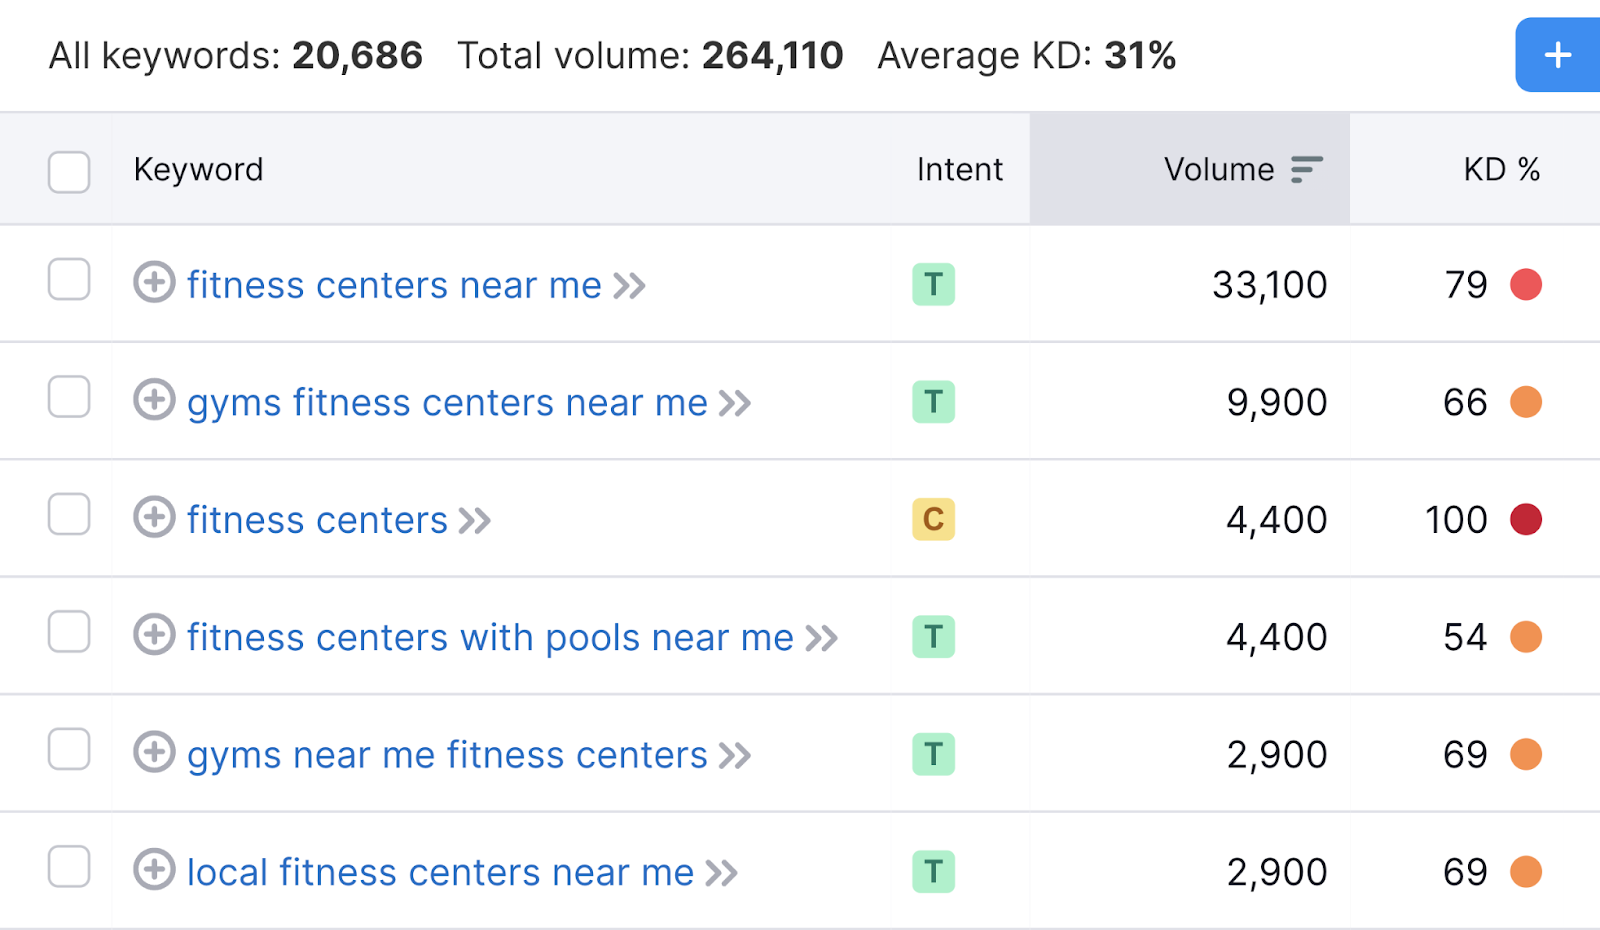
Since your website is new, pick mostly keywords that have lower keyword difficulty scores. Anything below 30 is likely a good choice.
Pay attention to search intent (Intent)—the reason driving a searcher’s query—as well. Because it helps you determine which keywords to use on certain pages.
For example, your product or service pages should be centered around commercial (C) and transactional (T) keywords. Which both indicate the searcher is close to making a purchase.
Once you’ve identified relevant terms, incorporate them into the important pages you already set up where it makes sense to. And save others to use for future pages.
8. Add More Content to Your Site
Consider adding more content to your site, especially through blog posts. Because blog posts are great for providing answers to your target audience’s questions.
Over time, that can help grow your business. Especially if those articles are focused on some of the keywords you identified earlier.
If you need more ideas, use the Topic Research tool to find popular topics in your niche.
Open the tool, enter a broad term related to your business, and click the “Get content ideas” button.
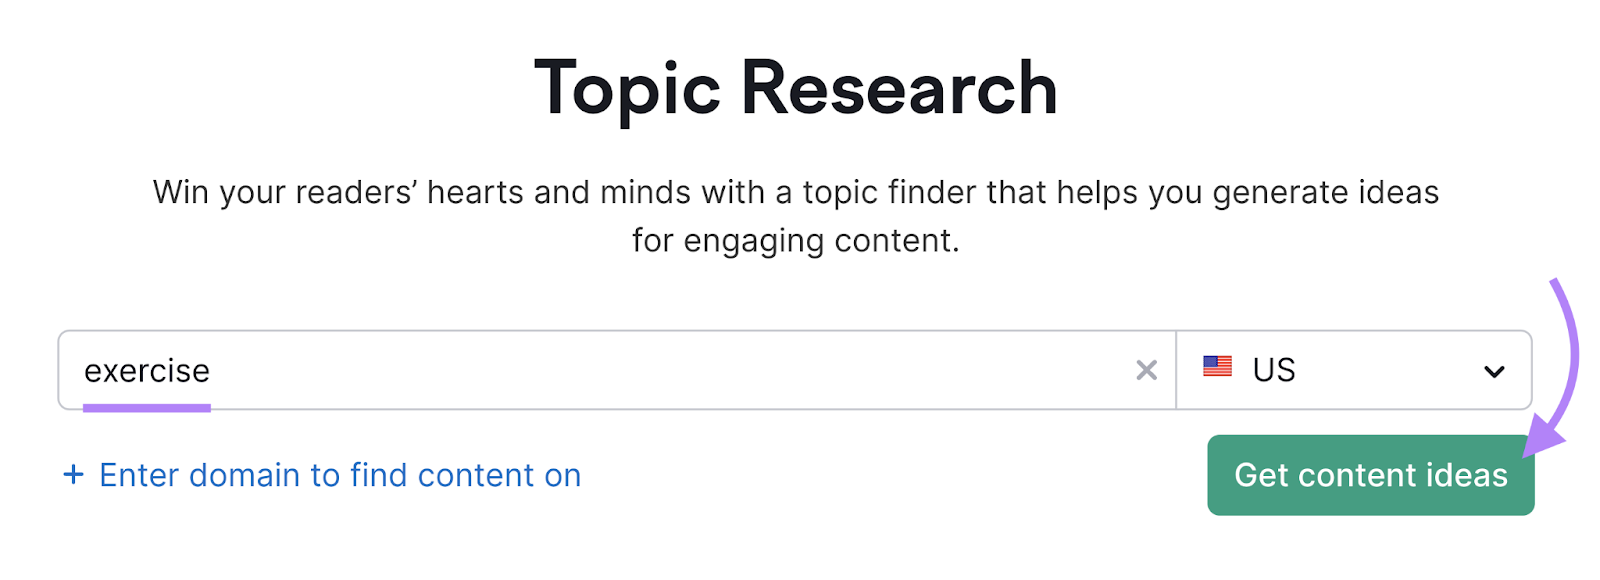
The tool will then generate tons of topic ideas.
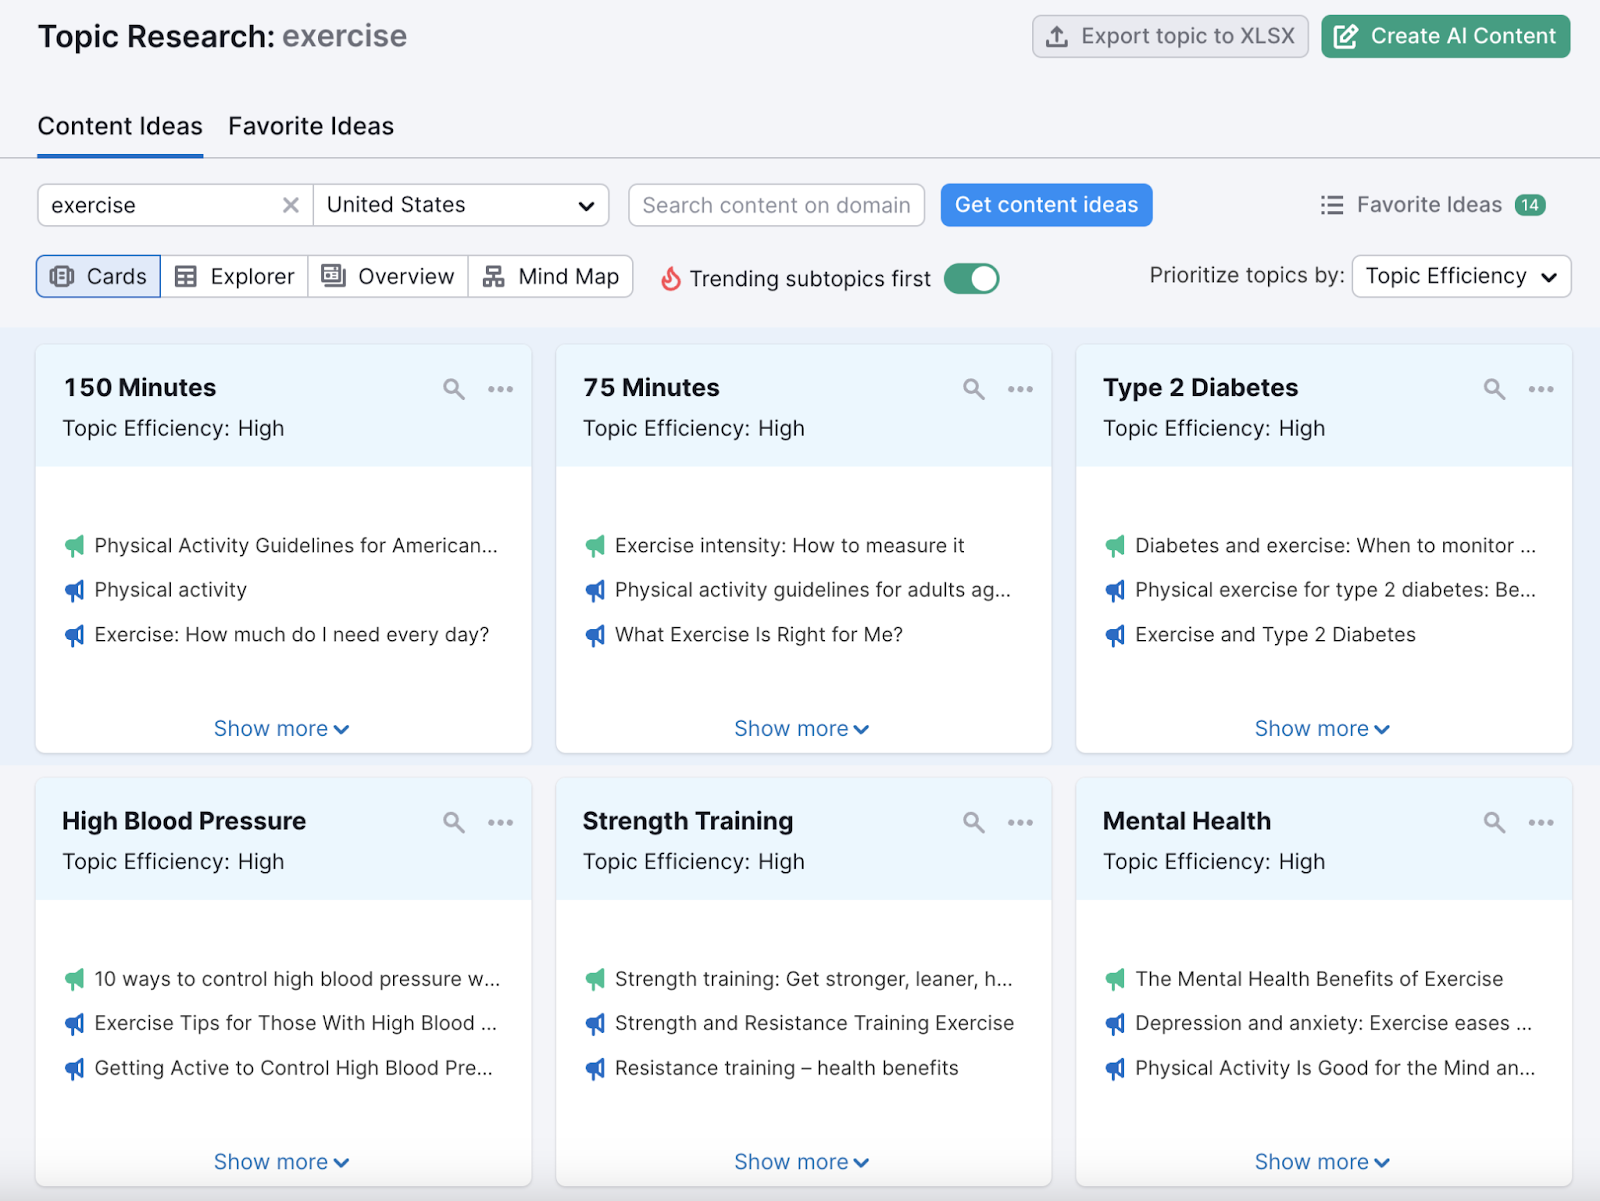
Choose any topic that seems particularly appealing. And start writing your first blog post.
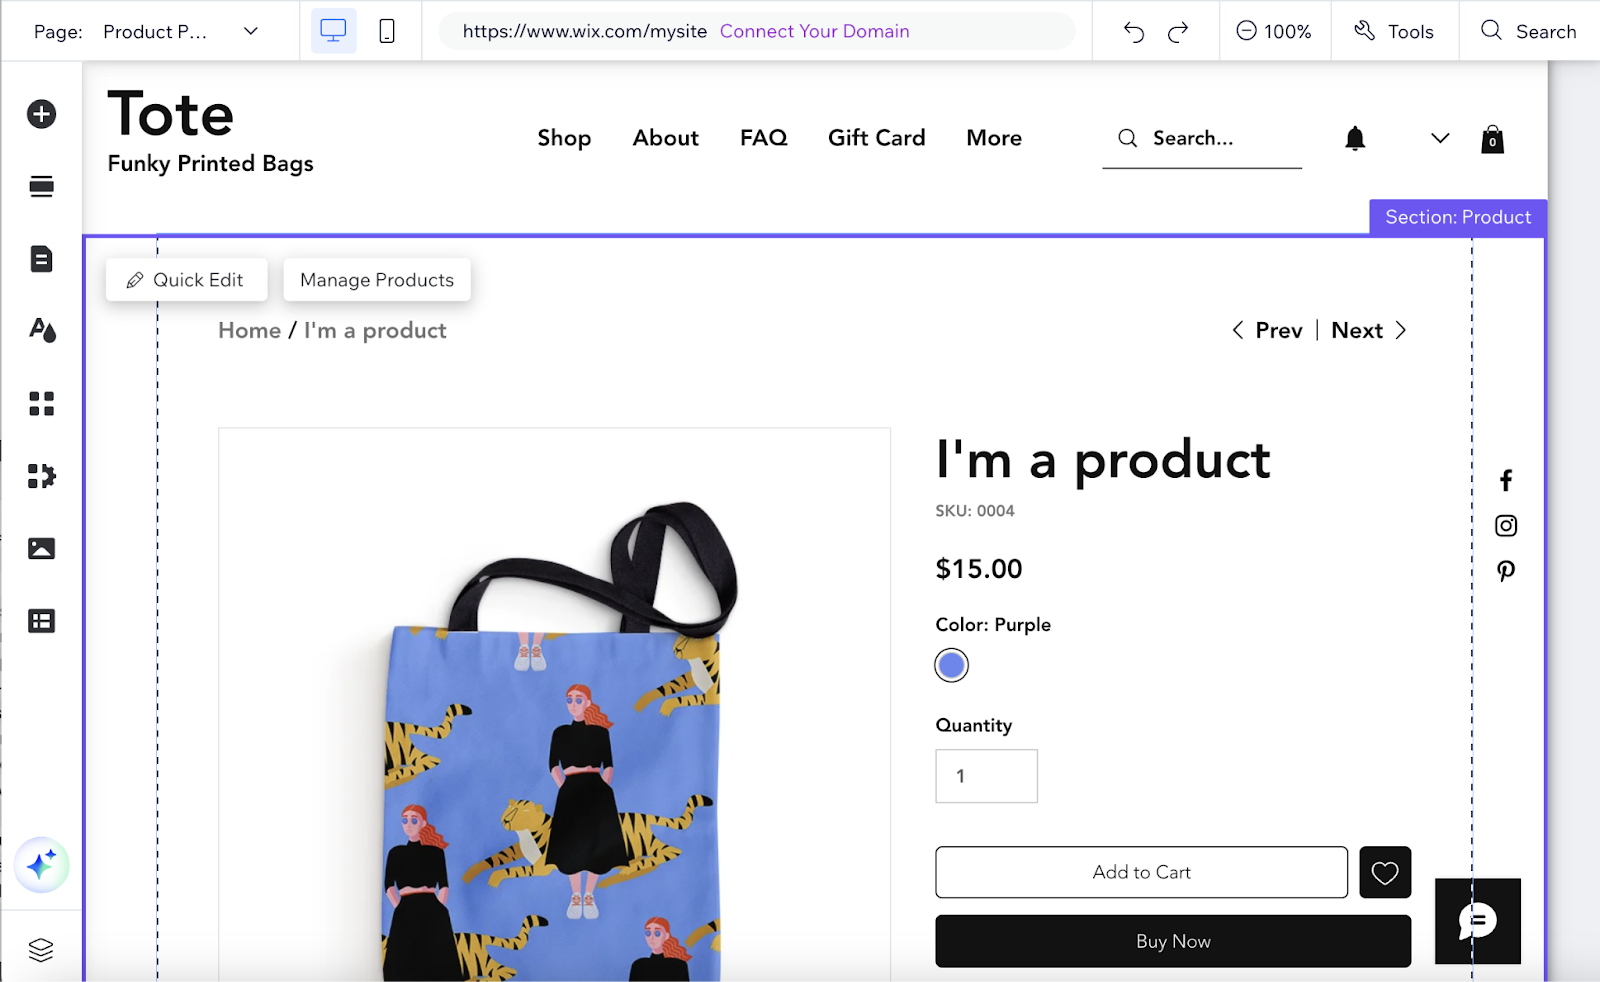
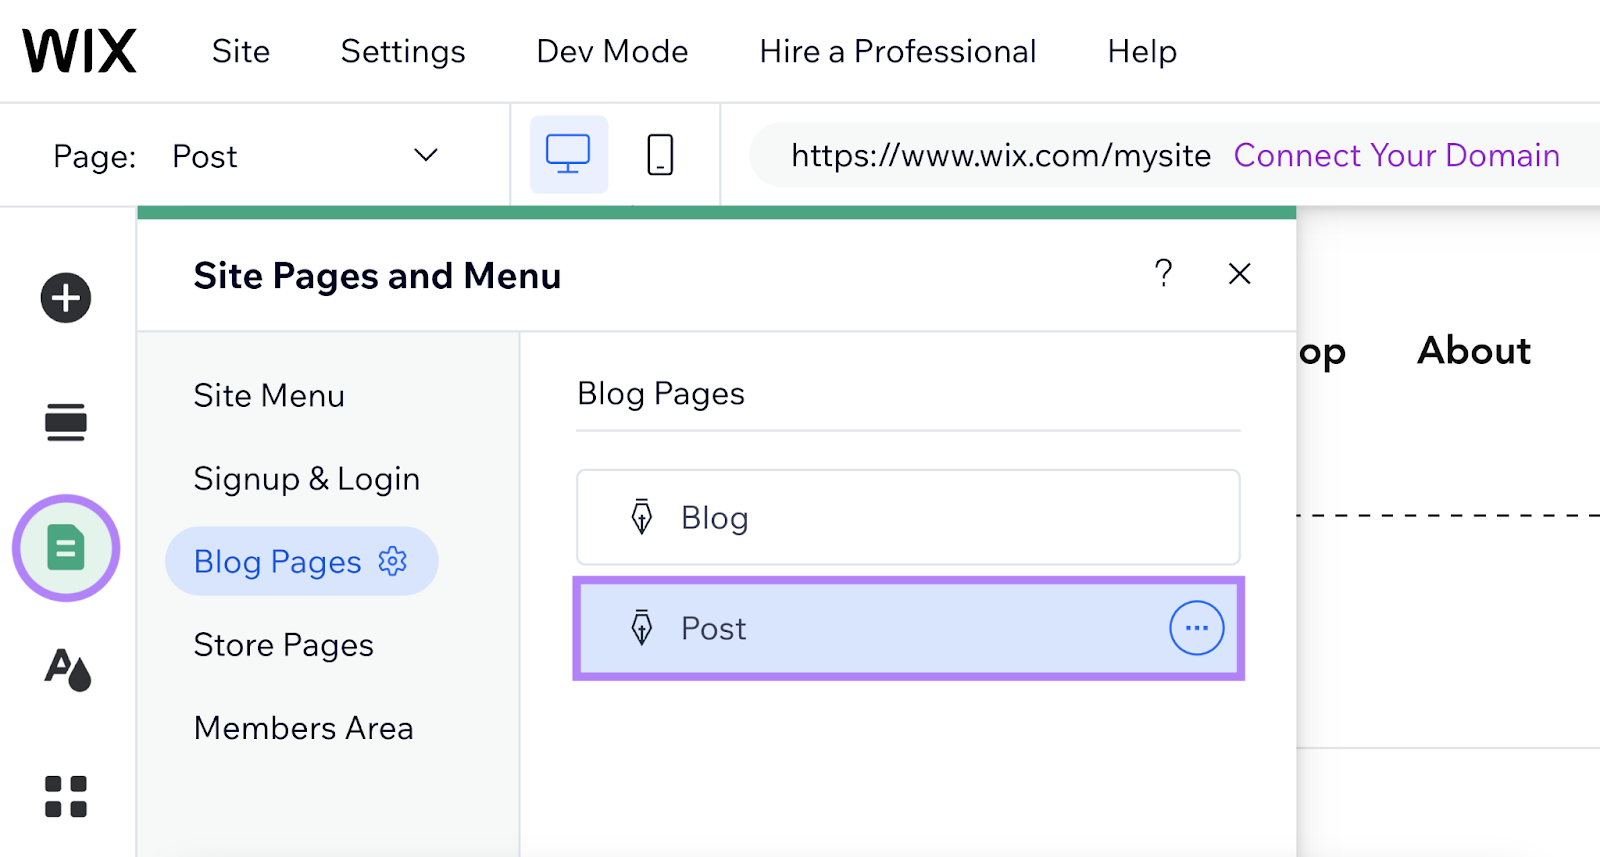
Most Wix templates will have a dedicated blog section already set up.
You’ll just need to go in and add new posts. Here’s what that process might look like:
9. Review and Publish Your Site
At this point, you've done most of the work to create your small business website.
Before you make it live, take some time to review everything carefully.
We recommend that you:
- Go through each page and check for any errors or things you want to change
- Make sure all the information is correct and up to date
- Test all the links to ensure they work properly
- View your site on different devices like phones to make sure it looks good on all screens (You can do this right within your dashboard.)
Once you're happy with how everything looks, it's time to publish your site.
In most website builders, there's a "Publish" or "Go Live" button. Click this button to make your site visible to the public.
Grow Your New Website
Even though you've launched your website, this is just the beginning.
You’ll want to focus on growing your online presence. And Semrush offers a range of tools to help you do this effectively—whether you want to improve your SEO, run paid advertising campaigns, or analyze your competitors’ strategies.
Sign up today.