
What Is an .htaccess File?
An .htaccess file is a website file used to configure certain aspects of your site. Like redirects, customized error pages, and more. All without having to edit the main server configuration files.
It’s used on servers that run Apache, an open-source web server software. If your website runs on Nginx instead, you won’t have an .htaccess file.
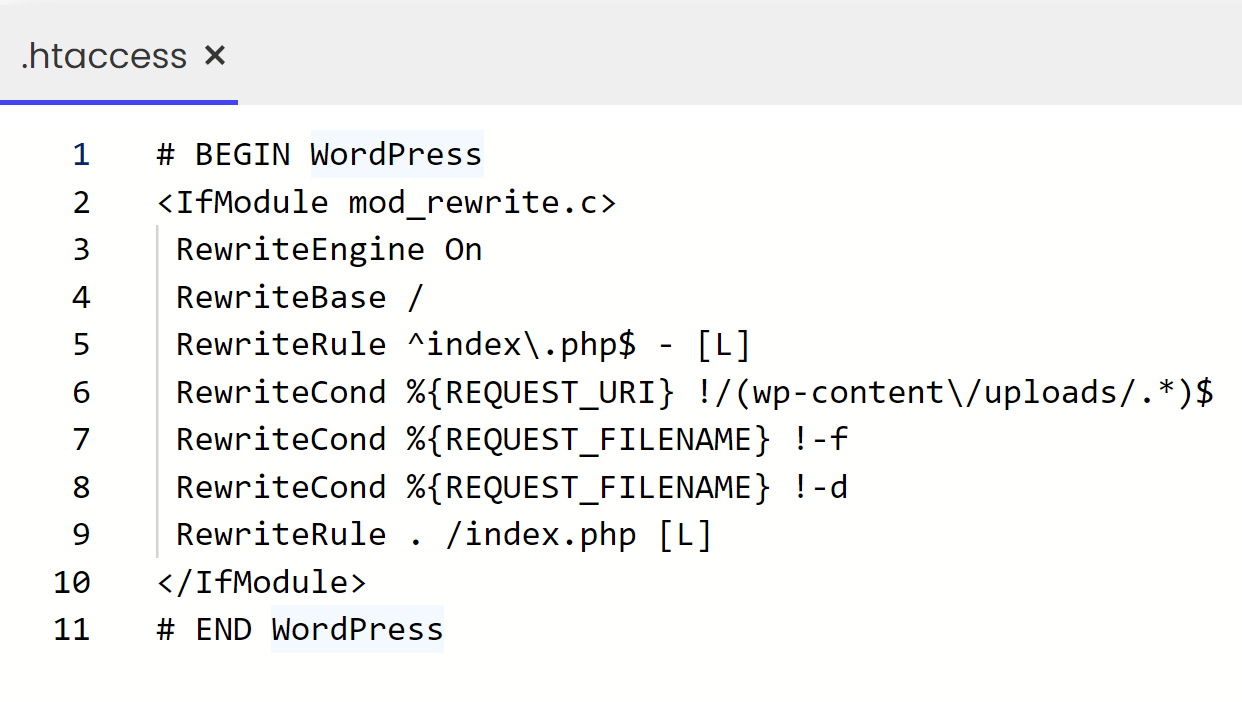
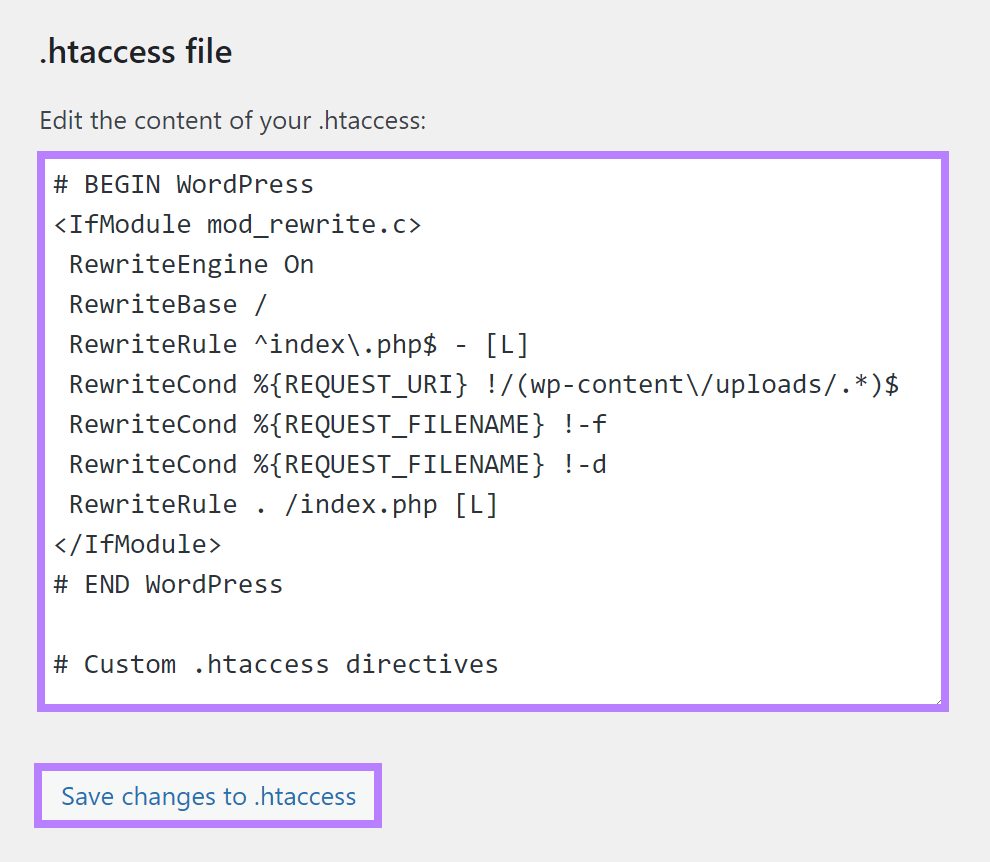
Here’s an example of what an .htaccess file might look like for a WordPress website:
Where Is the .htaccess File?
Your .htaccess file is usually located in the root directory of your website whether you’re using a content management system like WordPress or you created the site from scratch.
One way to access your site’s root directory is through your web host, typically through a file manager interface. Which is a directory within your web host where you can access and edit your site’s files—like your .htaccess file.
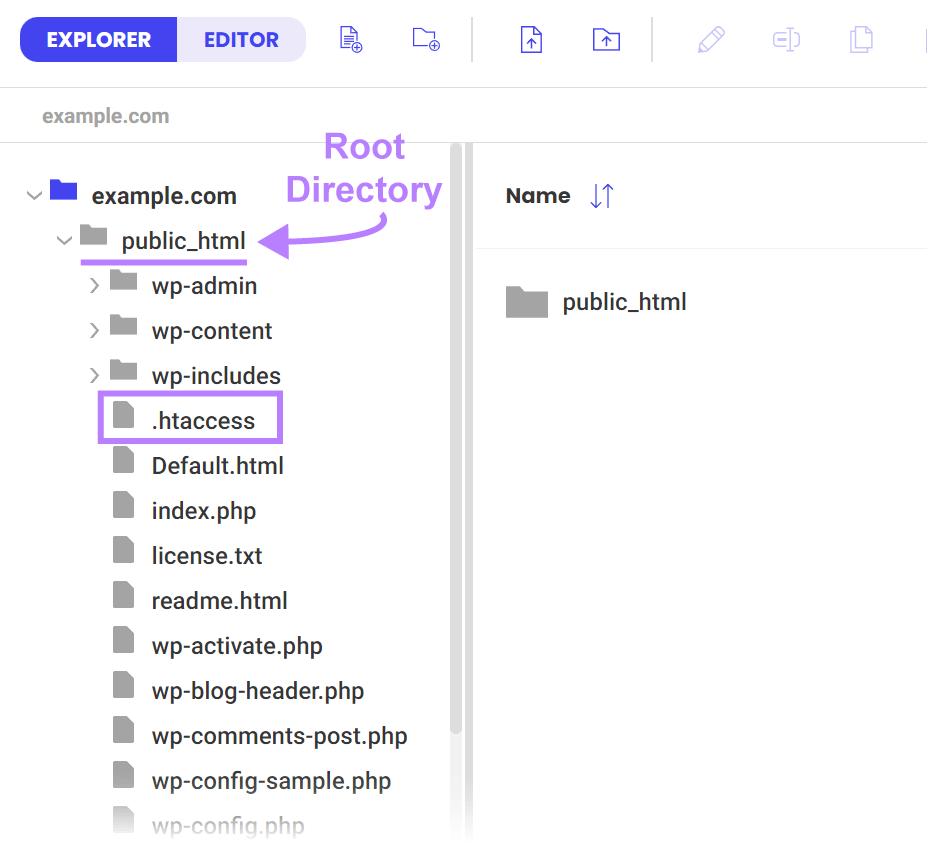
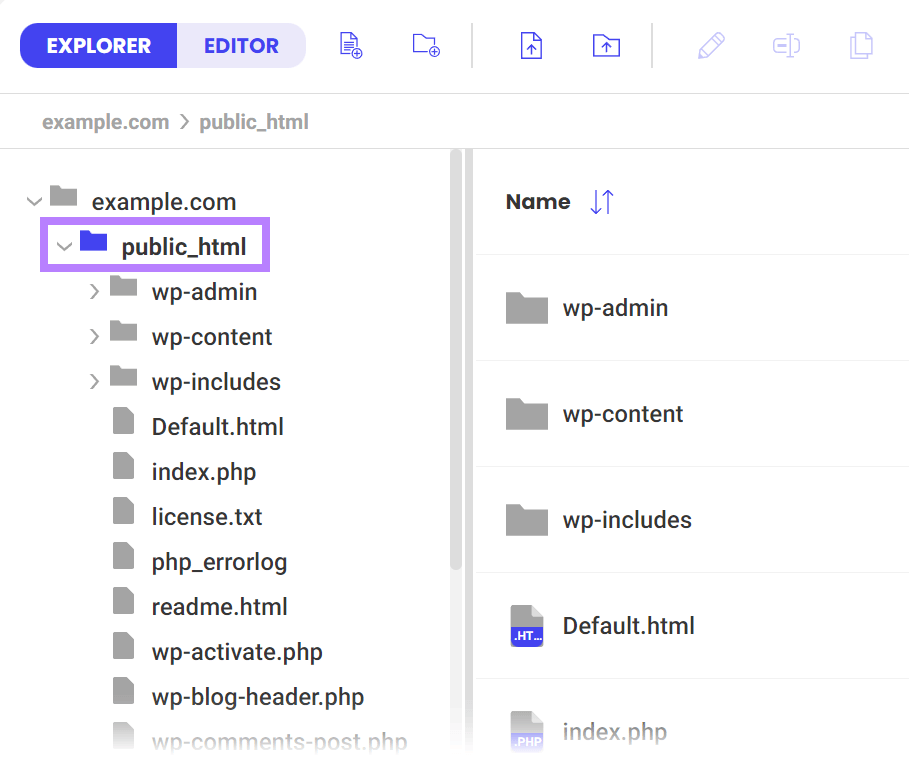
Your web host’s server files might look similar to the file folders you have on your computer:

But the exact location of an .htaccess file depends on its purpose.
For example, say you have an .htaccess file in the “image” directory of your website. The directives within that .htaccess file would only affect files in that directory.
But if your .htaccess file is in the root directory of your website—the folder that contains your main website files—the file’s directives would apply to all the files (and pages) on your site.
How to Edit Your .htaccess File
If you’re using WordPress, an .htaccess file should already have been generated when you installed WordPress (we’ll go over what to do if this isn’t the case in the next section.)
And there are three main ways to edit it:
1. File Manager
Many web hosts offer the ability to access key website files through a file manager.
To do this, log in to your host, head to your file manager, and locate your .htaccess file.
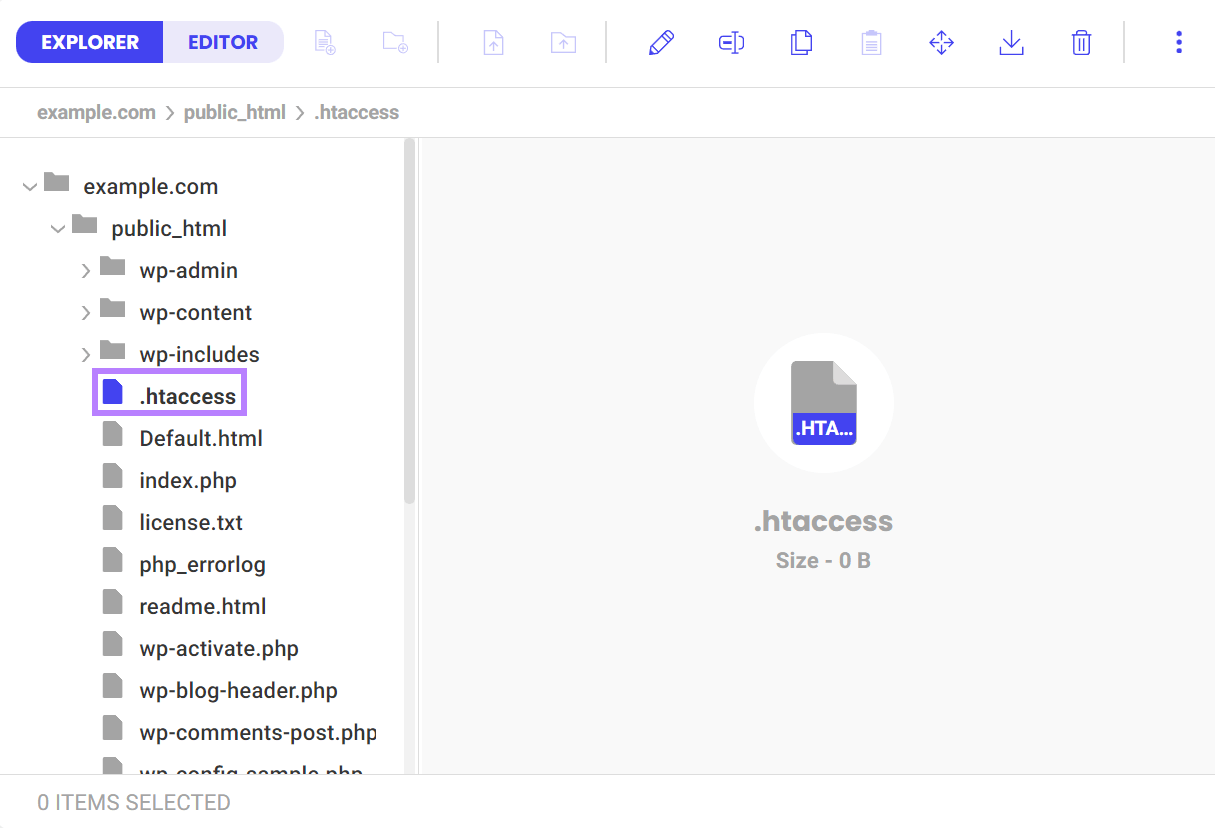
Your .htaccess file is likely located in your root folder. The root folder is titled “public_html” in our example below:
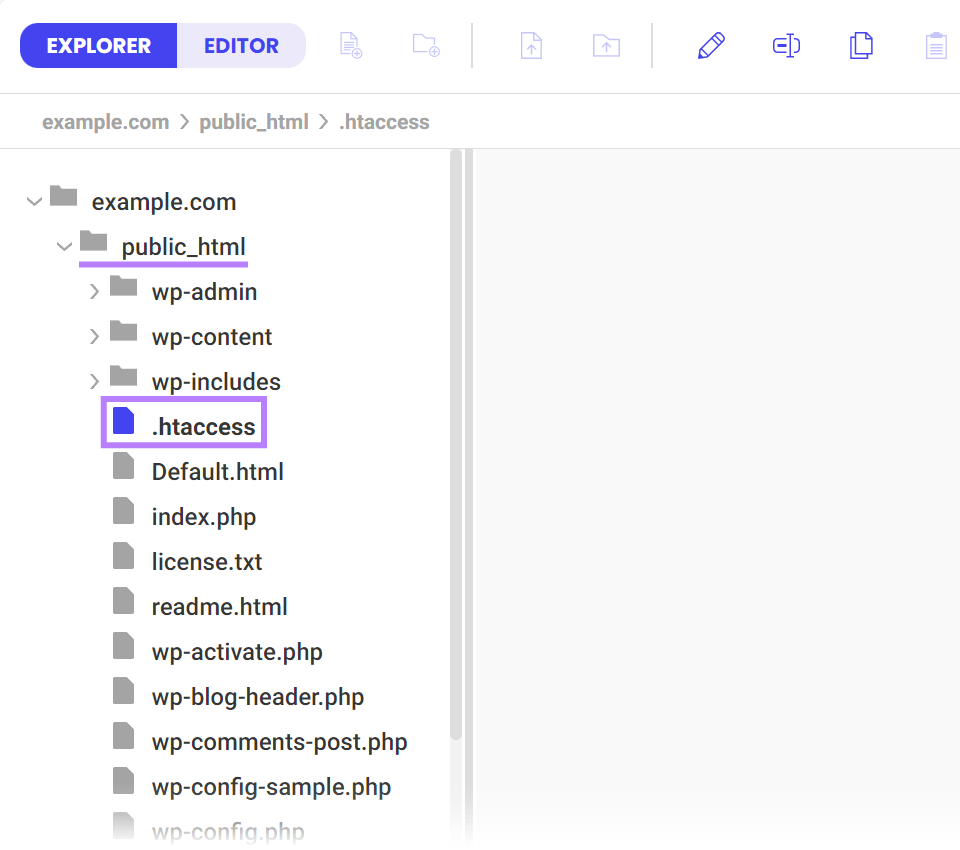
Double click “.htaccess” to open the plain text editor.
Then, make any changes—like adding or removing directives—and hit the save button.

2. FTP Client
A file transfer protocol (FTP) client is an application that lets you transfer files between your computer and your website. Cyberduck is an example of an FTP client.
You need to set up an FTP client if you don’t have one. Which may entail reaching out to your host for the details you need to connect to it.
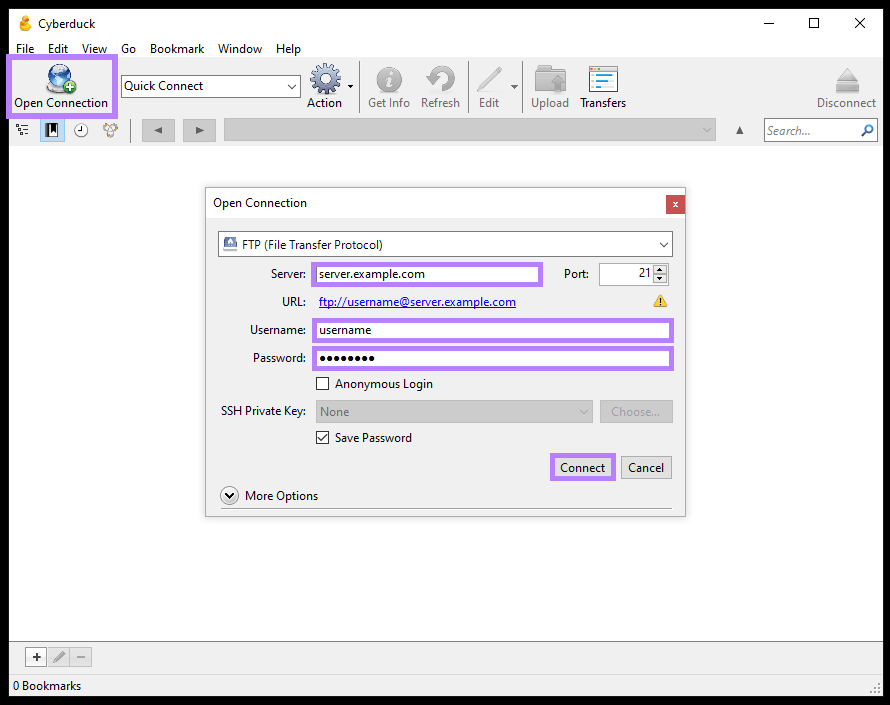
Once you’re set up with an FTP client, you can log in to your site via FTP. We’ll use Cyberduck for our example.
Click “Open Connection” and enter your login details. Your web host usually provides these.
Next, enable hidden files. Any files that begin with a dot (like the .htaccess file) are hidden by default. Meaning you can’t view—or edit—them.
To show hidden files in Cyberduck, go to “Edit” > “Preferences” > “Browser” and check the box next to “Show hidden files.”
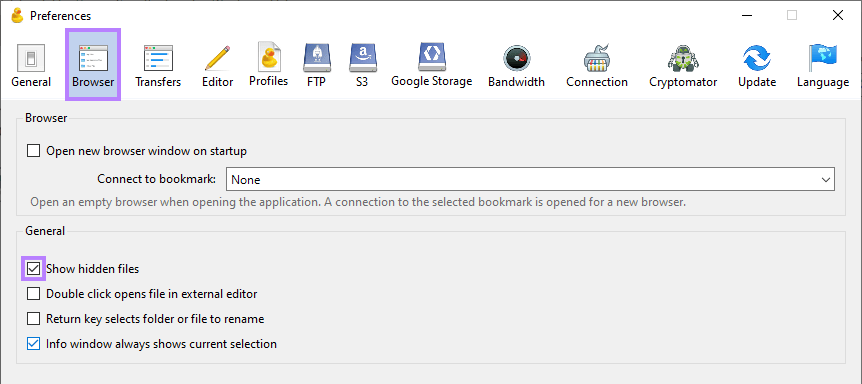
Exit out of the preferences. Then, locate your .htaccess file. Again, it’s likely in your root folder.
Select the file and click “Edit.”
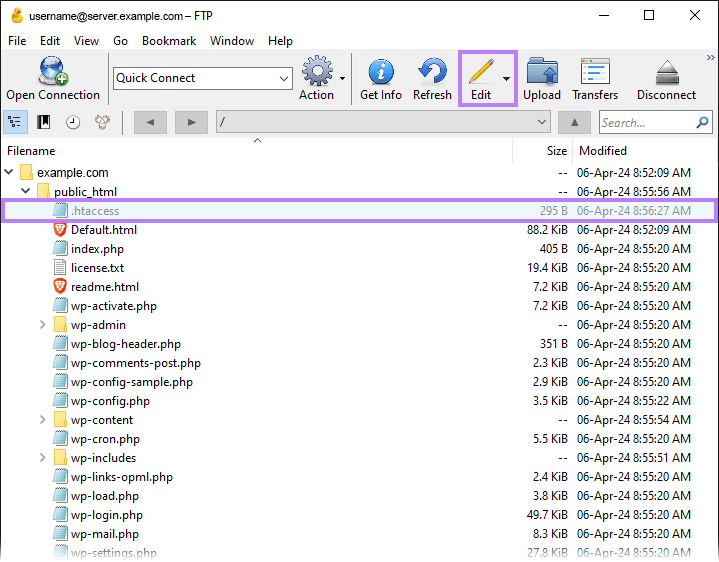
This opens your .htaccess file on your computer as a plain text file.
Make any edits directly in the file and hit save. Your saved changes are automatically added to your .htaccess file.
3. WordPress Plugin
Plugins like Yoast make it easy to edit your .htaccess file from your site’s backend.
Log in to WordPress to download and activate the Yoast plugin.
Then click “Yoast SEO” and select “Tools.”
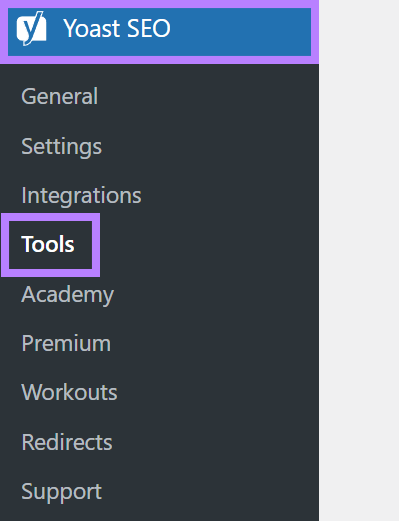
Click “File editor.”
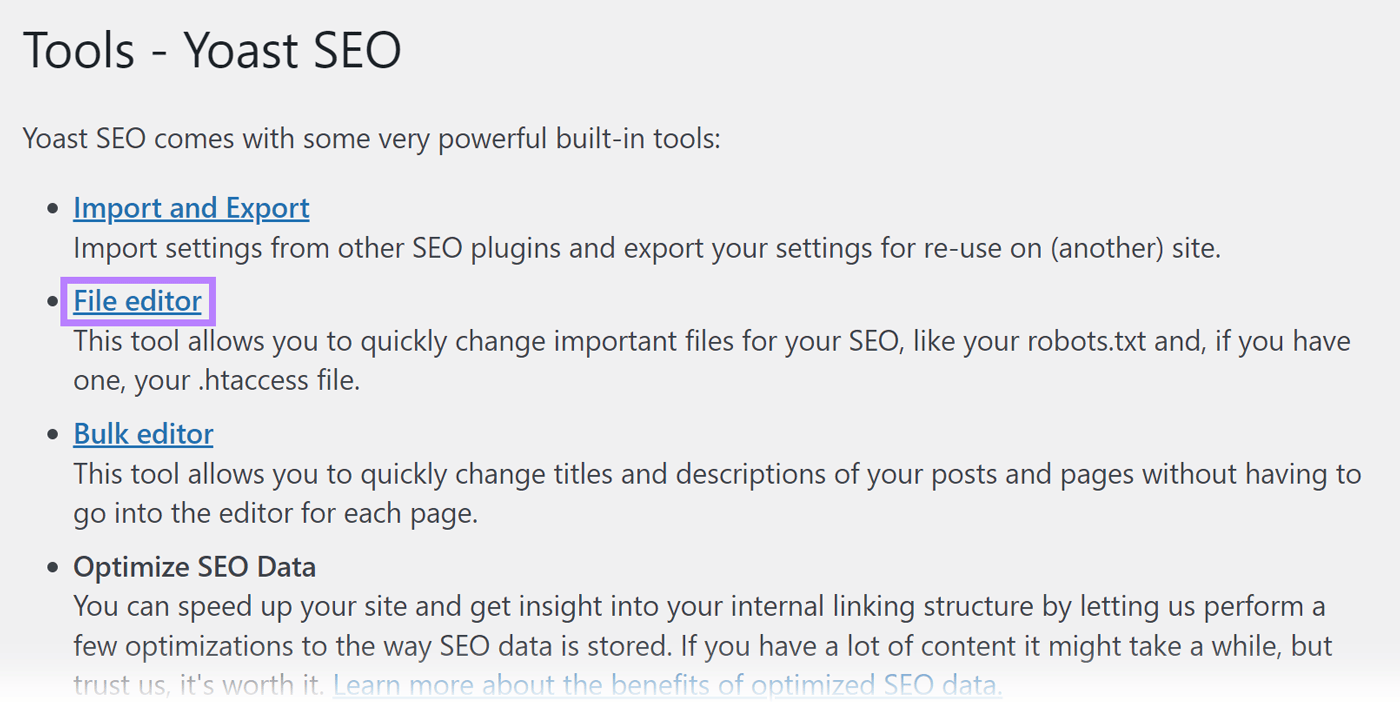
Scroll to the .htaccess file area and make your edits directly in the text box. And save them by clicking “Save changes to .htaccess.”
How to Create an .htaccess File
If you don’t already have an .htaccess file, follow the instructions below to create one yourself.
File Manager
To create an .htaccess file in your host’s file manager, select the folder you’d like your .htaccess file to be in. And keep in mind that the .htaccess file can affect the directory you put it in and its subdirectories.
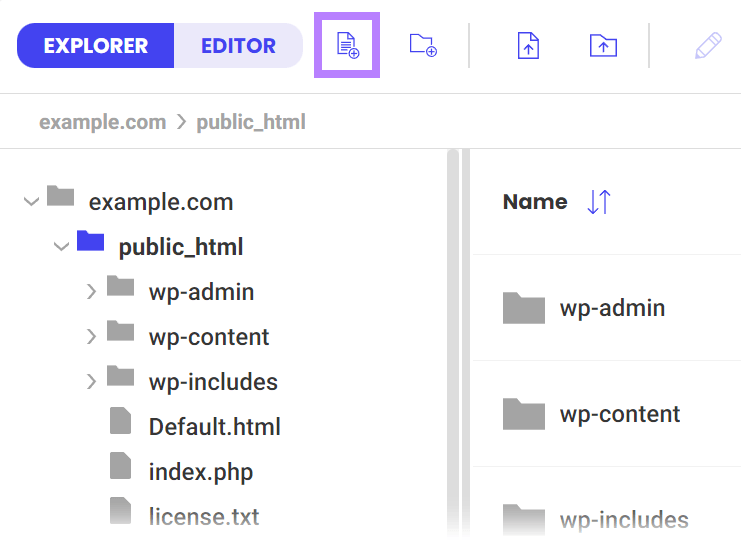
Then click the new file button.
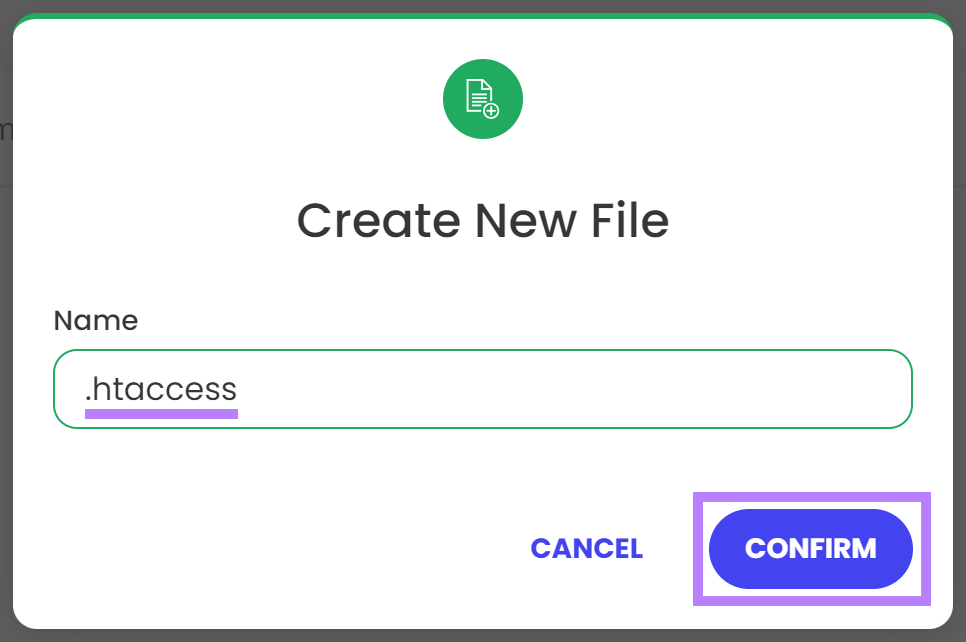
Next name your file “.htaccess” (with the dot). Click “Confirm.”
You now have an .htaccess file ready to edit.
FTP Client
To create an .htaccess file using your FTP client, save a plain text file on your computer as “.htaccess” (with the dot). You can create a plain text file using apps like the Notepad.
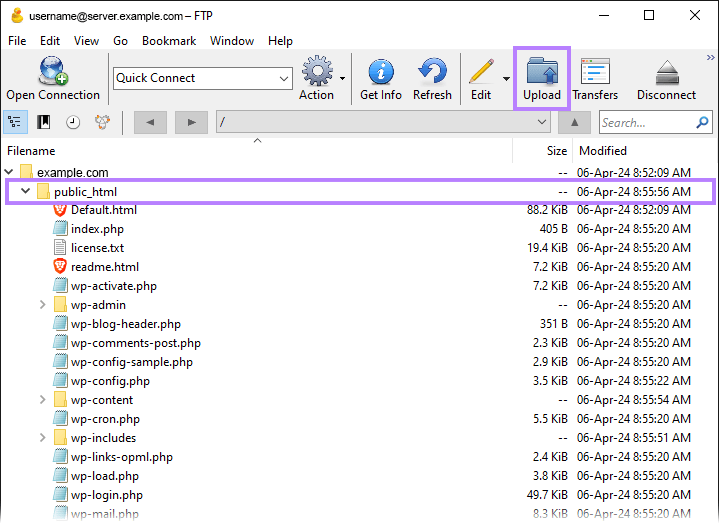
Then, within your chosen FTP client (we’re using Cyberduck), select the directory you want to place the .htaccess file in (like “public_html”). And click “Upload” and select the .htaccess file saved to your computer.
Your .htaccess file is now ready to use.
4 Common .htaccess Directives
These four .htaccess directives can help you improve and customize your site.
1. Add Redirects Using .htaccess
You can redirect URLs using .htaccess in several ways depending on what you want to redirect.
Before adding some types of redirects, you may need to load the RewriteEngine module by adding this directive to your .htaccess file:
<IfModule mod_rewrite.c>
RewriteEngine On
</IfModule>
Then, add your redirect directives under this module.
We’ll include the “RewriteEngine On” code where required in each example below for clarity. But depending on how your .htaccess file is set up, you may not need to include it each time.
Redirect Individual URLs
Redirect individual URLs with this directive:
Redirect 301 /old-page/ https://www.yourdomain.com/new-page/The “old-page” should mention the URL path—the portion that comes after your domain. This should begin with a slash.
And the second part should be the new page’s full URL.
Users will be automatically redirected to the new page whenever they try to access the URL from the old page.
Redirect WWW URLs to Non-WWW URLs
If your domain uses the www subdomain, you can use your .htaccess file to redirect it to the non-www version with this directive:
RewriteEngine On
RewriteCond %{HTTP_HOST} ^www.yourdomain.com [NC]
RewriteRule (.*) https://yourdomain.com/$1 [L,R=301]
Redirect Subfolders to New Locations
A subfolder is a folder that exists within another folder on your site. For example, in “www.yourdomain.com/blog,” the “blog” part is a subfolder.
And you can redirect subfolders to different locations on your domain using the .htaccess file with this directive (using your URL paths):
RewriteEngine On
RewriteRule ^/?blog/(.\*)$ /news/$1 [R,L]
In the above example, any URL in the “blog” subfolder will be redirected to the “news” subfolder.
Redirect an Old Domain to a New Domain
You can also use the .htaccess file to redirect users from an old domain to a new one with this directive:
RewriteEngine On
RewriteCond %{HTTP_HOST} ^(?:www\.)?oldsite\.com$ [NC]
RewriteRule ^(.*)$ https://newsite.com%{REQUEST_URI} [L,R=301]
This redirects both the www and the non-www versions of your domain to the new one.
Other Ways to Redirect URLs
There are other ways to redirect URLs if you don’t want to edit your .htaccess file.
First, run an audit of your site to see which pages may need redirects.
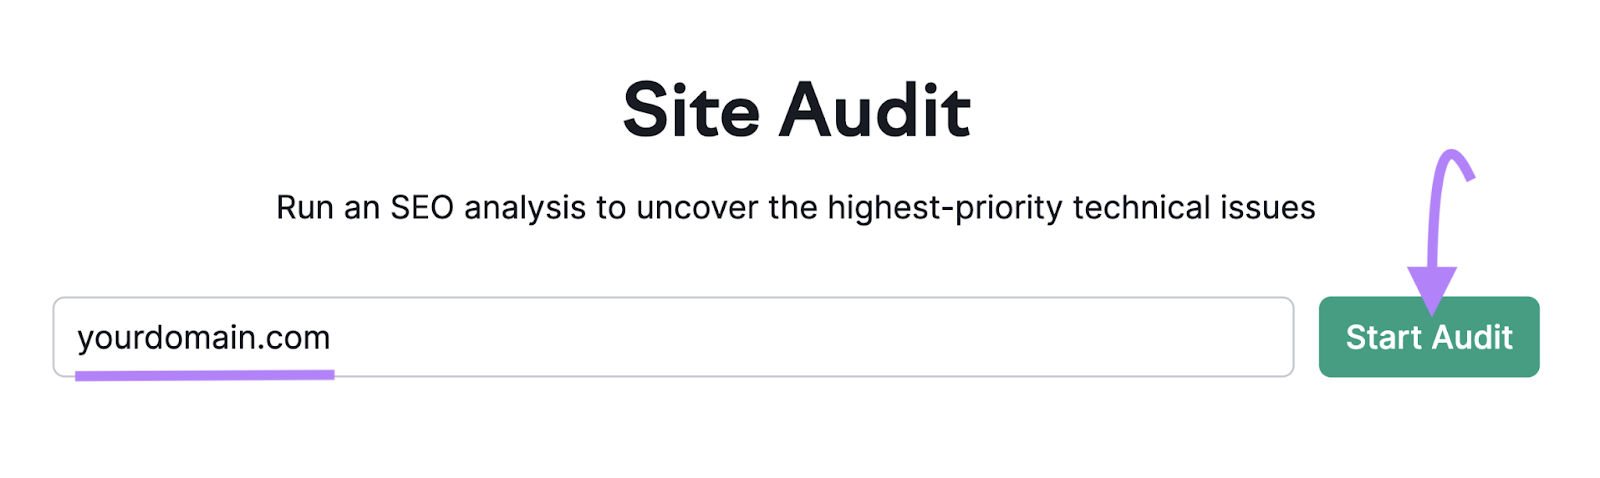
The Semrush Site Audit tool can identify those pages for you.
Within the Site Audit tool, enter your URL and click “Start Audit.”
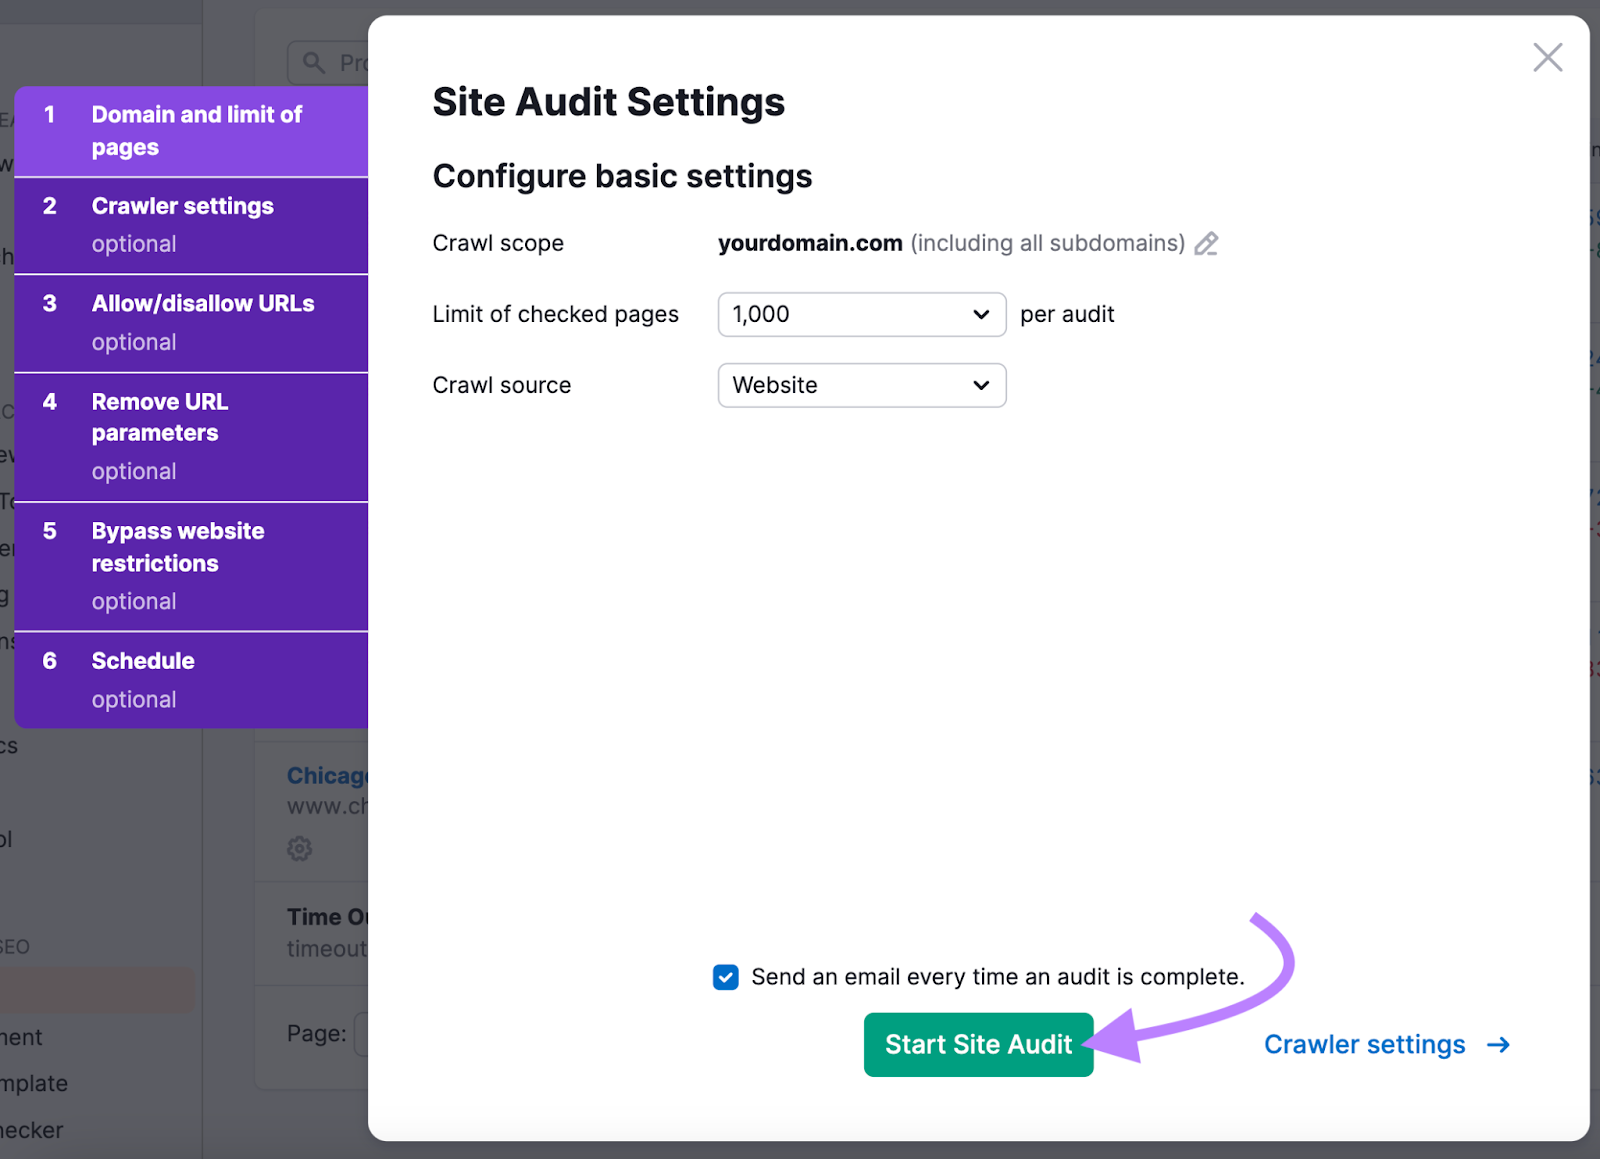
Configure your audit settings on the following page. Like how many pages you’d like to check during the audit. And how frequently you want to run the audit.
Click “Start Site Audit” after configuring your audit settings.
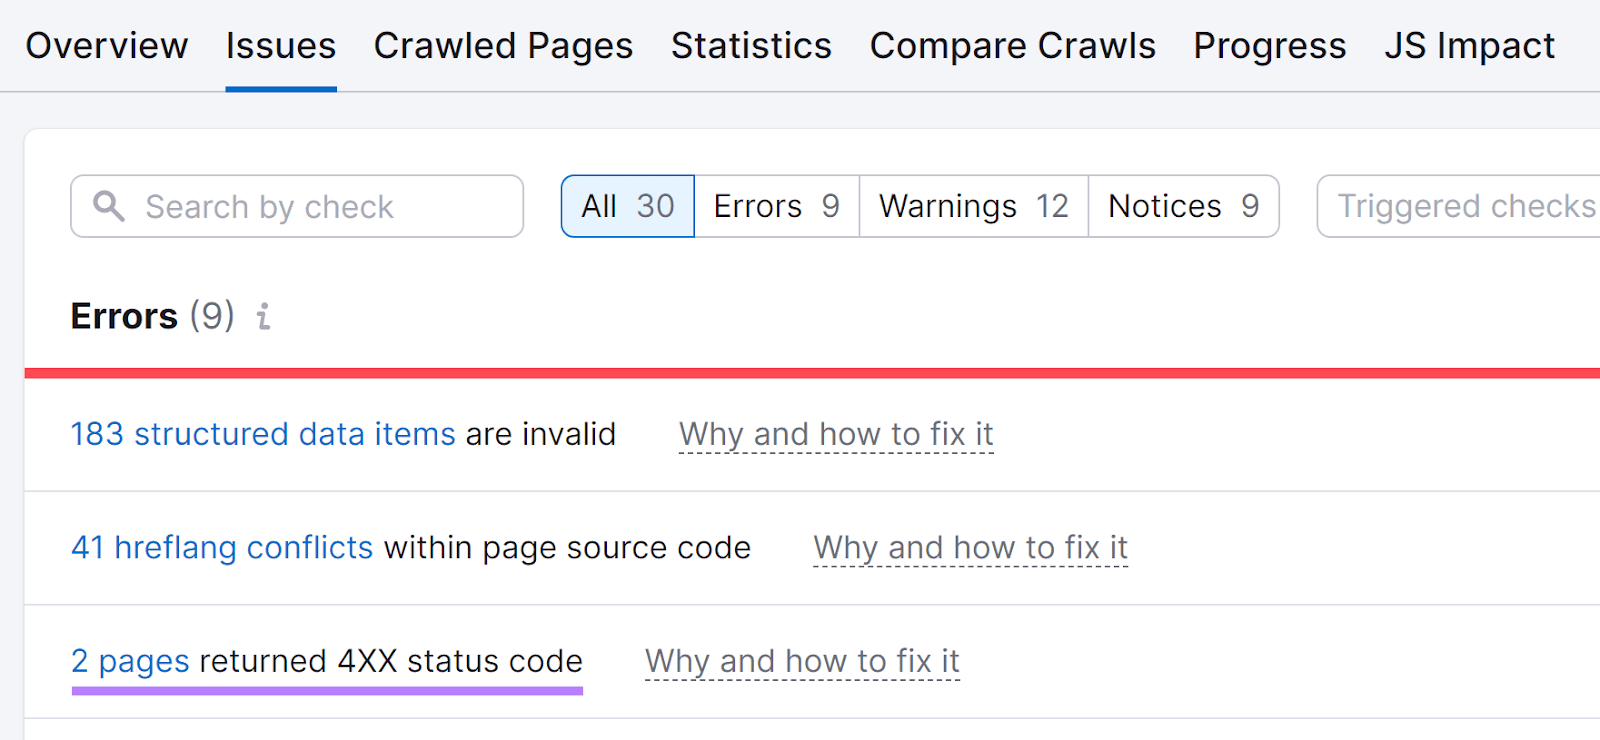
When the audit is done, click “Issues” and look for “# pages returned 4XX status code.” Which means the server couldn’t reach those pages due to a client-side error.
Click the “# pages” to view each affected page.
Review which pages you need to redirect. And which ones (if any) you’d prefer to keep as 404 errors.
You might indeed want a page to display a 404 error if you’ve deleted the page and there isn’t any relevant page to redirect users to.
To implement redirects for these pages on WordPress without editing your .htaccess file, you can use a plugin like Yoast.
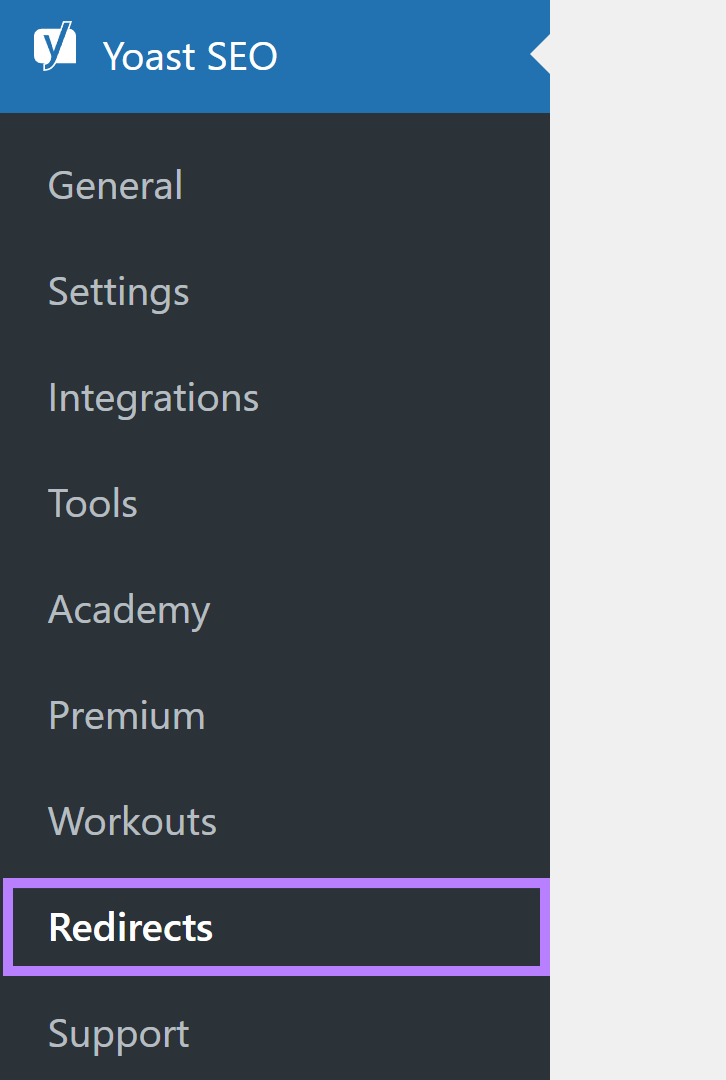
Click “Yoast SEO” and “Redirects” in the left-hand toolbar after installing and activating the plugin.
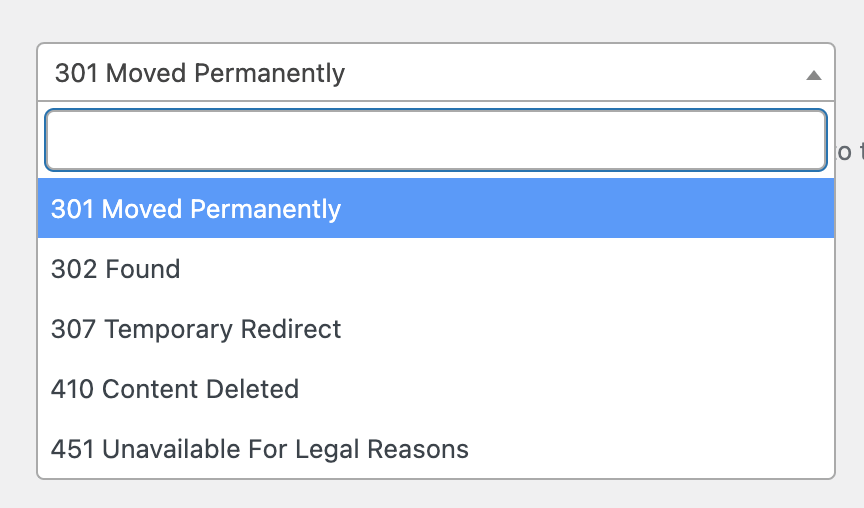
Select the type of redirect you want. We'll use 301 because we want to permanently redirect the old page to a new one.
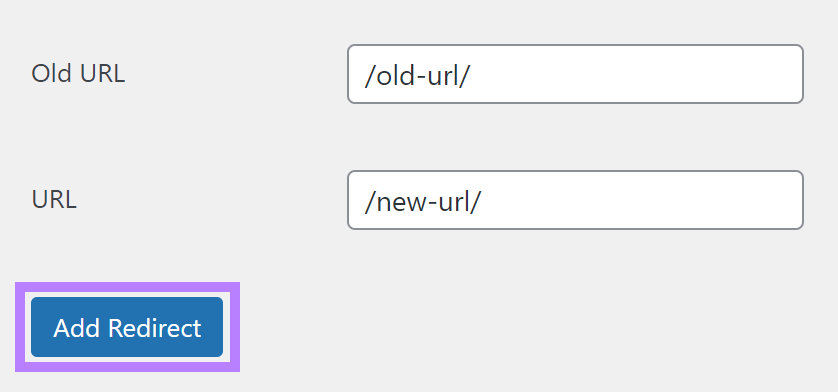
Enter the old URL slug—the last part of the URL—and the destination URL slug. And click “Add Redirect.”
Lastly, test the URL by entering the old URL into your address bar to make sure it redirects to the new page. You may want to clear your cache first.
2. Load Custom 404 Error Pages with .htaccess
Your .htaccess file also lets you load custom 404 error pages—the page that shows when the server cannot find a webpage at that URL. This can happen when the page no longer exists or if someone enters an incorrect URL.
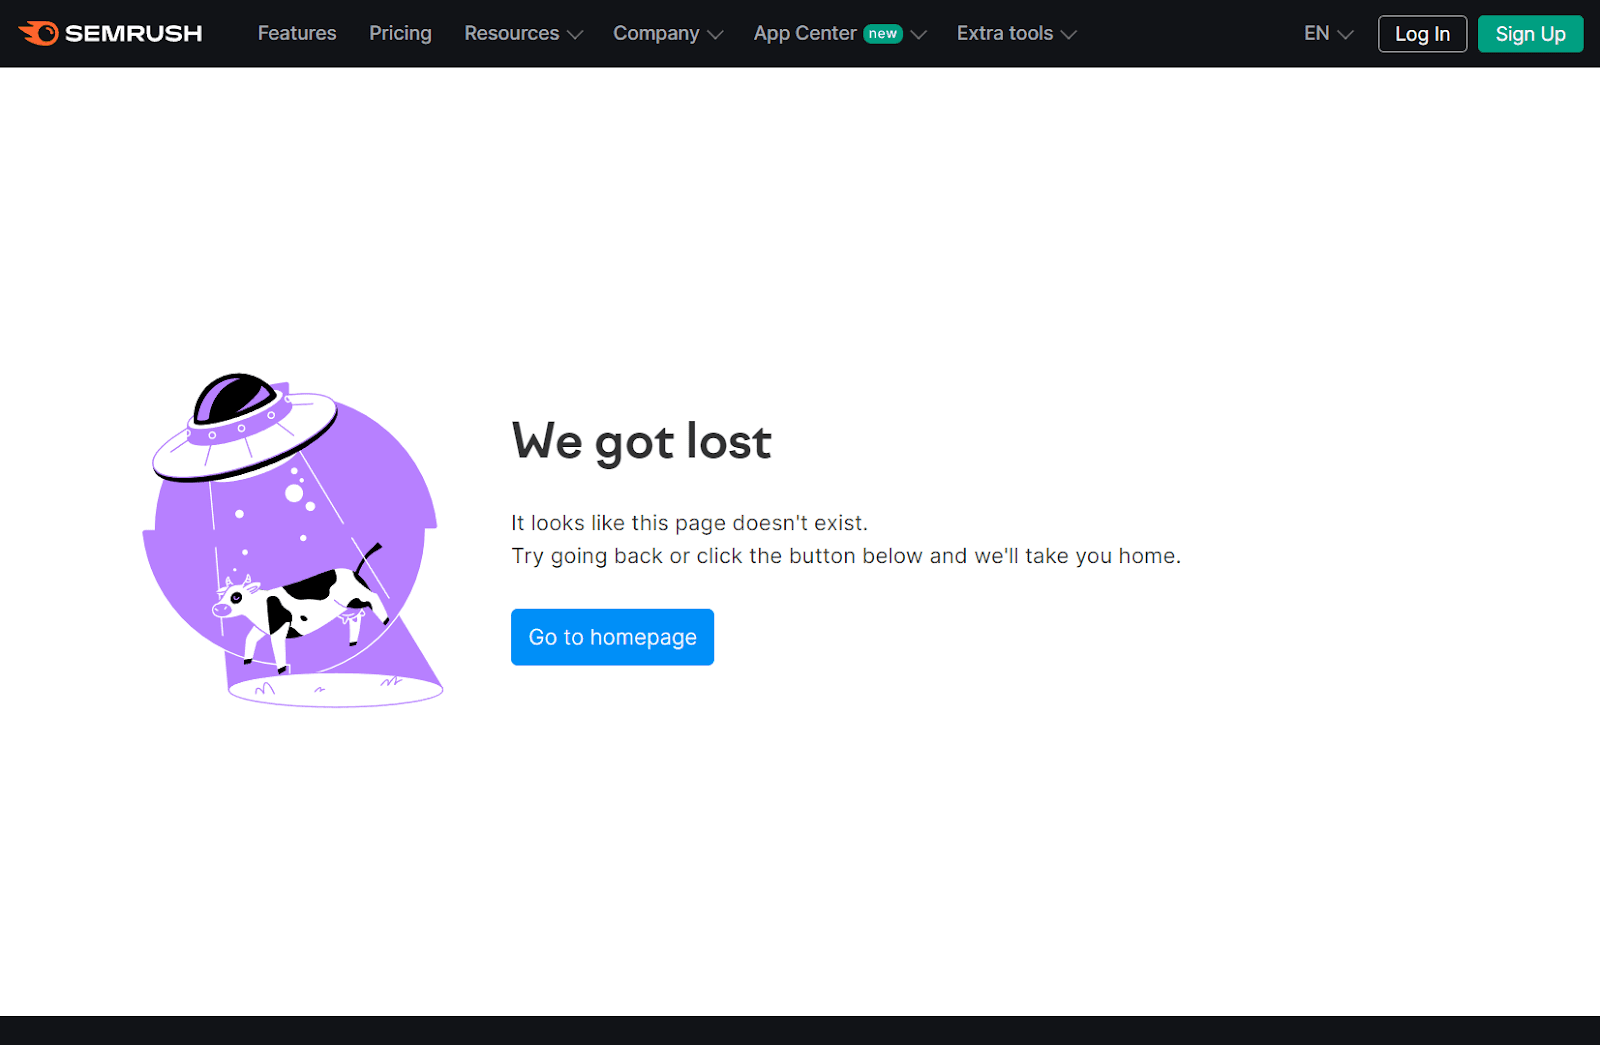
You might want a 404 page that reflects your brand, and perhaps gives users directions to relevant content or pages.
For example, our 404 page looks like this:
First, create the page you’d like to load when someone encounters a 404 error.
Then, add this code to your .htaccess file:
ErrorDocument 404 /404-page.htmlAnd update the path to reflect your custom 404 page’s path.
Your custom 404 page should then load any time someone visits a page on your site that doesn’t exist.
Other Ways to Create a Custom 404 Page
If you’re using WordPress, a plugin like the Smart Custom 404 error page can help you create a 404 page fairly easily.
Here’s how:
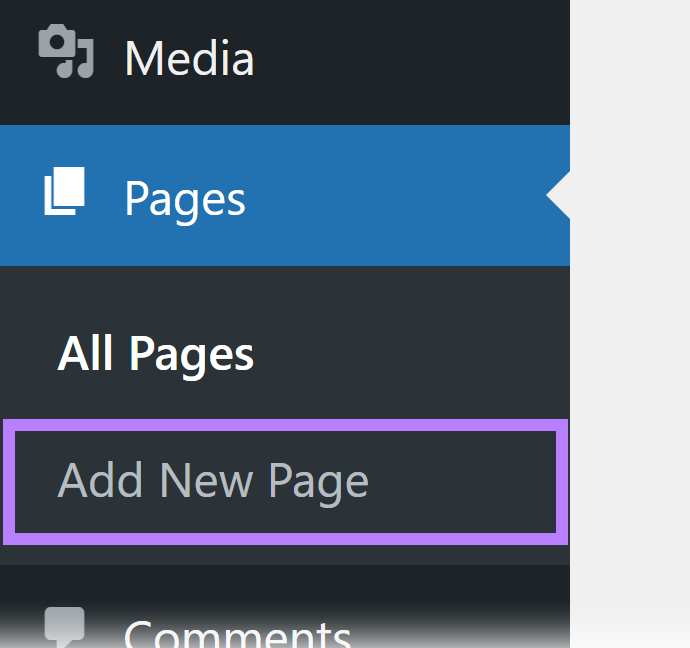
Install and activate the plugin when logged into your WordPress site. Then head to “Pages” and “AddNew Page.”
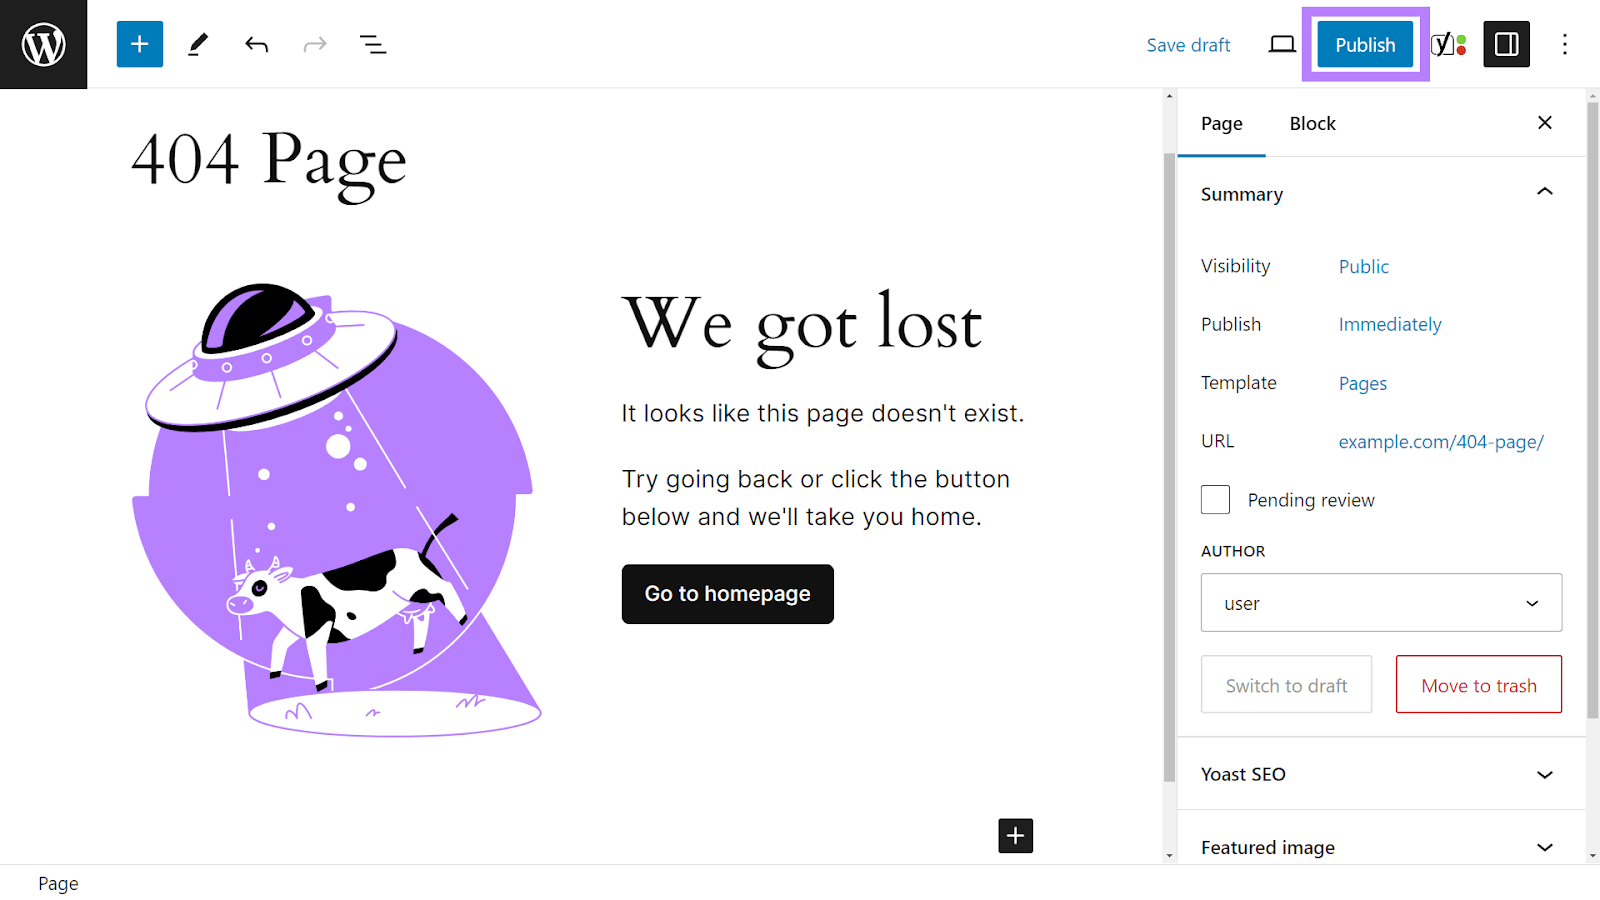
Create and publish your custom 404 error page within the editor.
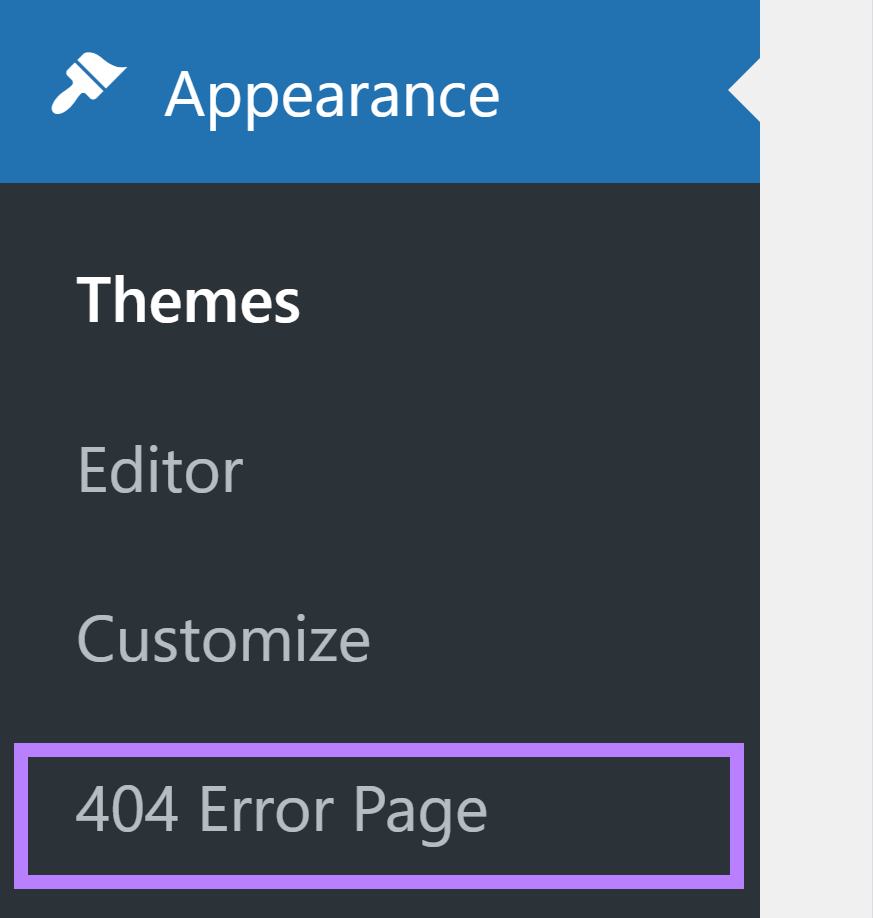
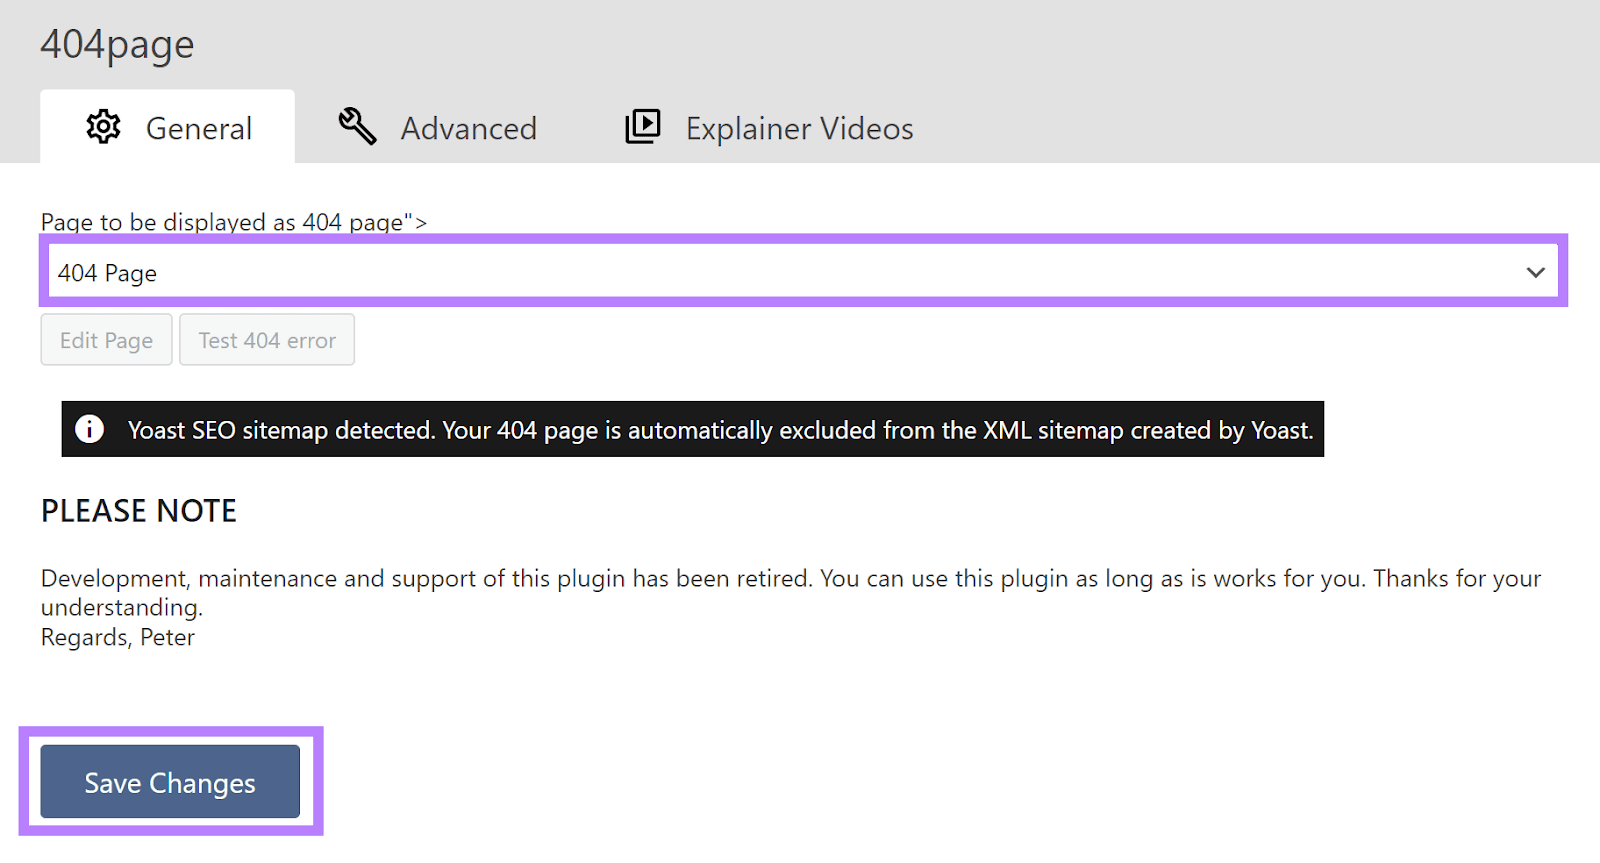
After publishing your page, click “Appearance” and “404 Error Page” in the menu bar.
Select your error page from the drop-down menu and click “Save Changes.”
Test your 404 page by visiting a URL that doesn’t exist on your site. It should redirect to your new 404 page.
3. Force Your Site to Load with HTTPS Through .htaccess
Hypertext transfer protocol secure (HTTPS) encrypts communications between the browser and your website. Which secures data sent from the browser to the server.
Plus, HTTPS is a ranking signal. So, using it could have a positive impact on your rankings.
If your site has a secure sockets layer (SSL) certificate, you can force HTTPS instead of HTTP using your .htaccess file.
To do so, add these lines of code to your .htaccess file:
RewriteEngine On
RewriteCond %{HTTPS} off
RewriteRule ^ https://%{HTTP_HOST}%{REQUEST_URI} [L,R=301]Other Ways to Use HTTPS Instead of HTTP
Your host can often help you switch to HTTPS.
Some even provide one-click options to force HTTPS:
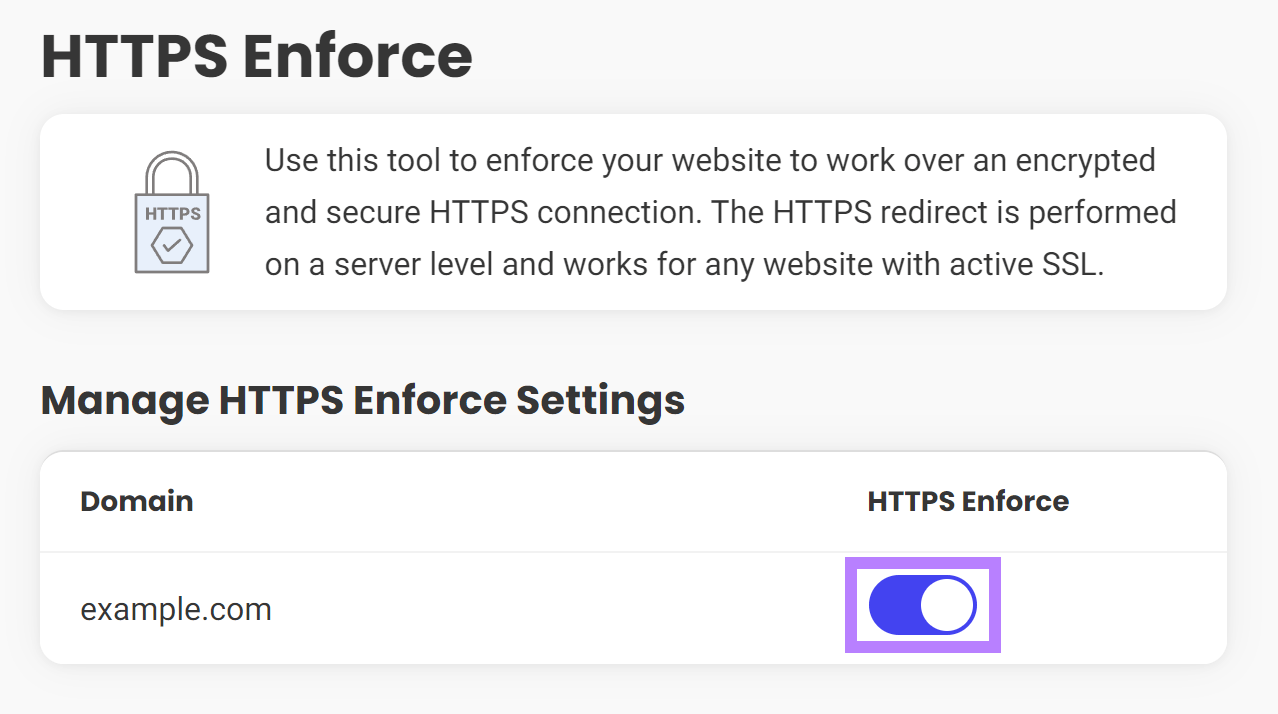
So, reach out to your host for help setting up HTTPS if you don’t want to edit your .htaccess file.
4. Enable Password Protection with Your .htaccess File
You can enable password protection on your site—or specific areas of your site—using your .htaccess file.
This may be useful if you’re making site updates and only want certain people to access your site. Like your web designer.
You’ll need two files to password-protect your site: .htpasswd and .htaccess.
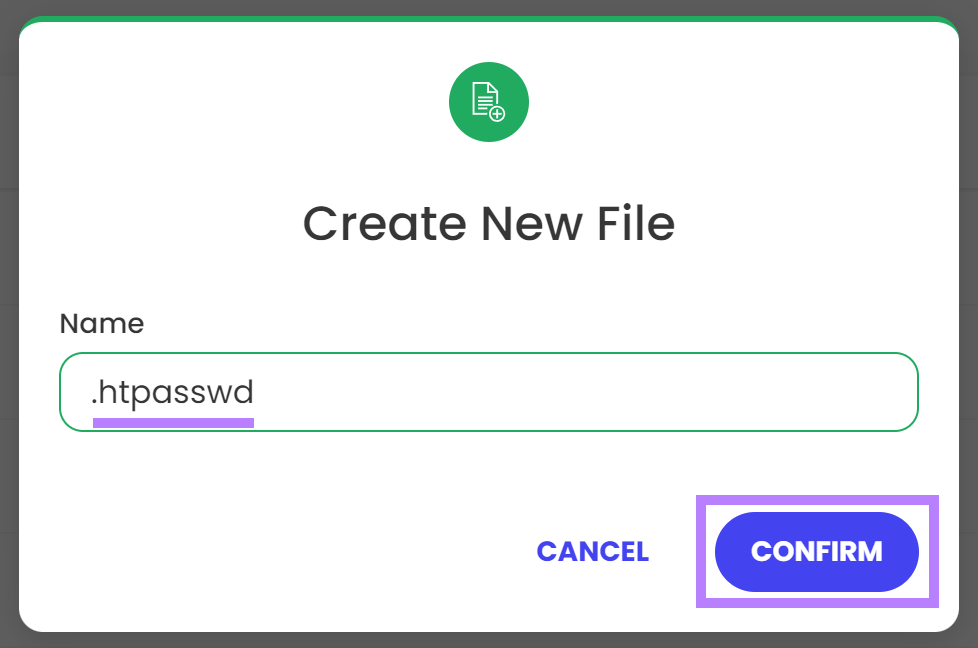
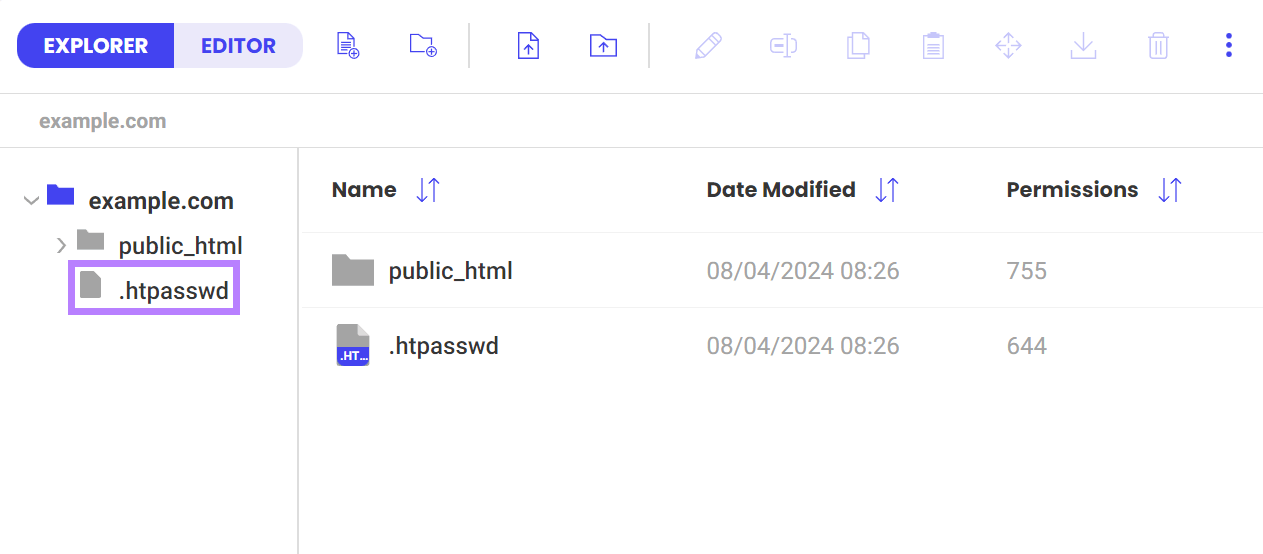
First, head to your website host’s file manager.
Add a new file outside your root directory. Name it “.htpasswd” and click “Confirm.”
Important: It’s best to place your .htpasswd file outside of your root directory as this may be more secure.
Double click your .htpasswd file to open and edit it. This is where you’ll add a username and password needed to access your site.
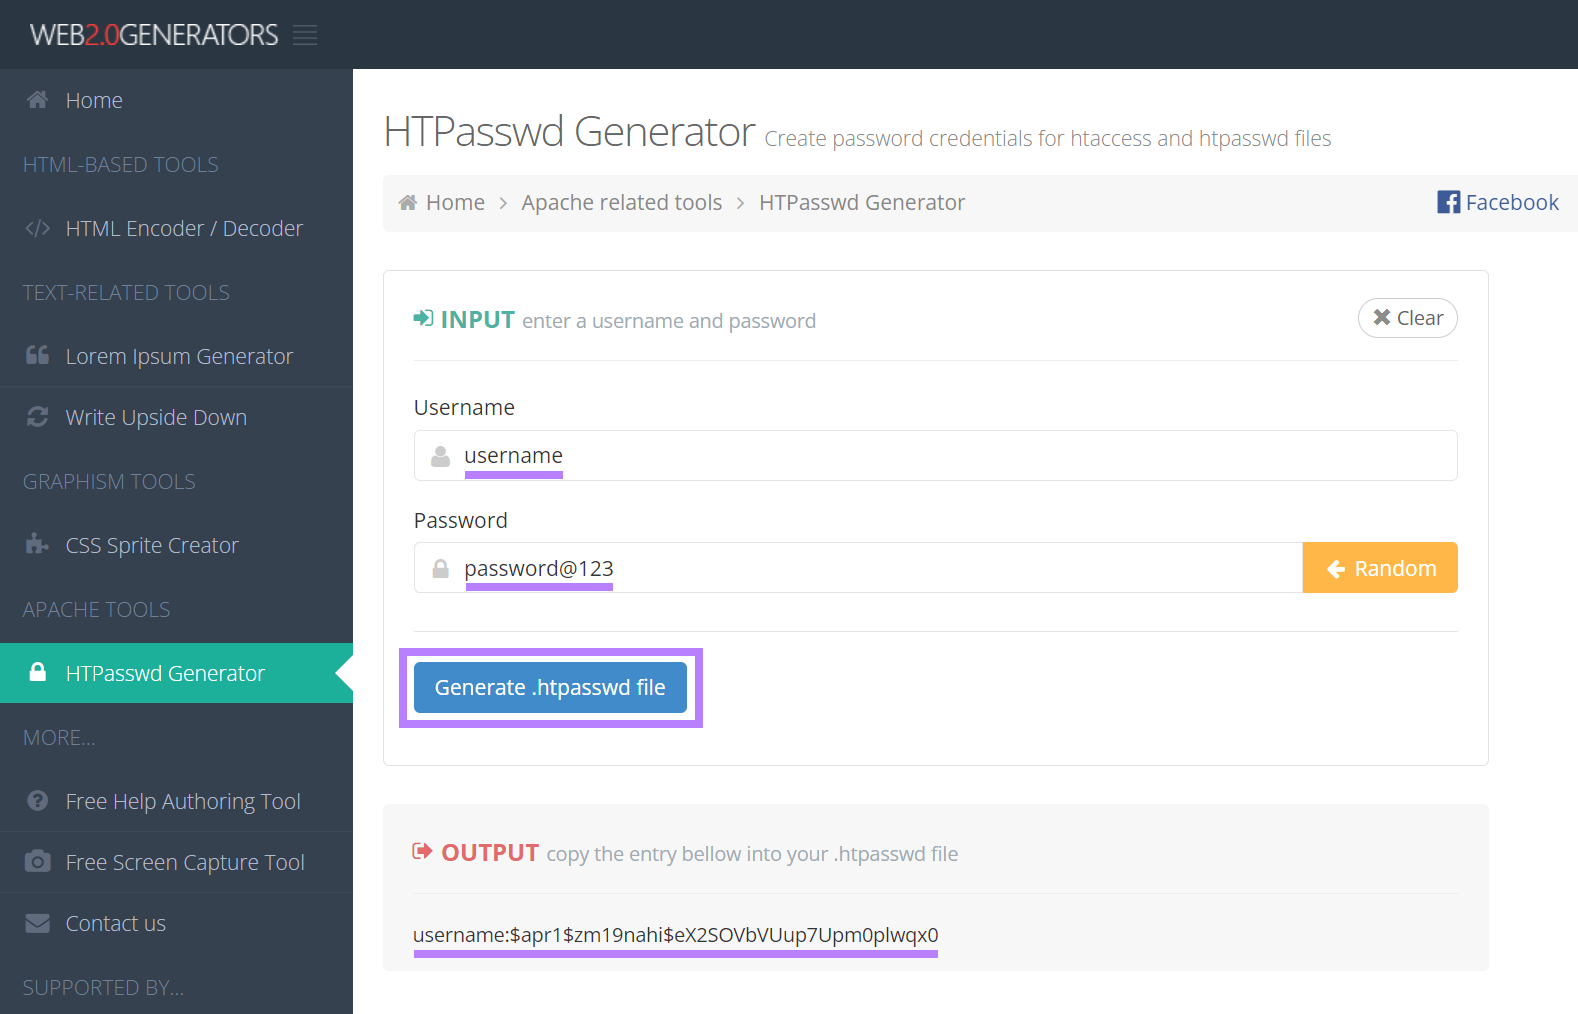
You then need to encrypt your passwords (for security purposes). A free tool like HTPasswd Generator will encrypt your password for you.
Just enter your username, password, and click “Generate .htpasswd file.” And copy the output.
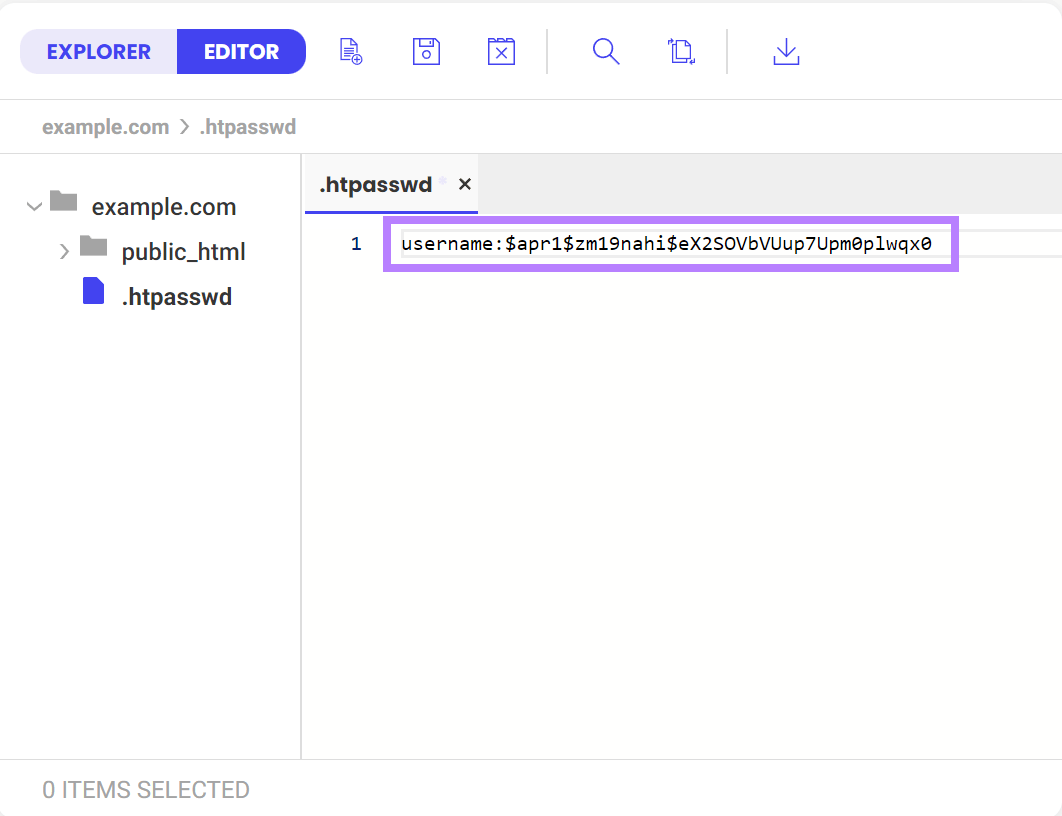
Paste the output in your .htpasswd file and save your file.
Lastly, open your .htaccess file and add this directive:
# Password protection
AuthType Basic
AuthName "Restricted Area"
AuthUserFile /path/to/.htpasswd
Require valid-user
Make sure to change the path of the “AuthUserFile” line to the path of your .htpasswd file. And save the file.
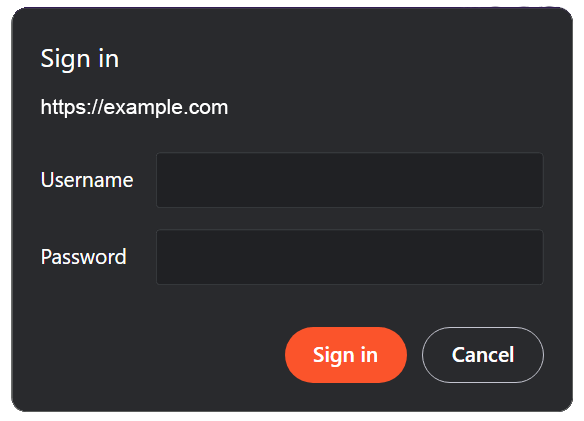
Head to your website. Your site should display a prompt upon loading if the directive works.
Enter your username and password and click “Sign in” to access your site.
Other Ways to Password-Protect Your Site
If you’re using WordPress, an easier way to set up password-protected pages is by using the platform’s native password protection functionality.
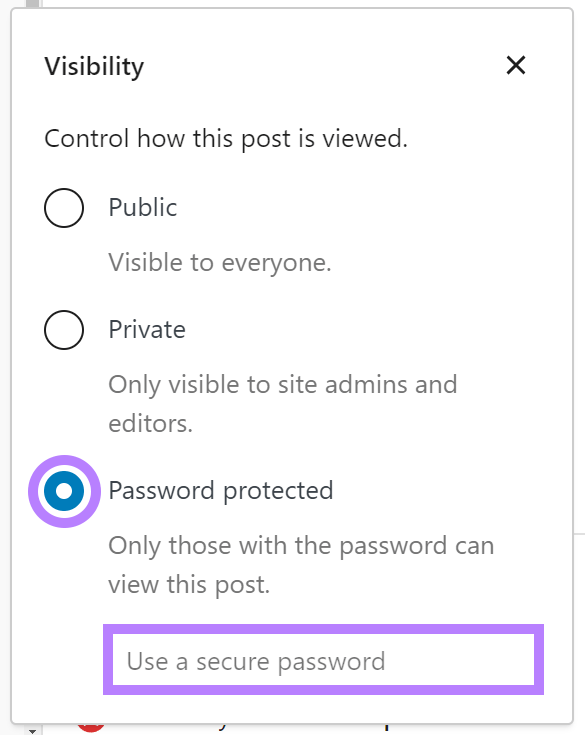
Log in to your site and head to the page or post you want to set up password protection for.
Next to “Visibility,” click on “Public.”
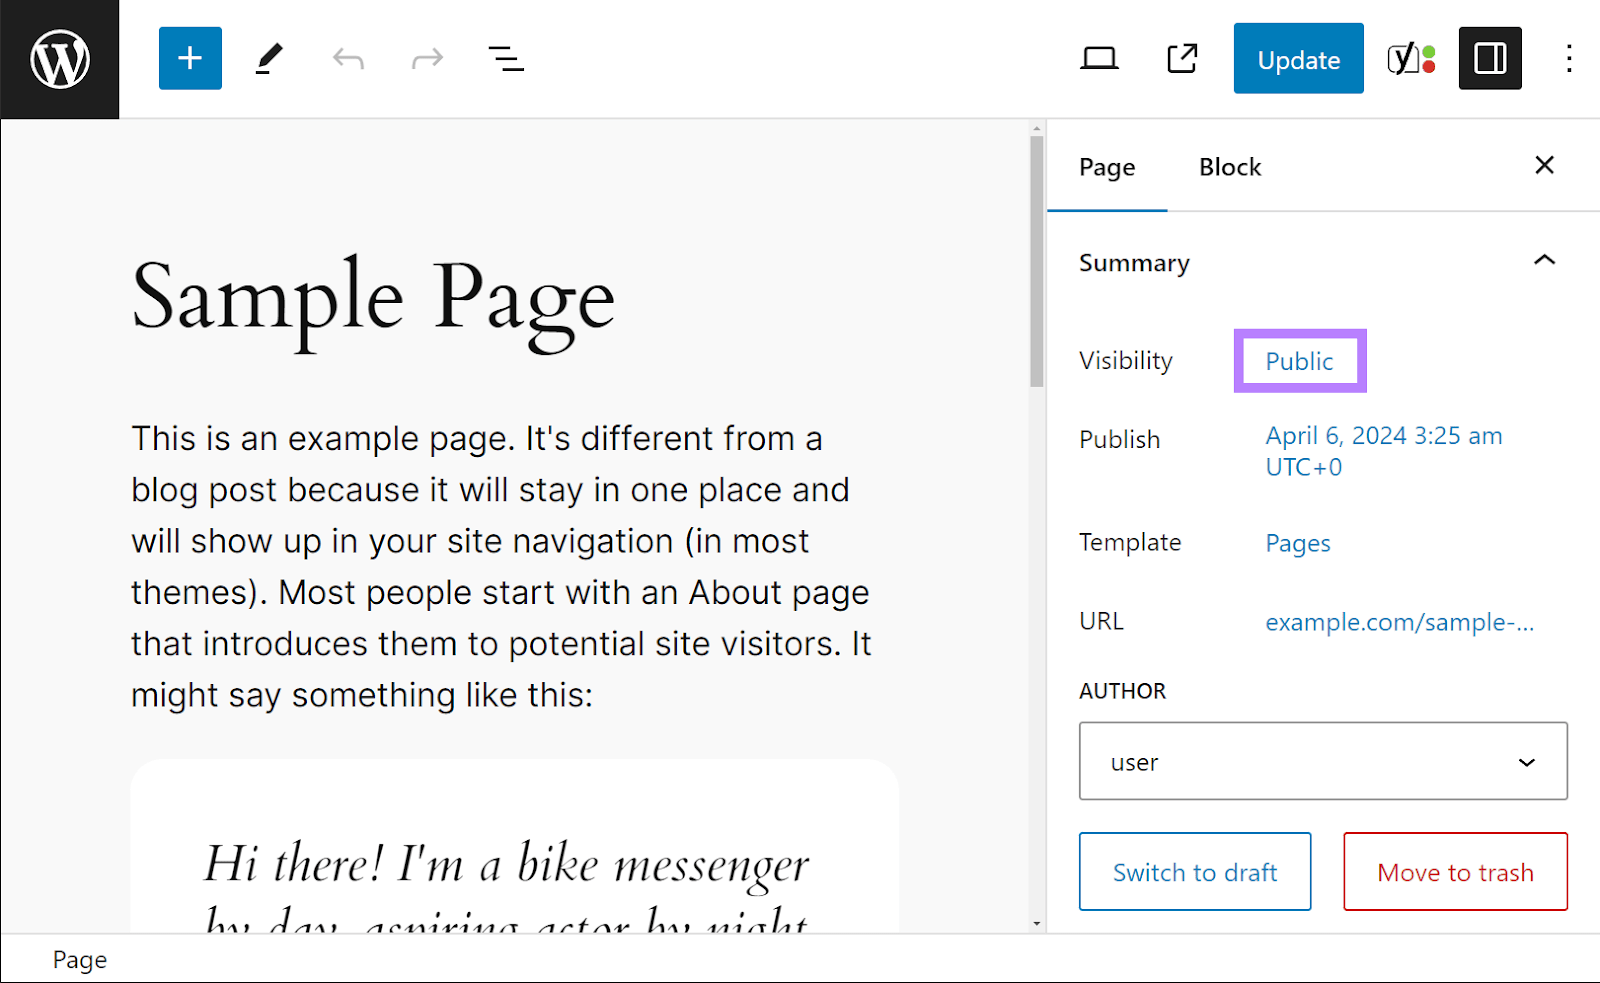
Select the circle next to “Password protected” and enter the password you want to use. Then, exit out of the prompt and click “Update.”
Now when someone tries to access the page, they’ll see something that looks like this:
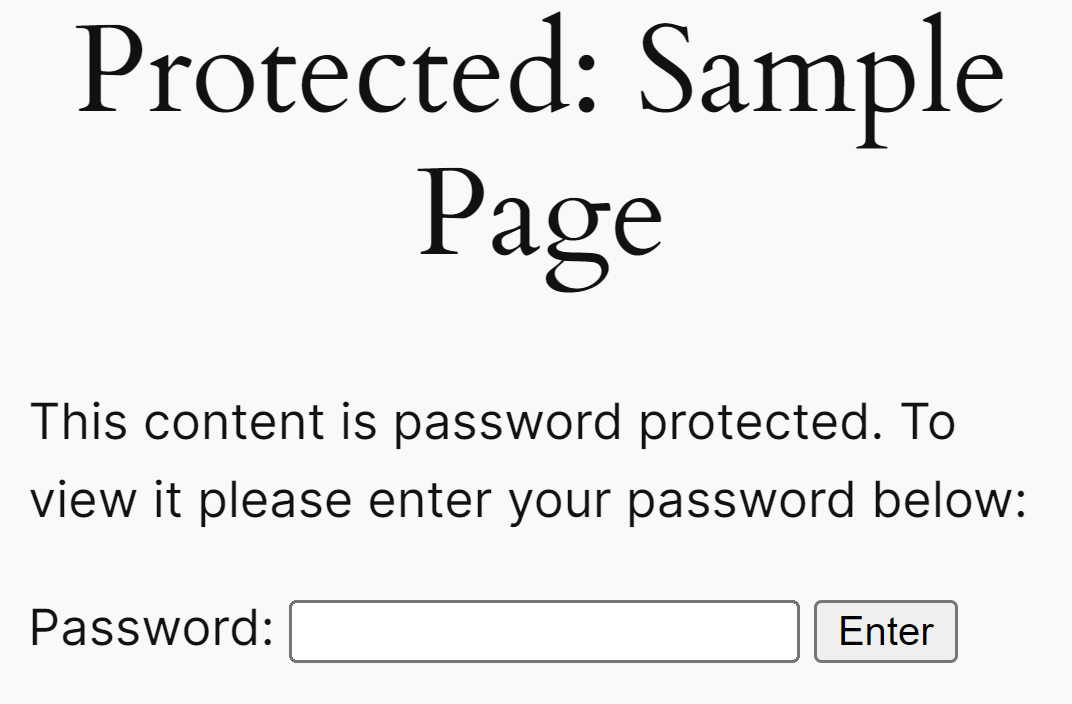
And they’ll need the password to access the content.
But this means you can only have one password for each page—you can’t have different passwords for different users.
For extra functionality, you may want to consider using WordPress plugins instead.
Common Performance Issues Associated with .htaccess
Keep these issues in mind if you decide to rely on your .htaccess file to make specific changes to your site.
Speed
Using many or very complex .htaccess files can impact your site’s performance. And cause it to run slowly.
Why?
Because Apache needs to read and interpret each directive every time a request is made to your server.
So, carefully consider what’s necessary to include in your .htaccess and what isn’t.
And keep it as concise as possible to avoid site performance issues. Since page speed is a ranking factor, you want your site to load fast.
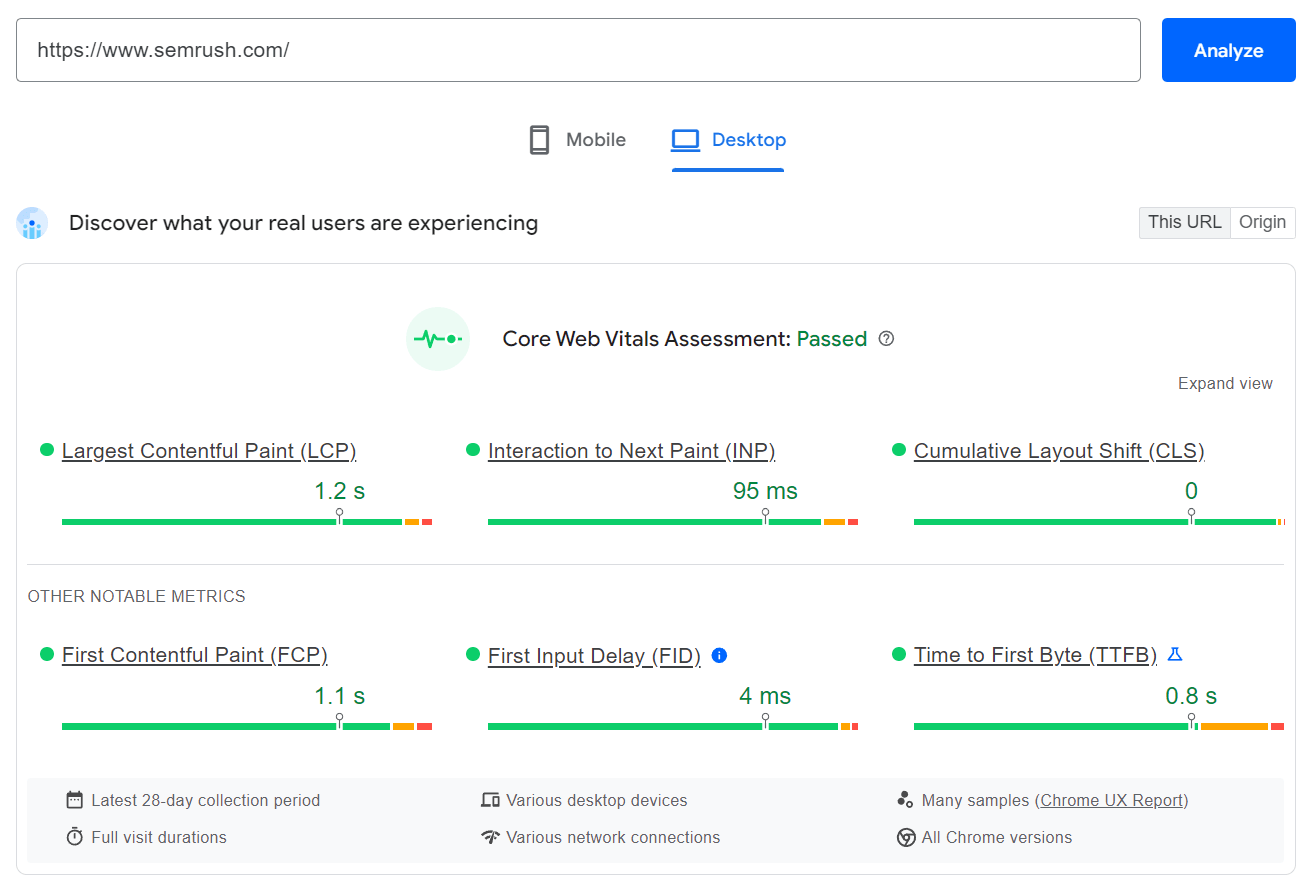
While there’s no ideal length for an .htaccess file, one way to determine if your .htaccess file is impacting side speed is to run speed tests before and after making any .htaccess file changes.
Free tools like Google’s Page Speed Insights let you test page speed by entering a URL:
You may need to speak with a developer to review your .htaccess file if your page loads slowly after making updates.
Security
Because .htaccess files let you redirect entire sites, someone who hacks your site can use the .htaccess file to redirect your site somewhere else.
So, check your .htaccess periodically for any directives you didn’t add.
Also maintain regular backups of your site. Ideally, your host will also do this for you, but you may want to keep your own backups as well.
That way, you can quickly revert your site to an older version (which includes the older version of your .htaccess file, too) if something happens.
Accessibility
Improperly configured .htaccess directives can lead to accessibility issues. Like incorrect redirects that don’t take people to the right page.
Users are more likely to leave your site (and potentially head to a competitor) if they can’t find the content they want.
So, it’s important to keep an eye on any technical issues that might arise from improperly configured .htaccess directives.
Spot Technical Issues on Your Site
Your .htaccess file allows you to make powerful changes to your site with relative ease.
But those edits can also cause unwanted errors.
Use Semrush’s Site Audit tool to help keep your site error-free when editing your .htaccess file.
Site Audit monitors errors and sends you regular updates, so you don’t need to worry about keeping track of them yourself.
Try it today.