What Is Technical SEO?
Technical SEO is about improving your website to make it easier for search engines to find, understand, and store your content.
It also involves user experience factors. Such as making your website faster and easier to use on mobile devices.
Done right, technical SEO can boost your visibility in search results.
In this post, you’ll learn the fundamentals and best practices to optimize your website for technical SEO.
Let’s dive in.
Why Is Technical SEO Important?
Technical SEO can make or break your SEO performance.
If pages on your site aren’t accessible to search engines, they won’t appear in search results—no matter how valuable your content is.
This results in a loss of traffic to your website and potential revenue to your business.
Plus, a website’s speed and mobile-friendliness are confirmed ranking factors.
If your pages load slowly, users may get annoyed and leave your site. User behaviors like this may signal that your site doesn’t create a positive user experience. As a result, search engines may not rank your site well.
To understand technical SEO better, we need to discuss two important processes: crawling and indexing.
Understanding Crawling and How to Optimize for It
Crawling is an essential component of how search engines work.
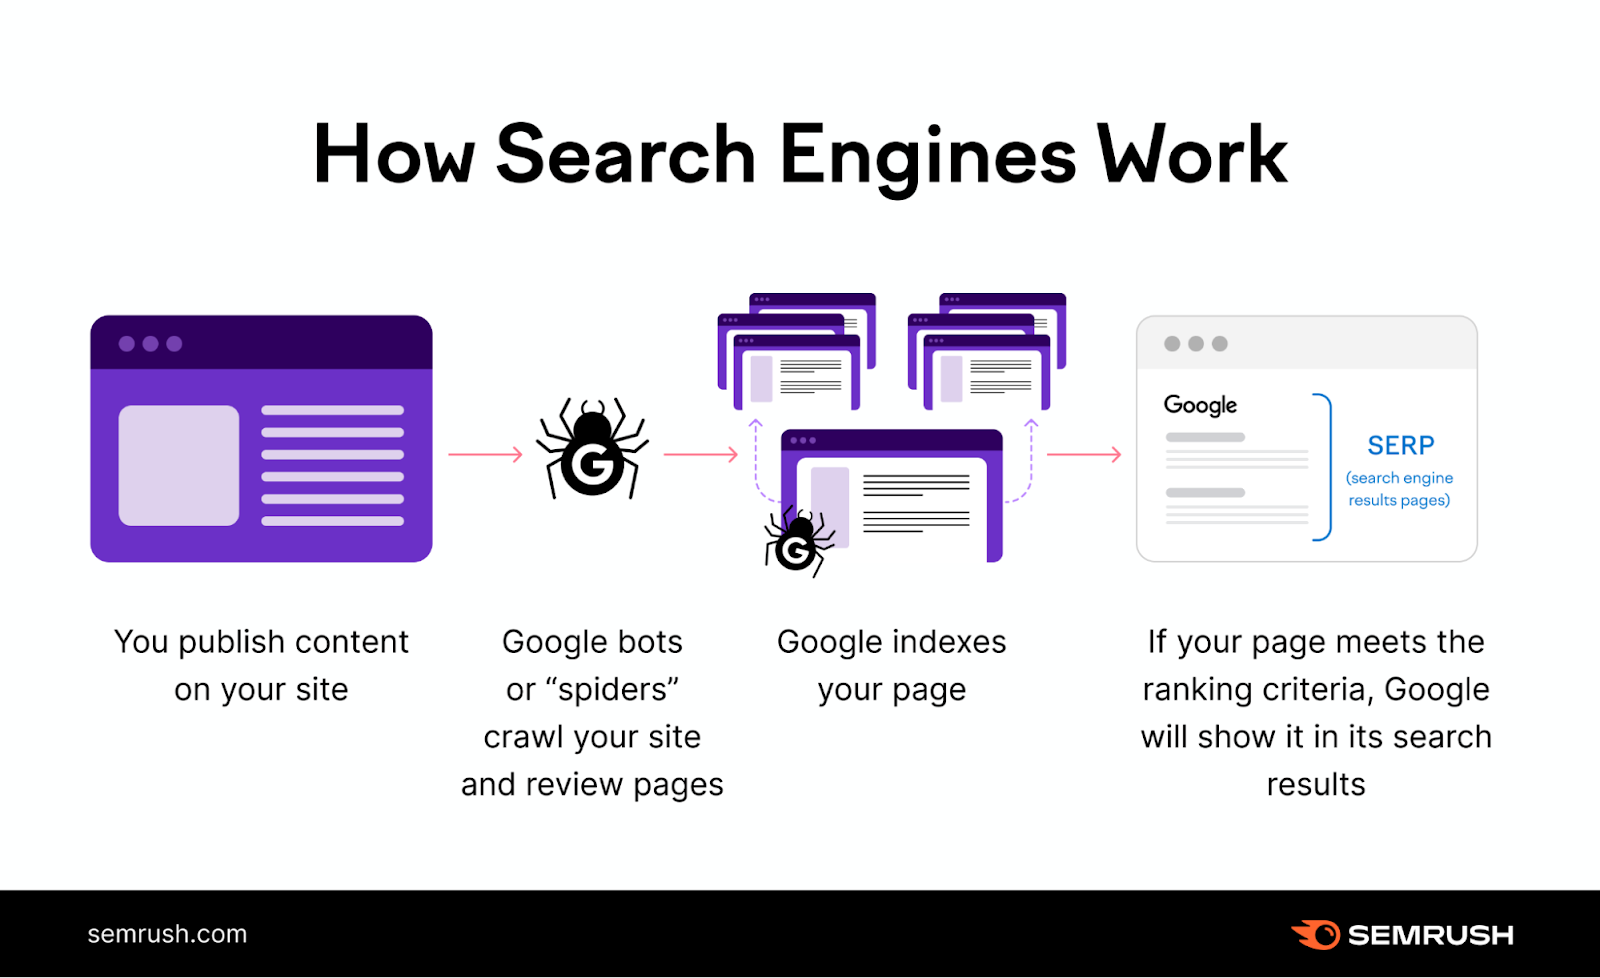
Crawling happens when search engines follow links on pages they already know about to find pages they haven’t seen before.
For example, every time we publish new blog posts, we add them to our main blog page.
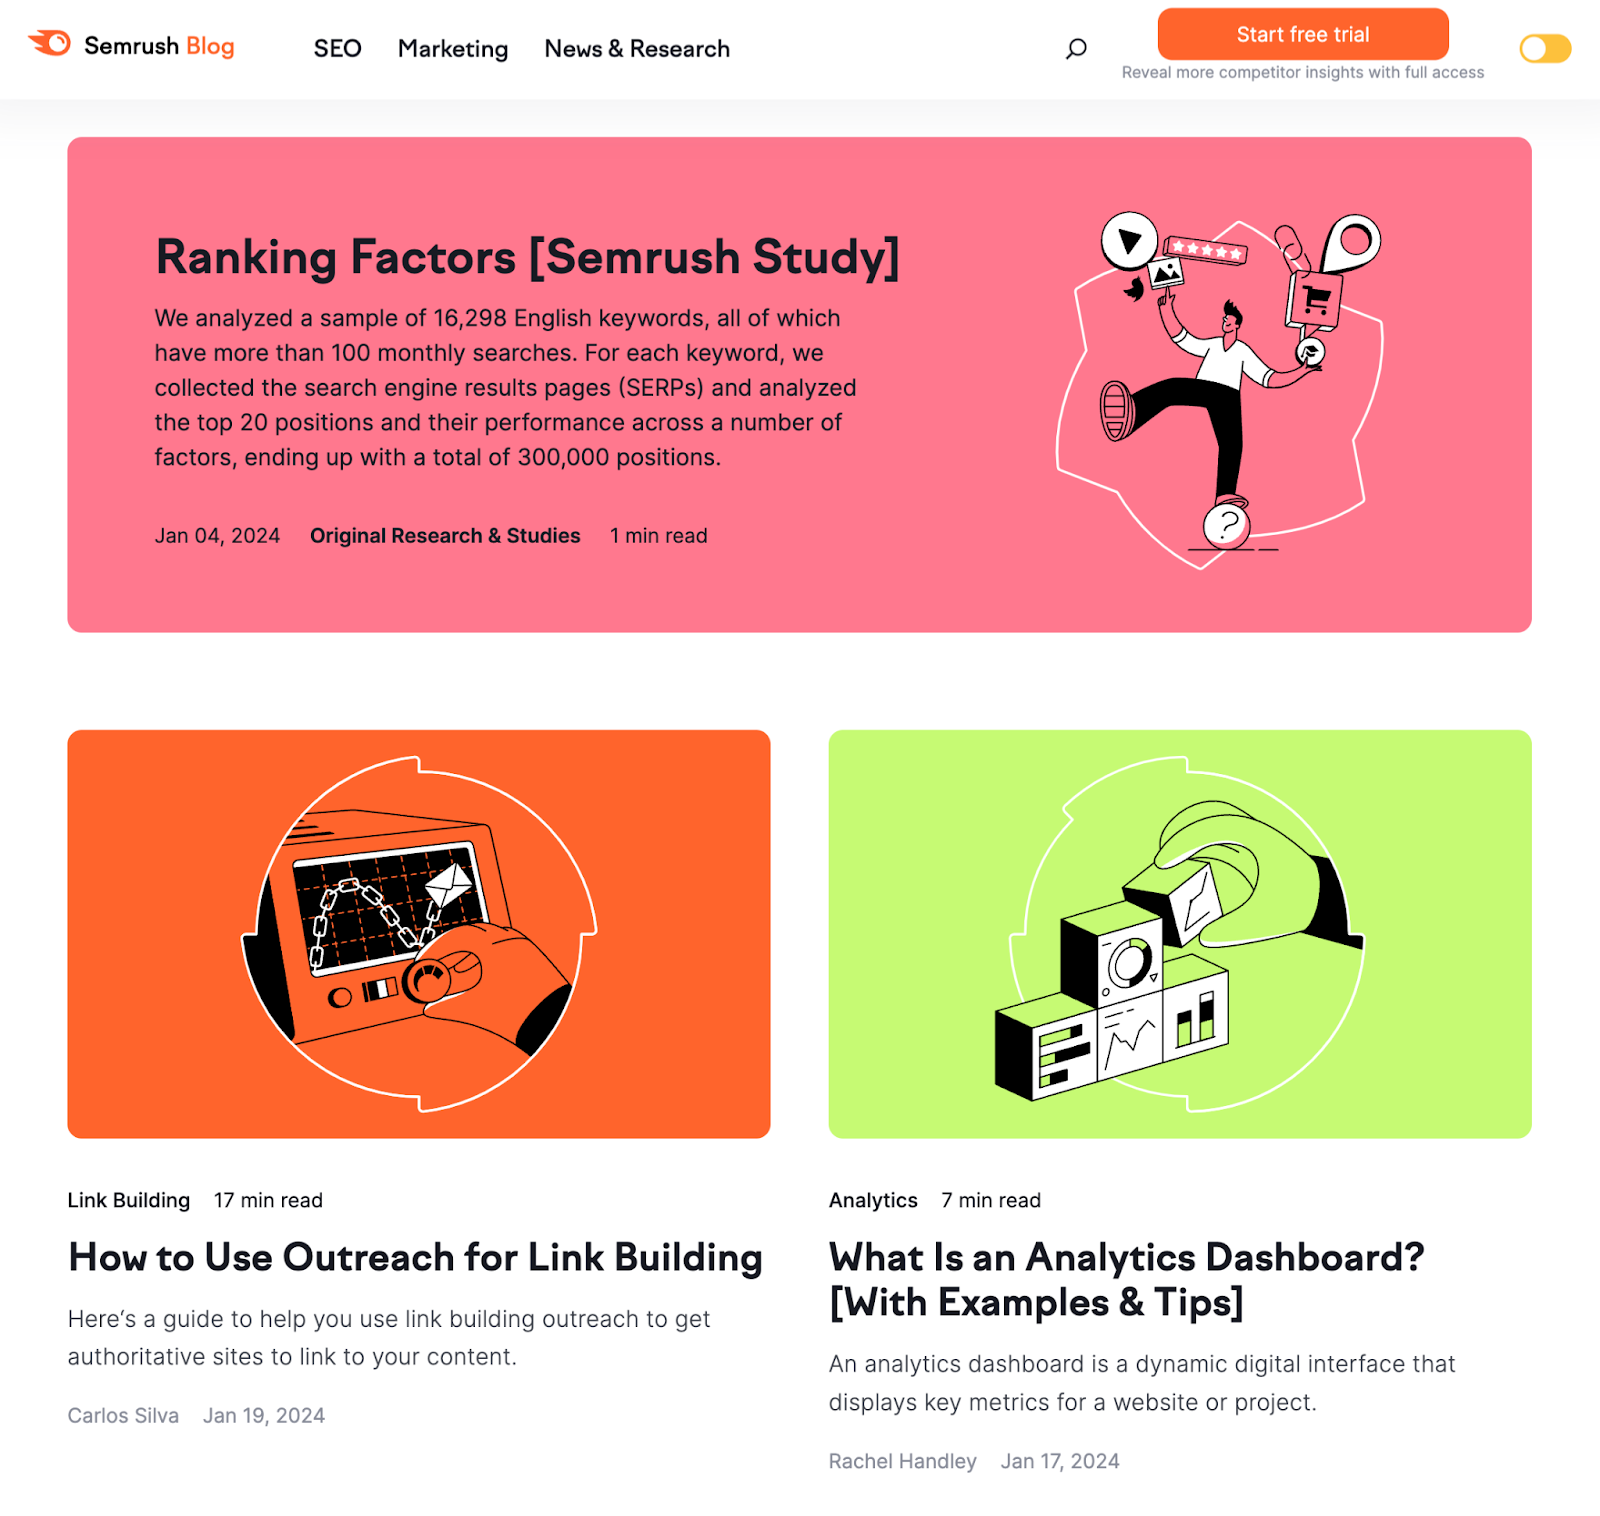
So, the next time a search engine like Google crawls our blog page, it sees the recently added links to new blog posts.
And that’s one of the ways Google discovers our new blog posts.
There are a few ways to ensure your pages are accessible to search engines:
Create an SEO-Friendly Site Architecture
Site architecture (also called site structure) is the way pages are linked together within your site.
An effective site structure organizes pages in a way that helps crawlers find your website content quickly and easily.
So, ensure all the pages are just a few clicks away from your homepage when structuring your site.
Like this:
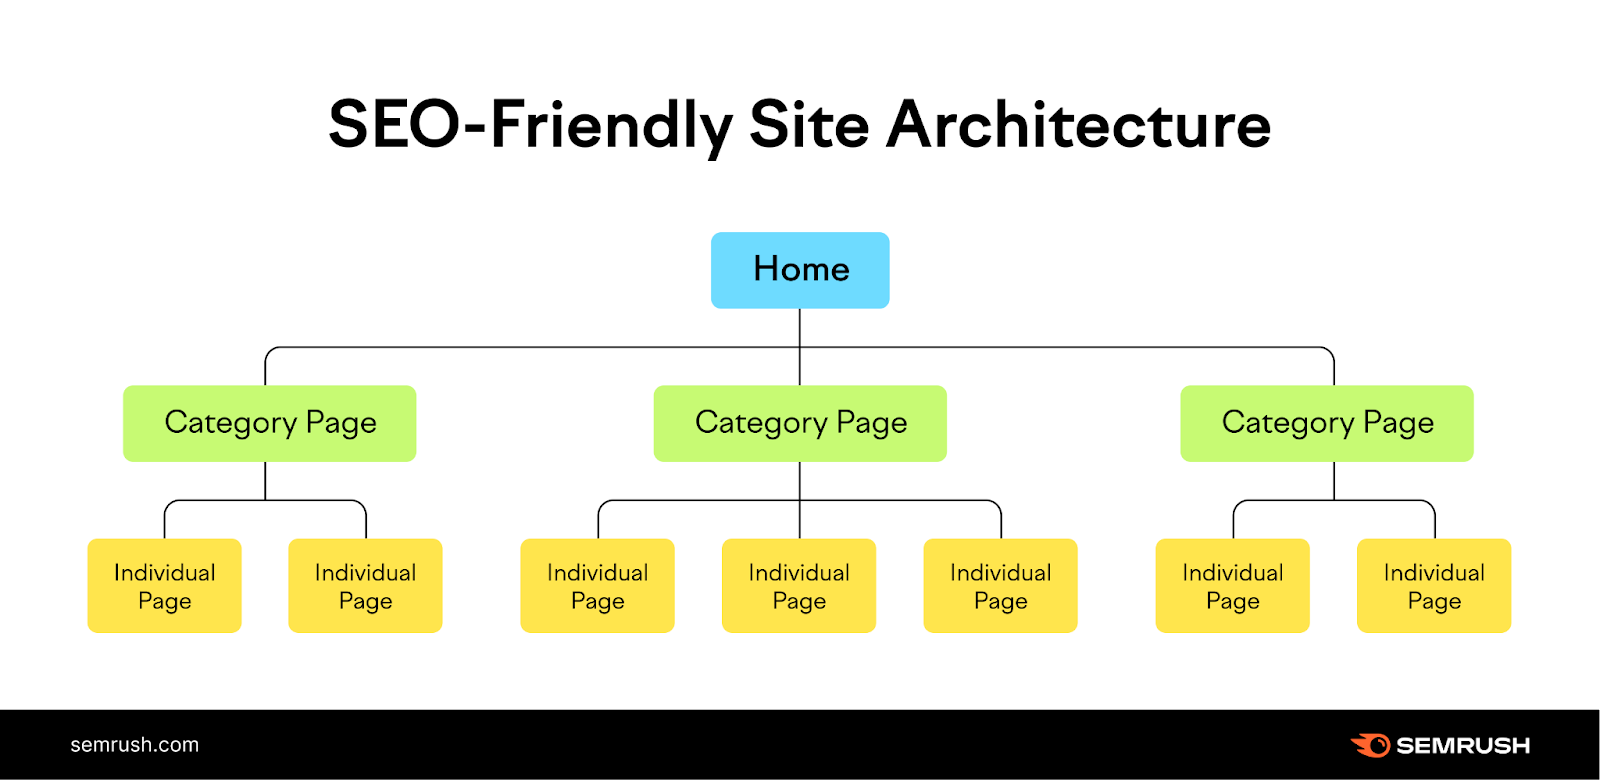
In the site structure above, all the pages are organized in a logical hierarchy.
The homepage links to category pages. And the category pages link to individual subpages on the site.
This structure also reduces the number of orphan pages.
Orphan pages are pages with no internal links pointing to them, making it difficult (or sometimes impossible) for crawlers and users to find them.
If you’re a Semrush user, you can easily find whether your site has any orphan pages.
Set up a project in the Site Audit tool and crawl your website.
Once the crawl is complete, navigate to the “Issues” tab and search for “orphan.”
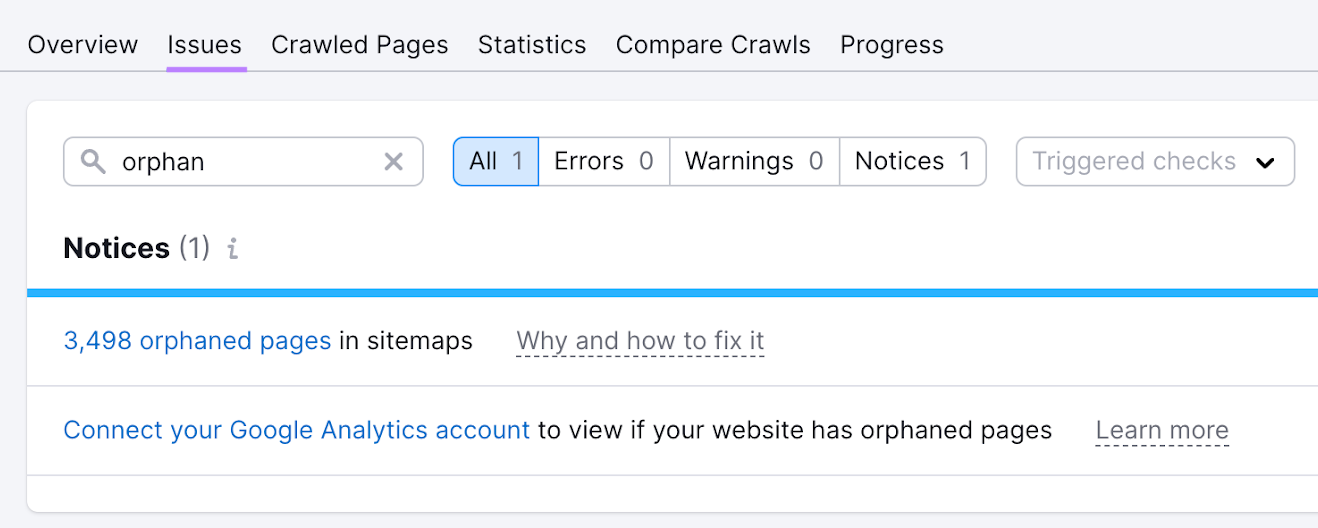
The tool shows whether your site has any orphan pages. Click the blue link to see which ones they are.
To fix the issue, add internal links on non-orphan pages that point to the orphan pages.
Submit Your Sitemap to Google
Using an XML sitemap can help Google find your webpages.
An XML sitemap is a file containing a list of important pages on your site. It lets search engines know which pages you have and where to find them.
This is especially important if your site contains a lot of pages. Or if they’re not linked together well.
Here’s what Semrush’s XML sitemap looks like:
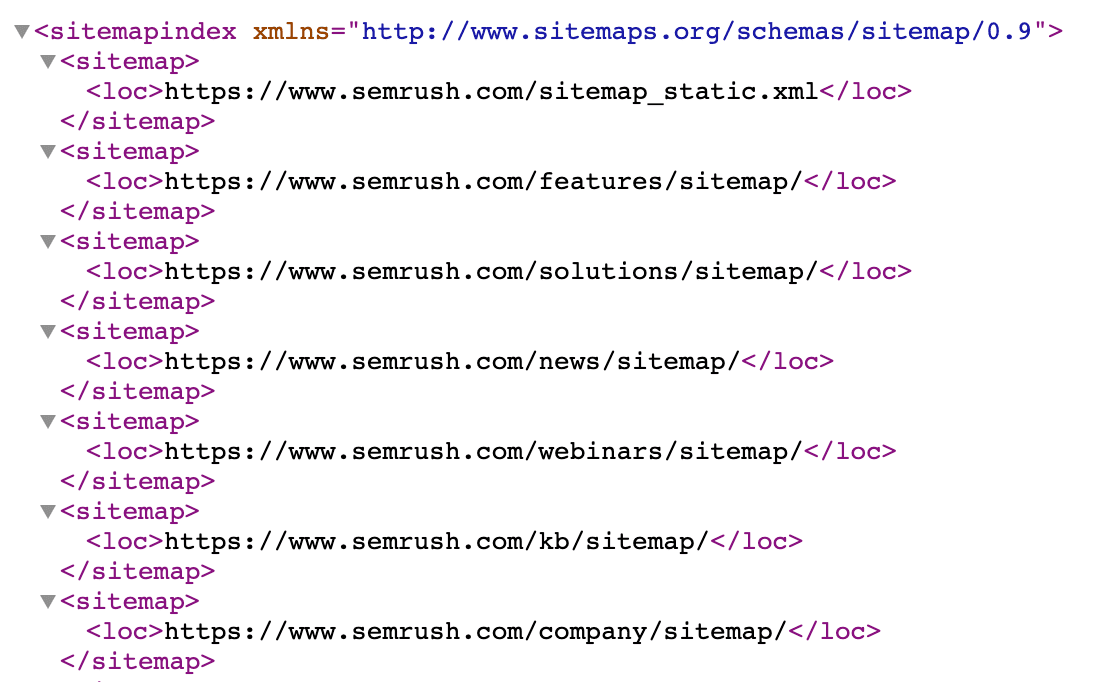
Your sitemap is usually located at one of these two URLs:
- yoursite.com/sitemap.xml
- yoursite.com/sitemap_index.xml
Once you locate your sitemap, submit it to Google via Google Search Console (GSC).
Go to GSC and click “Indexing” > “Sitemaps” from the sidebar.
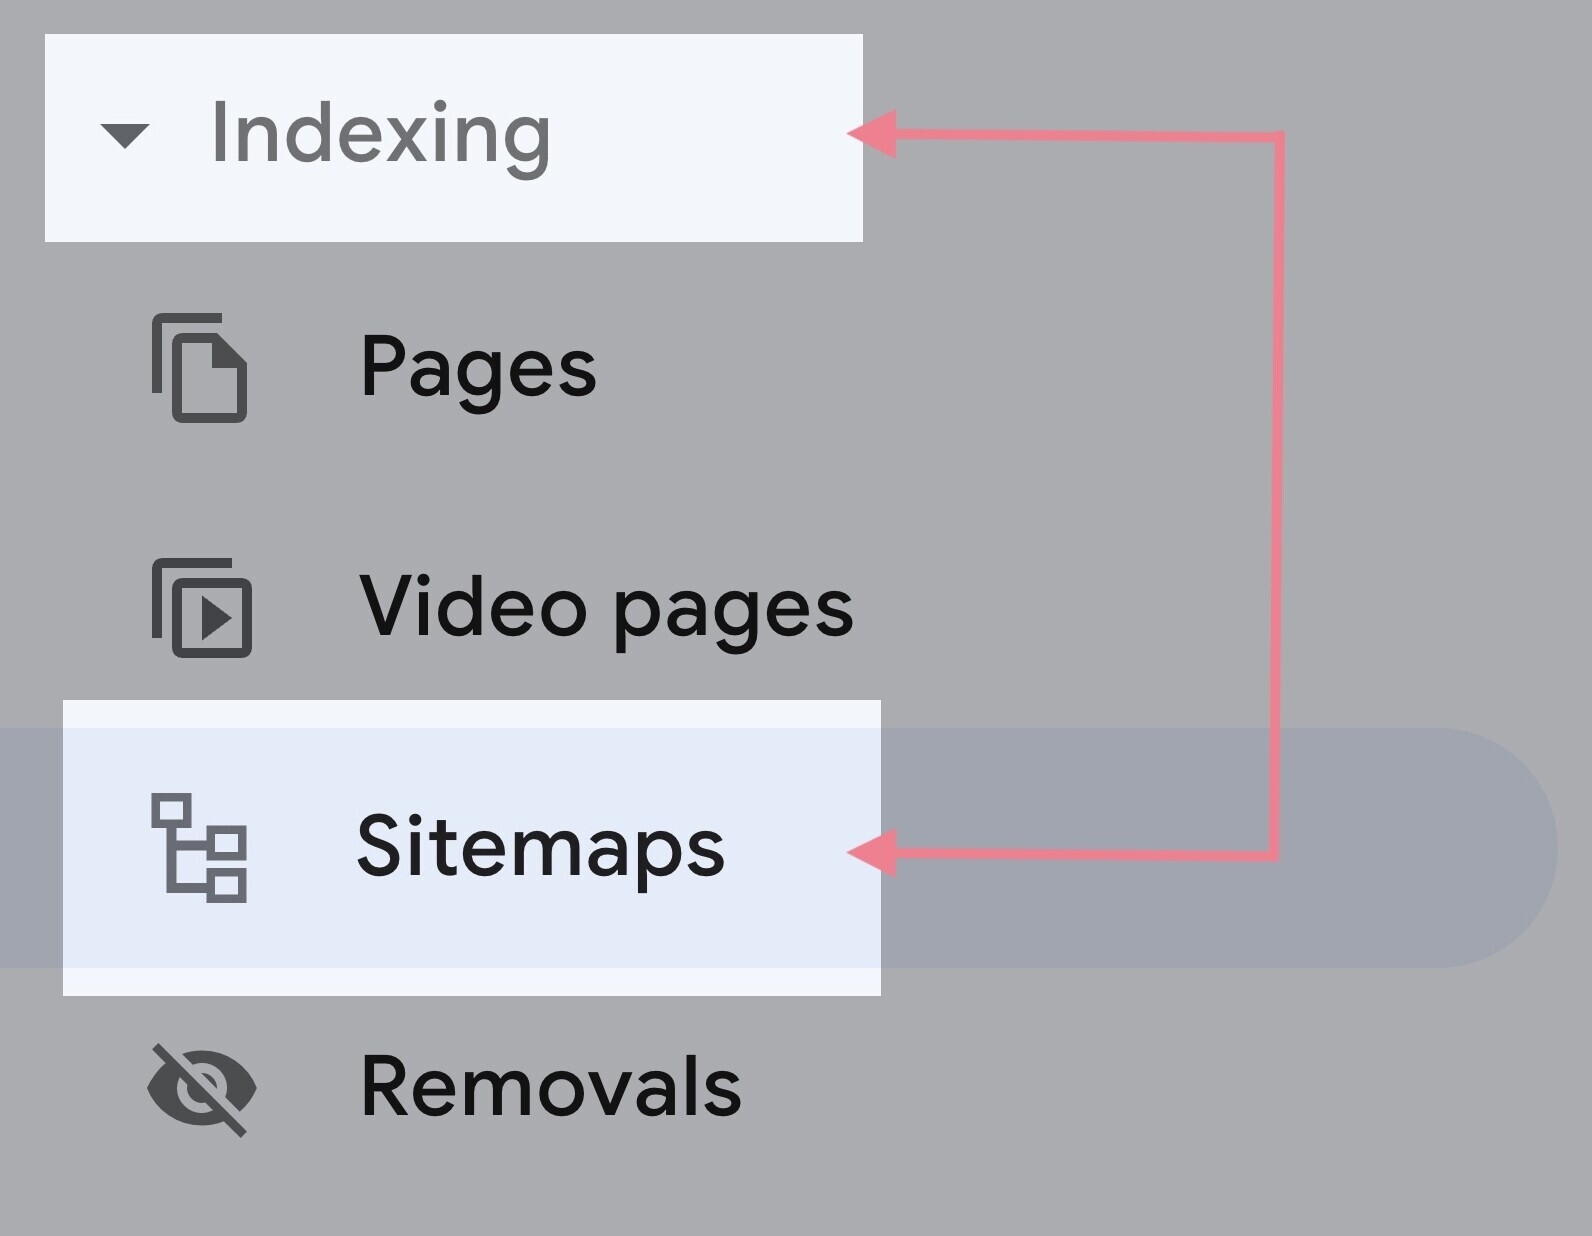
Then, paste your sitemap URL in the blank field and click “Submit.”

After Google is done processing your sitemap, you should see a confirmation message like this:

Understanding Indexing and How to Optimize for It
Once search engines crawl your pages, they then try to analyze and understand the content on those pages.
And then the search engine stores those pieces of content in its search index—a huge database containing billions of webpages.
Your webpages must be indexed by search engines to appear in search results.
The simplest way to check whether your pages are indexed is to perform a “site:” operator search.
For example, if you want to check the index status of semrush.com, you’ll type “site:www.semrush.com” into Google’s search box.
This tells you (roughly) how many pages from the site Google has indexed.
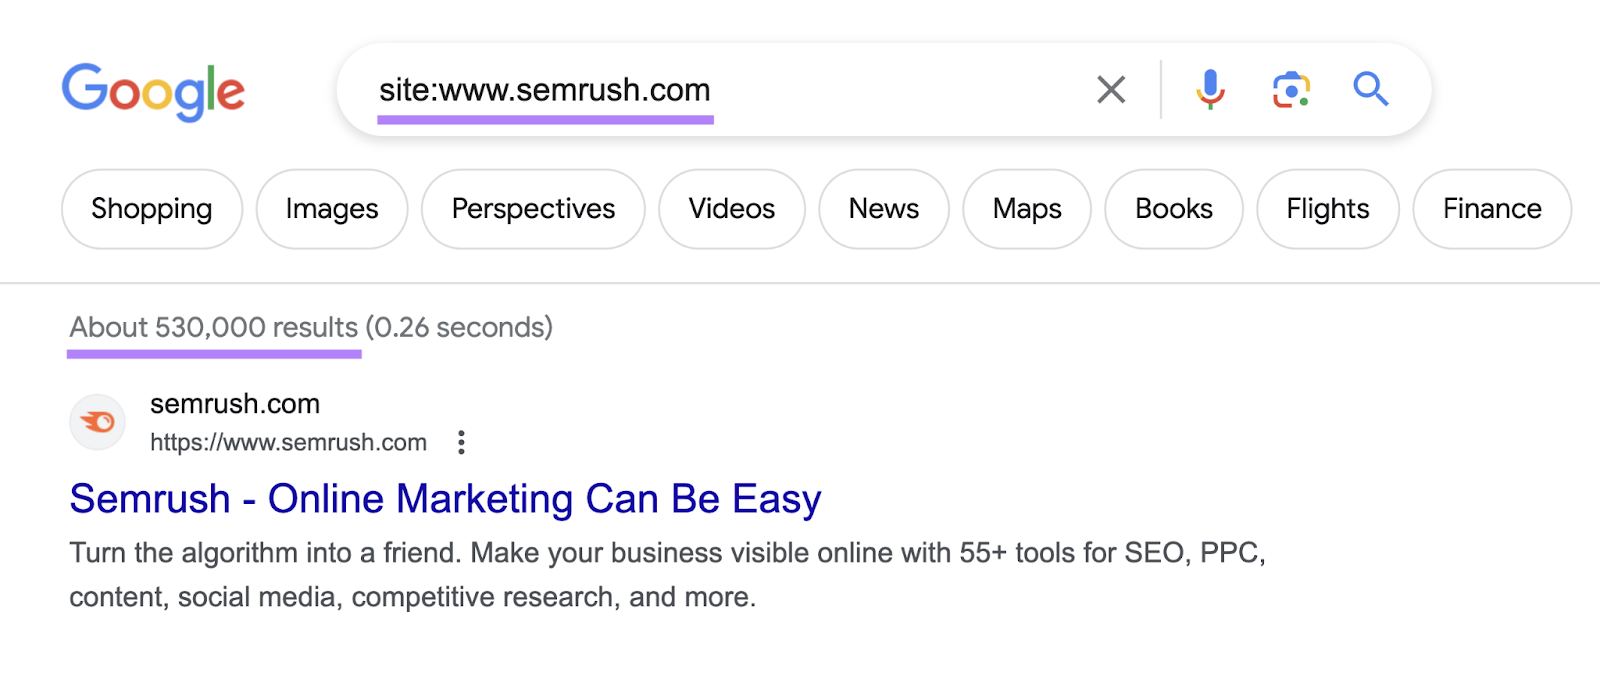
You can also check whether individual pages are indexed by searching the page URL with the “site:” operator.
Like this:
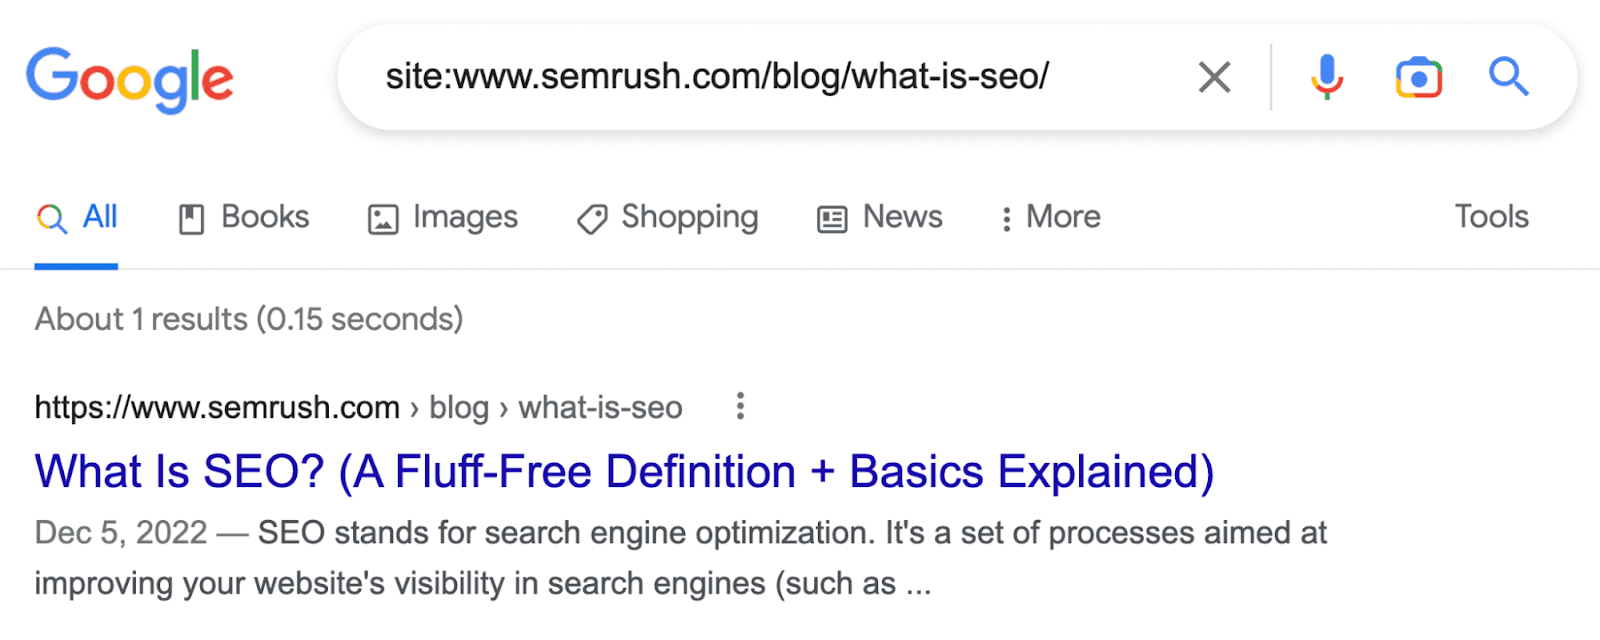
There are a few things you should do to ensure Google doesn’t have trouble indexing your webpages:
Use the Noindex Tag Carefully
The “noindex” tag is an HTML snippet that keeps your pages out of Google’s index.
It’s placed within the <head> section of your webpage and looks like this:
<meta name="robots" content="noindex">Ideally, you would want all your important pages to get indexed. So use the noindex tag only when you want to exclude certain pages from indexing.
These could be:
- Thank you pages
- PPC landing pages
To learn more about using noindex tags and how to avoid common implementation mistakes, read our guide to robots meta tags.
Implement Canonical Tags Where Needed
When Google finds similar content on multiple pages on your site, it sometimes doesn’t know which of the pages to index and show in search results.
That’s when “canonical” tags come in handy.
The canonical tag (rel="canonical") identifies a link as the original version, which tells Google which page it should index and rank.
The tag is nested within the <head> of a duplicate page (but it’s a good idea to use it on the main page as well) and looks like this:
<link rel="canonical" href="https://example.com/original-page/" />Additional Technical SEO Best Practices
Creating an SEO-friendly site structure, submitting your sitemap to Google, and using noindex and canonical tags appropriately should get your pages crawled and indexed.
But if you want your website to be fully optimized for technical SEO, consider these additional best practices.
1. Use HTTPS
Hypertext transfer protocol secure (HTTPS) is a secure version of hypertext transfer protocol (HTTP).
It helps protect sensitive user information like passwords and credit card details from being compromised.
And it’s been a ranking signal since 2014.
You can check whether your site uses HTTPS by simply visiting it.
Just look for the “lock” icon to confirm.
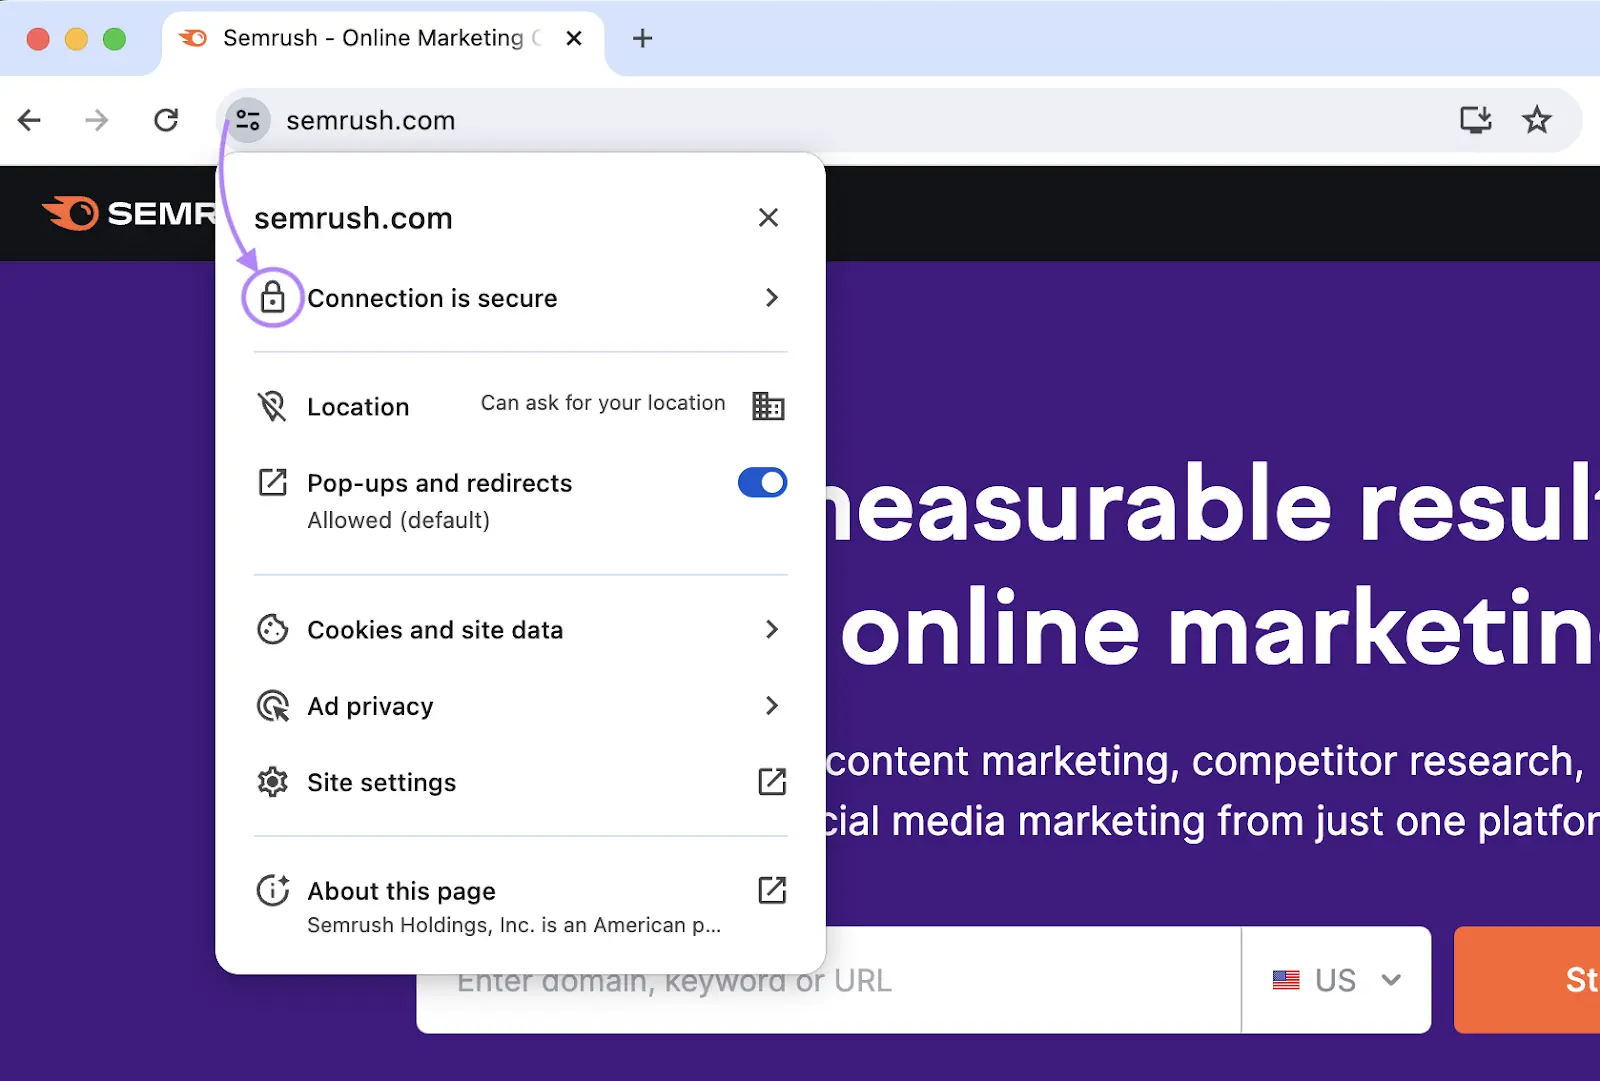
If you see the “Not secure” warning, you’re not using HTTPS.

In this case, you need to install a secure sockets layer (SSL) or transport layer security (TLS) certificate..
An SSL/TLS certificate authenticates the identity of the website. And establishes a secure connection when users are accessing it.
You can get an SSL/TLS certificate for free from Let’s Encrypt.
2. Find & Fix Duplicate Content Issues
Duplicate content is when you have the same or nearly the same content on multiple pages on your site.
For example, Buffer had these two different URLs for pages that are nearly identical:
- https://buffer.com/resources/social-media-manager-checklist/
- https://buffer.com/library/social-media-manager-checklist/
Google doesn’t penalize sites for having duplicate content.
But duplicate content can cause issues like:
- Undesirable URLs ranking in search results
- Backlink dilution
- Wasted crawl budget
With Semrush’s Site Audit tool, you can find out whether your site has duplicate content issues.
Start by running a full crawl of your site and then going to the “Issues” tab.
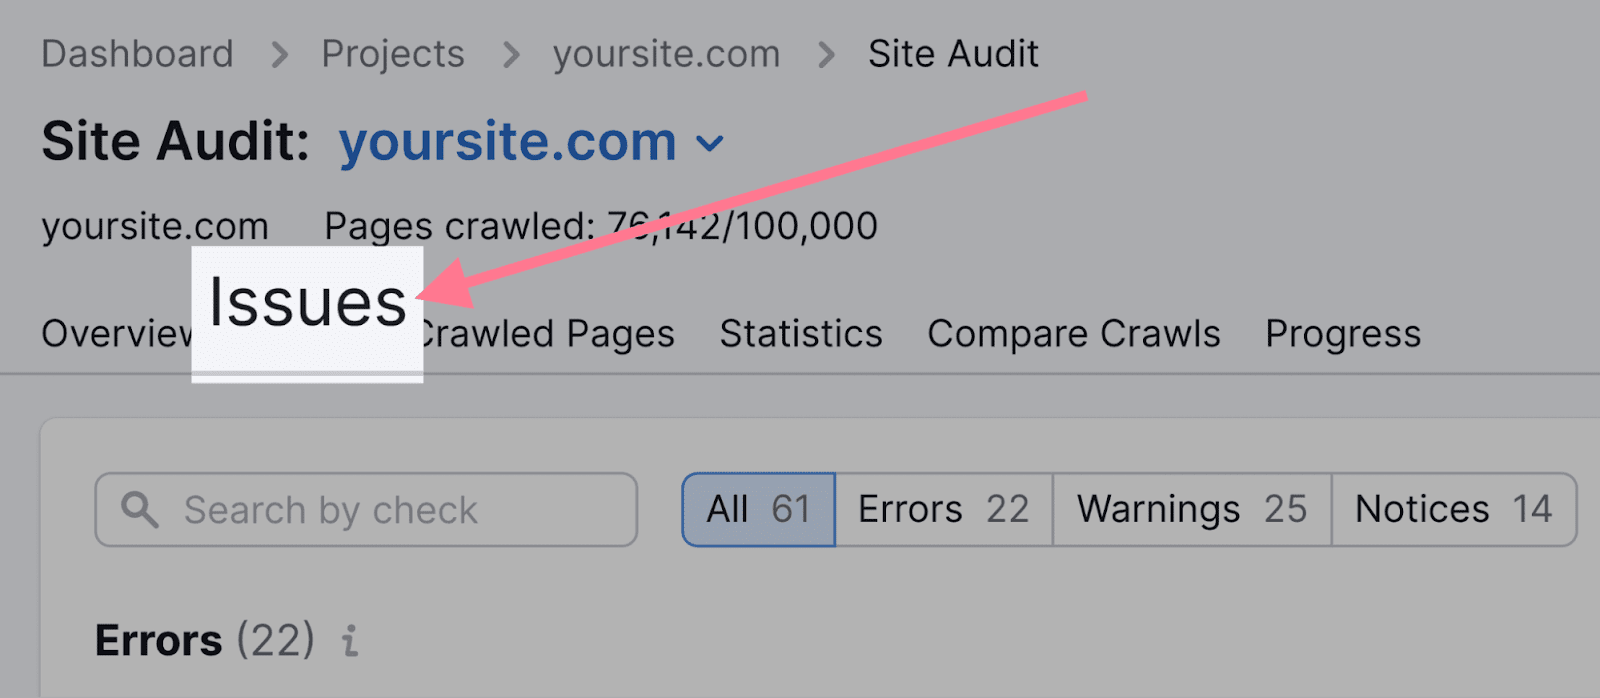
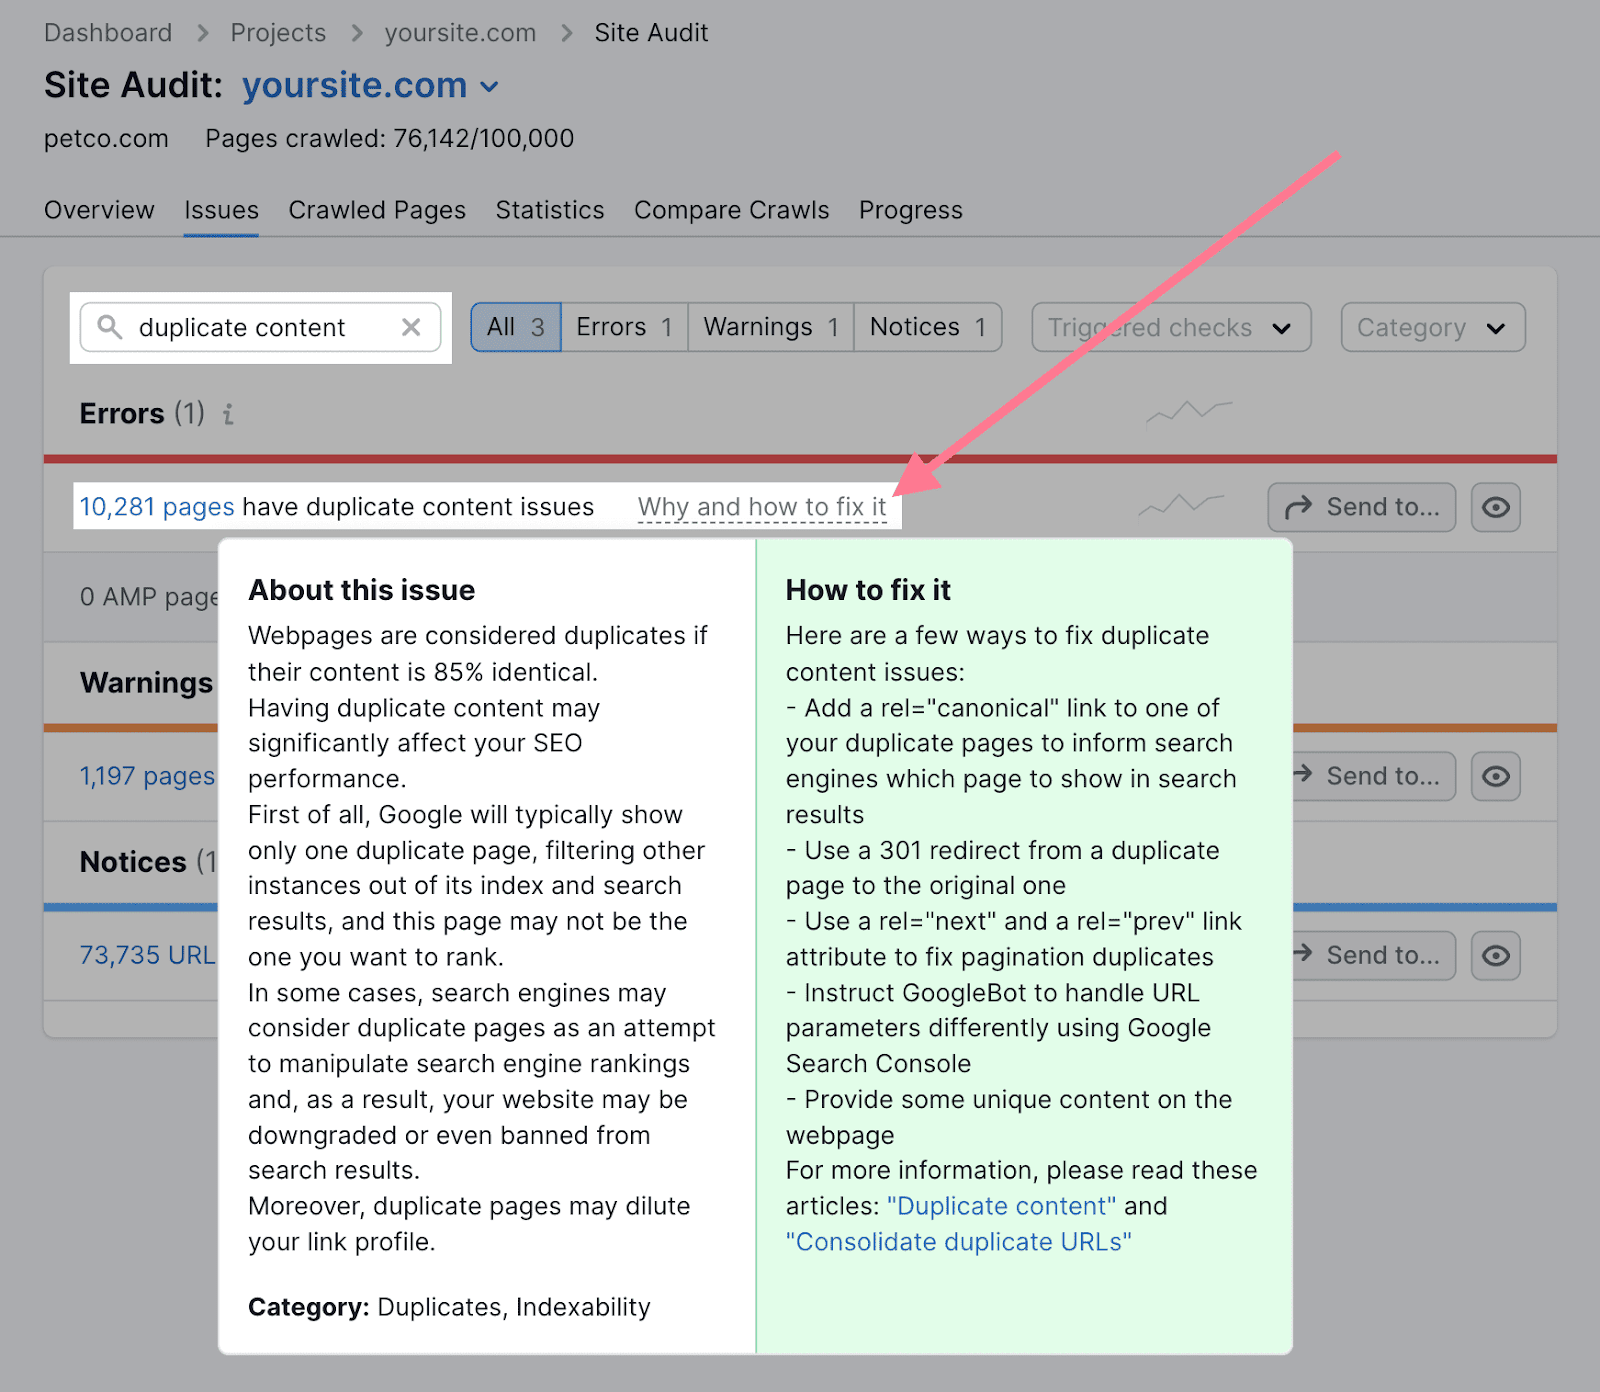
Then, search for “duplicate content.”
The tool will show the error if you have duplicate content. And offer advice on how to address it when you click “Why and how to fix it.”
3. Make Sure Only One Version of Your Website Is Accessible to Users and Crawlers
Users and crawlers should only be able to access one of these two versions of your site:
- https://yourwebsite.com
- https://www.yourwebsite.com
Having both versions accessible creates duplicate content issues.
And reduces the effectiveness of your backlink profile. Because some websites may link to the www version, while others link to the non-www version.
This can negatively affect your performance in Google.
So, only use one version of your website. And redirect the other version to your main website.
4. Improve Your Page Speed
Page speed is a ranking factor both on mobile and desktop devices.
So, make sure your site loads as fast as possible.
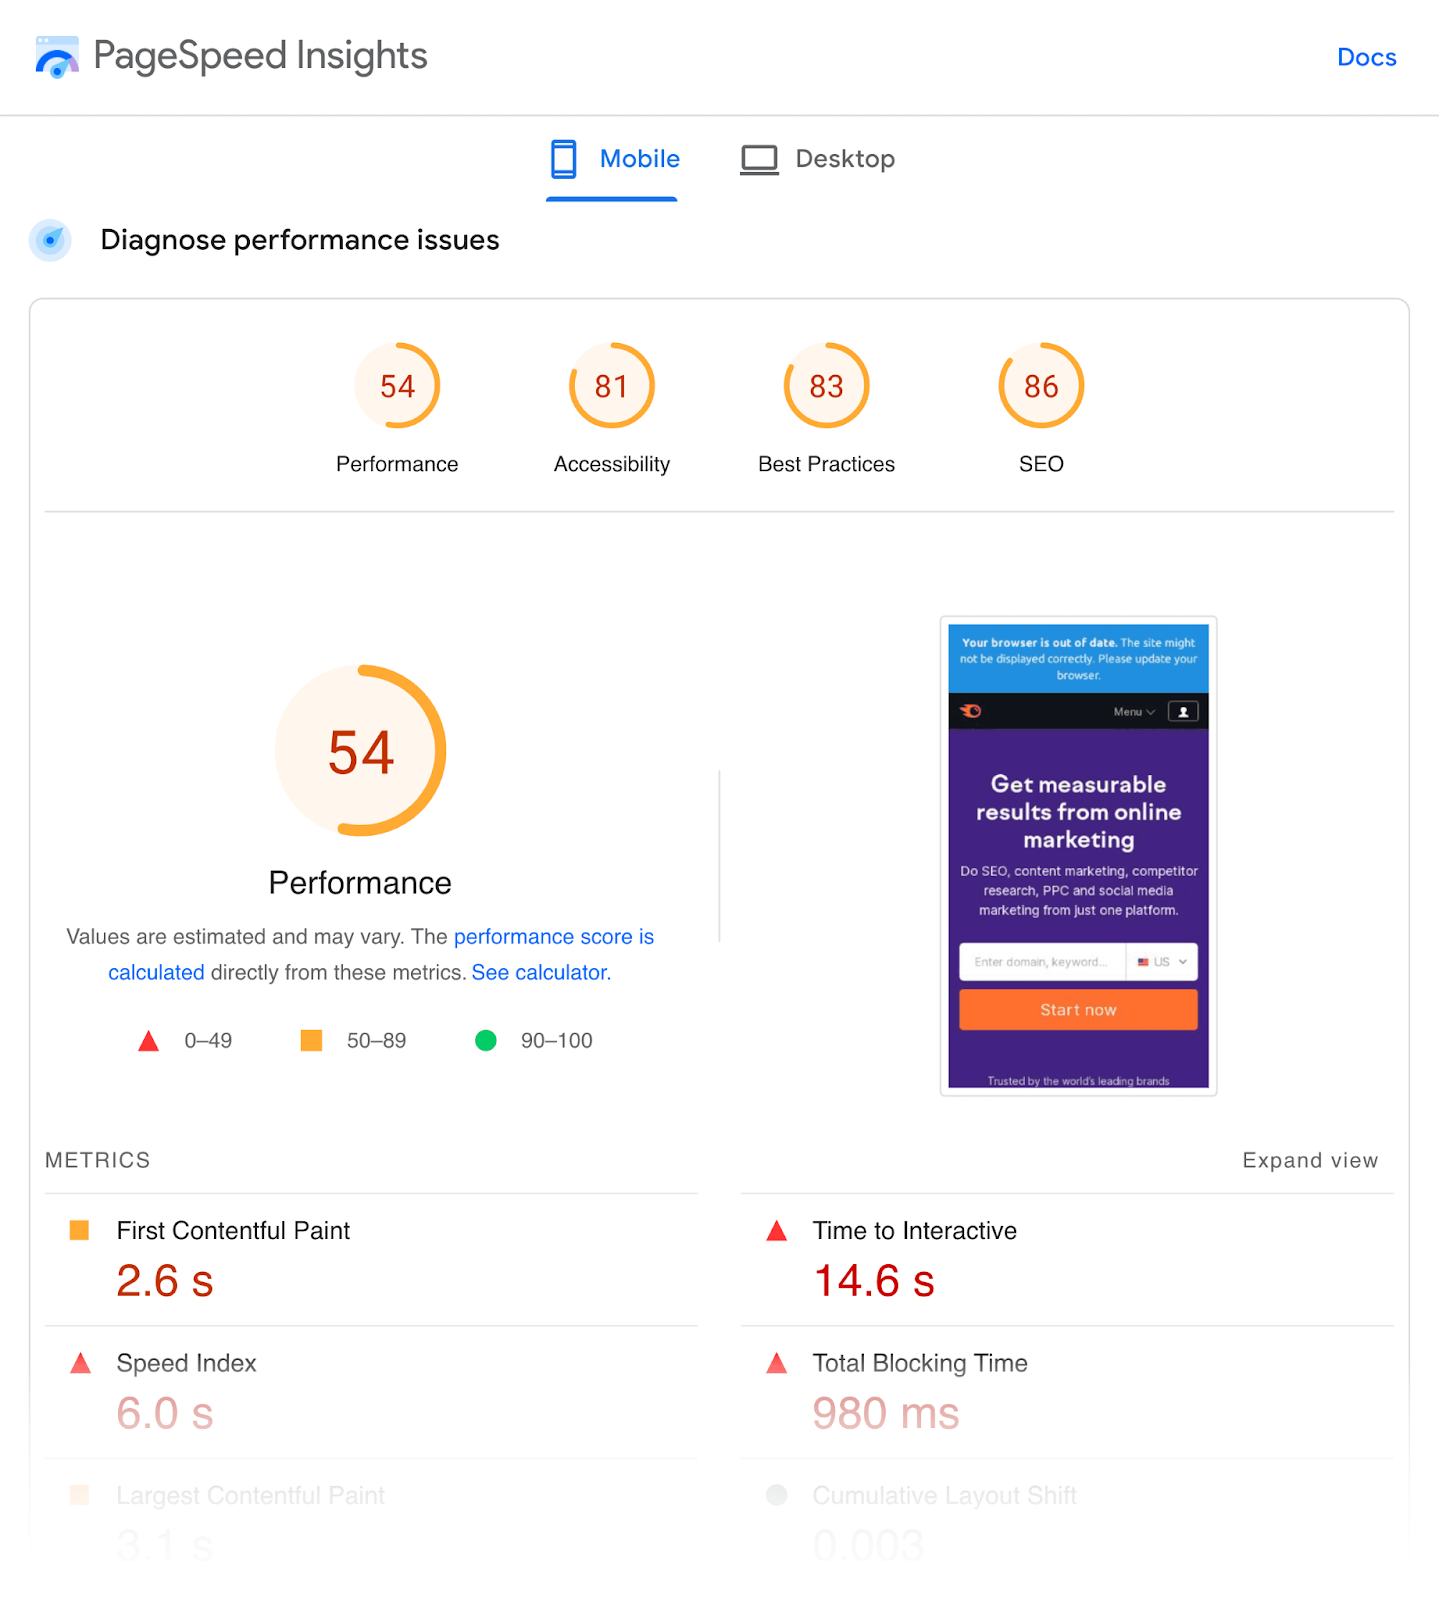
You can use Google’s PageSpeed Insights tool to check your website’s current speed.
It gives you a performance score from 0 to 100. The higher the number, the better.
Here are few ideas for improving your website speed:
- Compress your images—Images are usually the biggest files on a webpage. Compressing them with image optimization tools like ShortPixel will reduce their file sizes so they take as little time to load as possible.
- Use a content distribution network (CDN)—A CDN stores copies of your webpages on servers around the globe. It then connects visitors to the nearest server, so there’s less distance for the requested files to travel.
- Minify HTML, CSS, and JavaScript files—Minification removes unnecessary characters and whitespace from code to reduce file sizes. Which improves page load time.
5. Ensure Your Website Is Mobile-Friendly
Google uses mobile-first indexing. This means that it looks at mobile versions of webpages to index and rank content.
So, make sure your website is compatible on mobile devices.
To see if that’s the case for your site, use the same PageSpeed Insights tool.
Once you run a webpage through it, navigate to the “SEO” section of the report. And then the “Passed Audits” section.
Here, you’ll see whether mobile-friendly elements or features are present on your site:
- Meta viewport tags—code that tells browsers how to control sizing on a page’s visible area
- Legible font sizes
- Adequate spacing around buttons and clickable elements
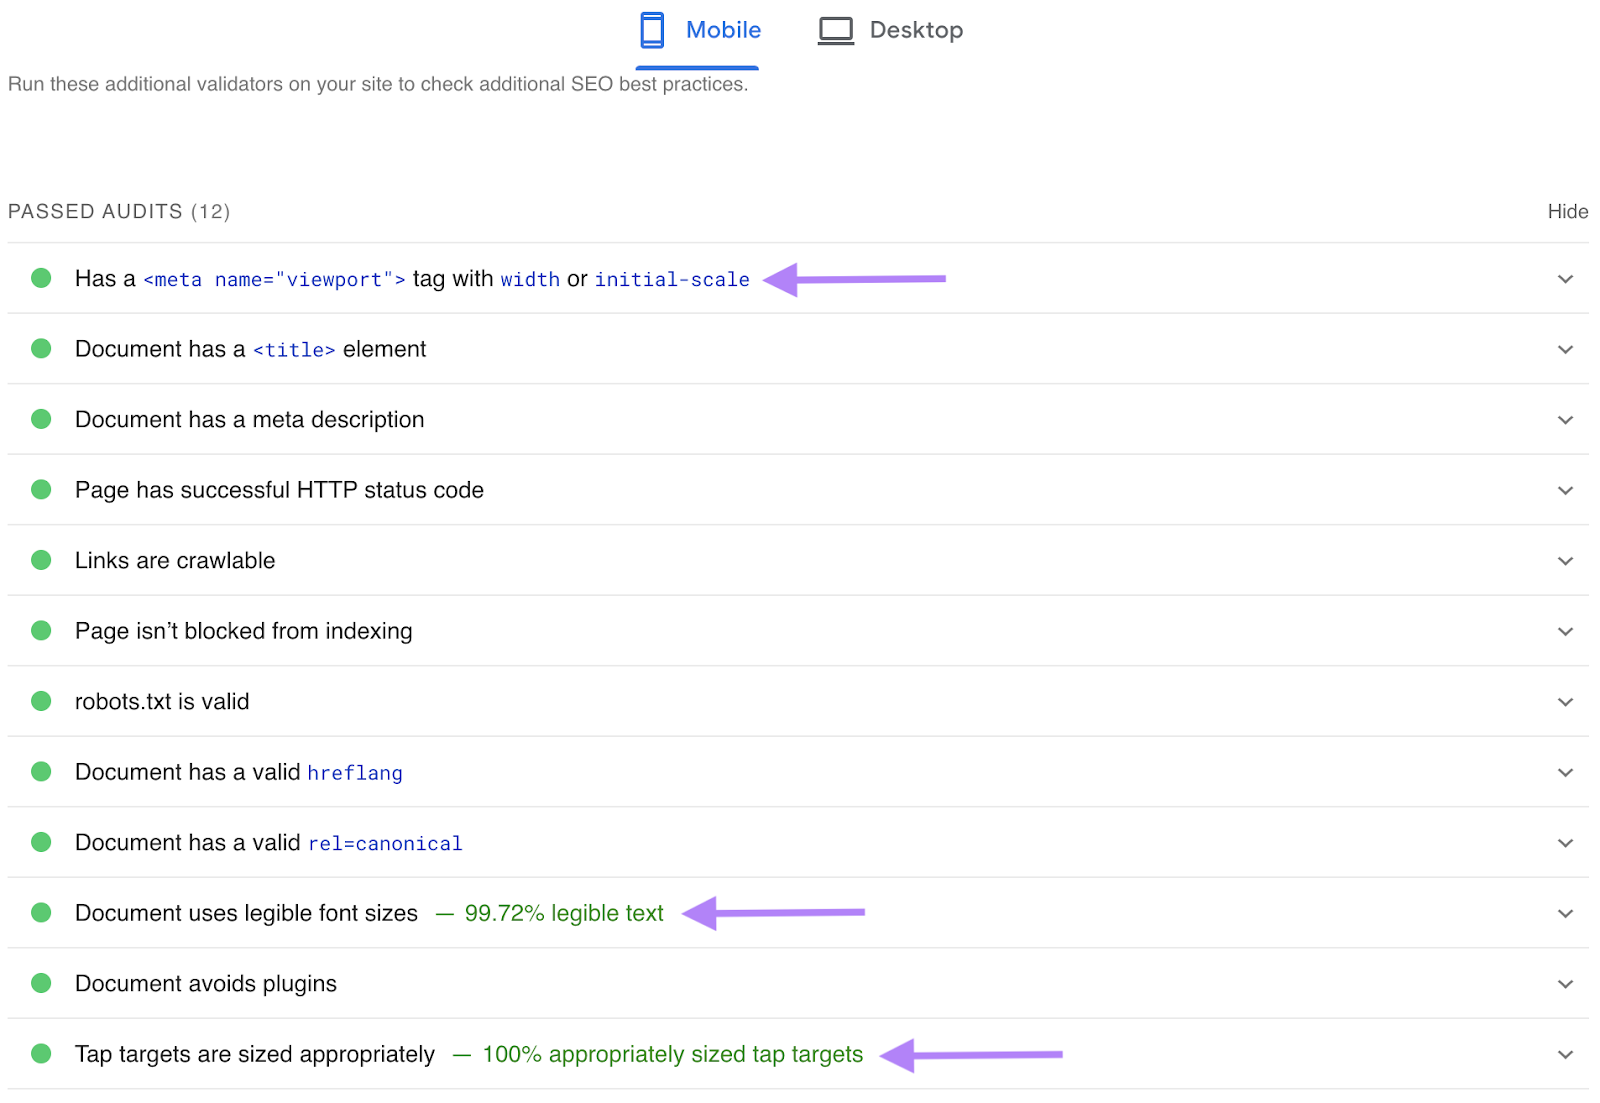
If you take care of these things, your website is optimized for mobile devices.
6. Use Breadcrumb Navigation
Breadcrumb navigation (or “breadcrumbs”) is a trail of text links that show users where they are on the website and how they reached that point.
Here’s an example:
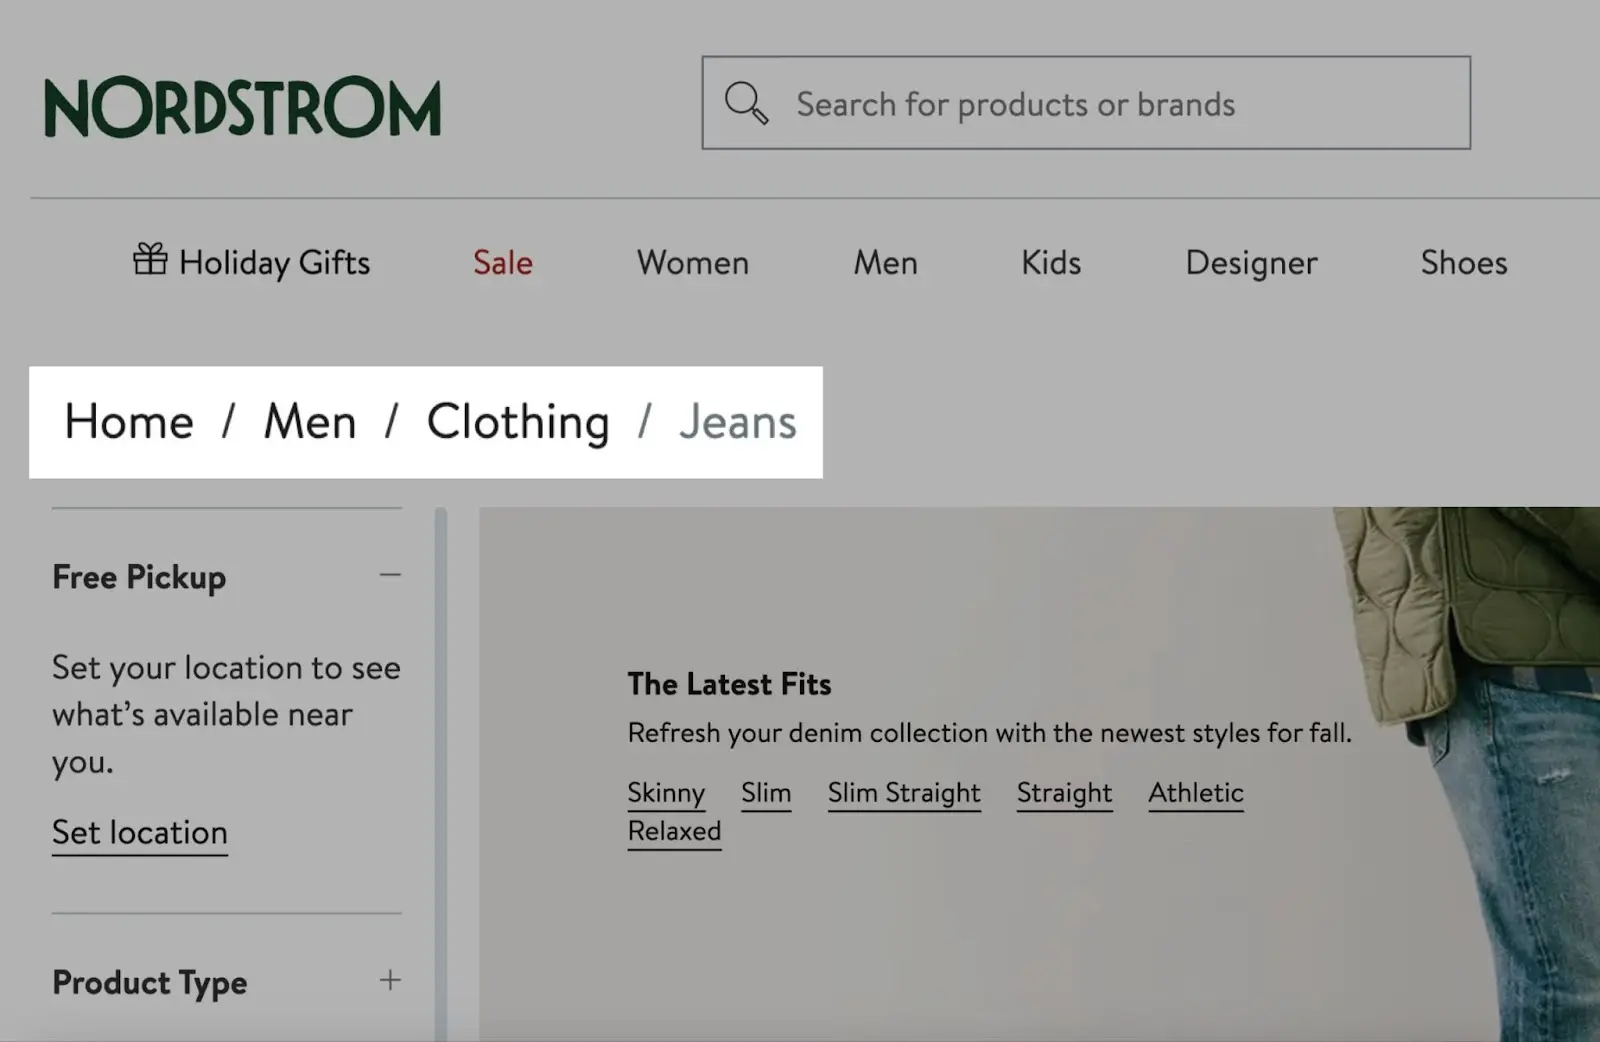
These links make site navigation easier.
How?
Users can easily navigate to higher-level pages without the need to repeatedly use the back button or go through complex menu structures.
So, you should definitely implement breadcrumbs. Especially if your site is very large. Like an ecommerce site.
They also benefit SEO.
These additional links distribute link equity (PageRank) throughout your website. Which helps your site rank higher.
If your website is on WordPress or Shopify, implementing breadcrumb navigation is particularly easy.
Some themes may include breadcrumbs out of the box. If your theme doesn’t, you can use the Yoast SEO plugin and it will set up everything for you.
7. Use Pagination
Pagination is a navigation technique that’s used to divide a long list of content into multiple pages.
For example, we’ve used pagination on our blog.
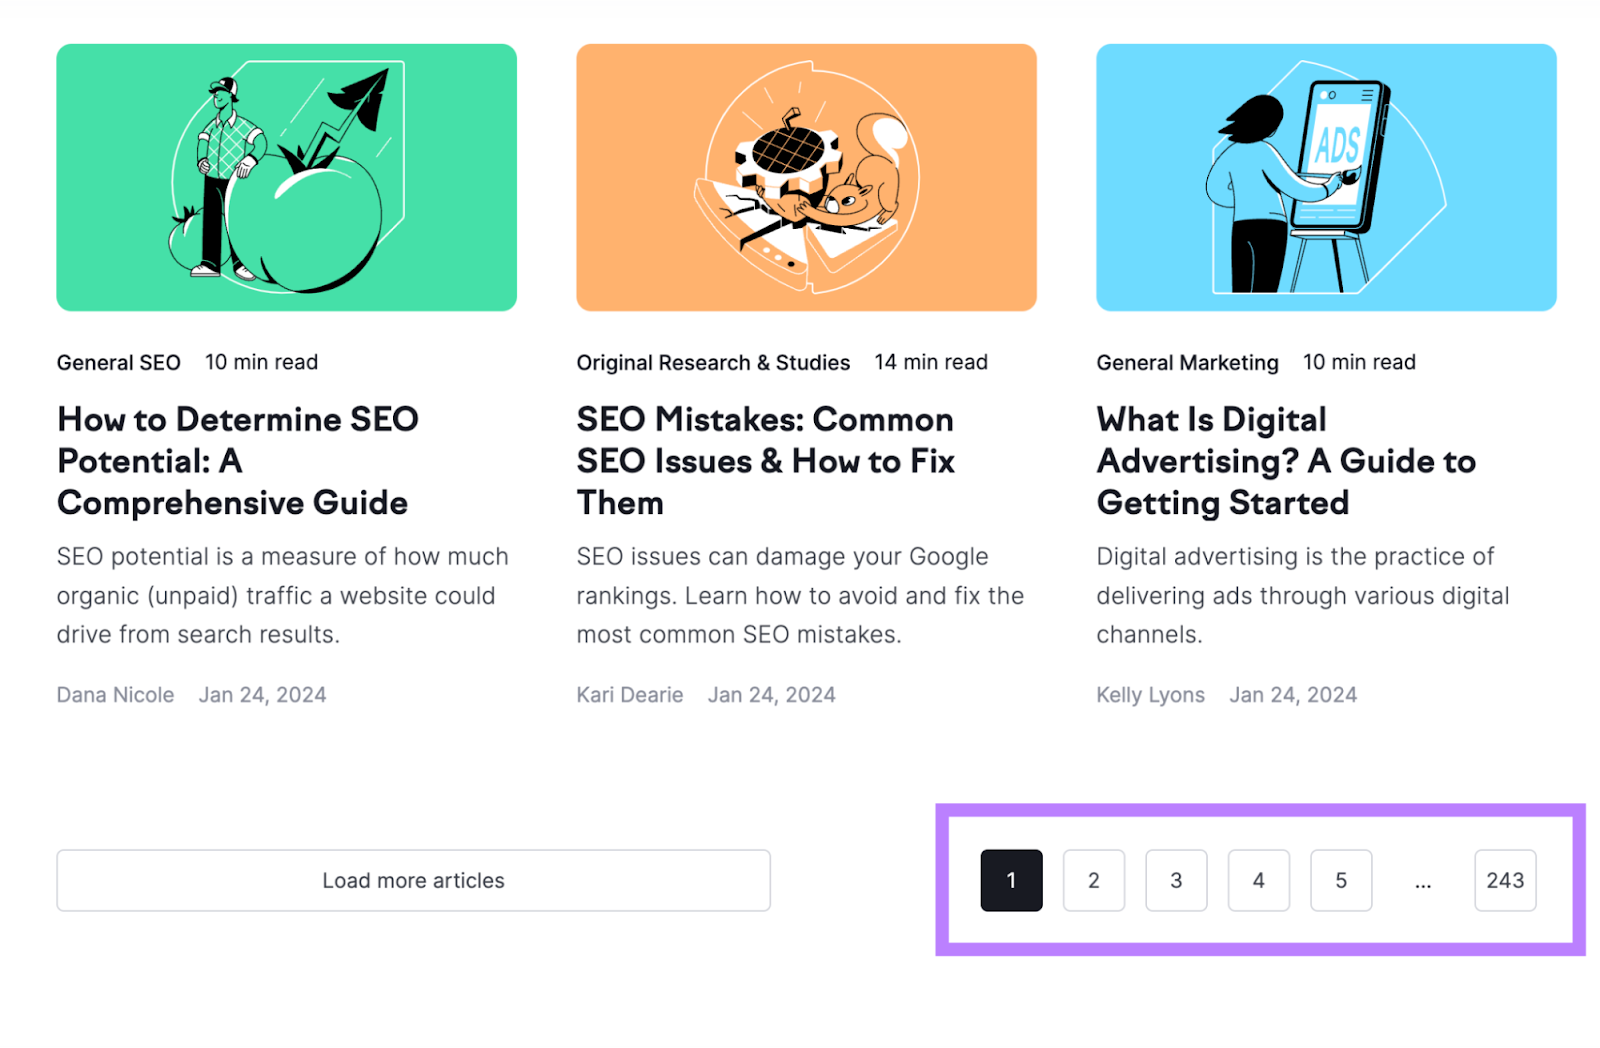
This approach is favored over infinite scrolling.
In infinite scrolling, content loads dynamically as users scroll down the page.
This creates an issue for Google. Because it may not be able to access all the content that loads dynamically.
And if Google can’t access your content, it won’t appear in search results.
Implemented correctly, pagination will reference links to the next series of pages. Which Google can follow to discover your content.
Learn more: Pagination: What Is It & How to Implement It Properly
8. Review Your Robots.txt File
A robots.txt file tells Google which parts of the site it should access and which ones it shouldn’t.
Here’s what Semrush’s robots.txt file looks like:
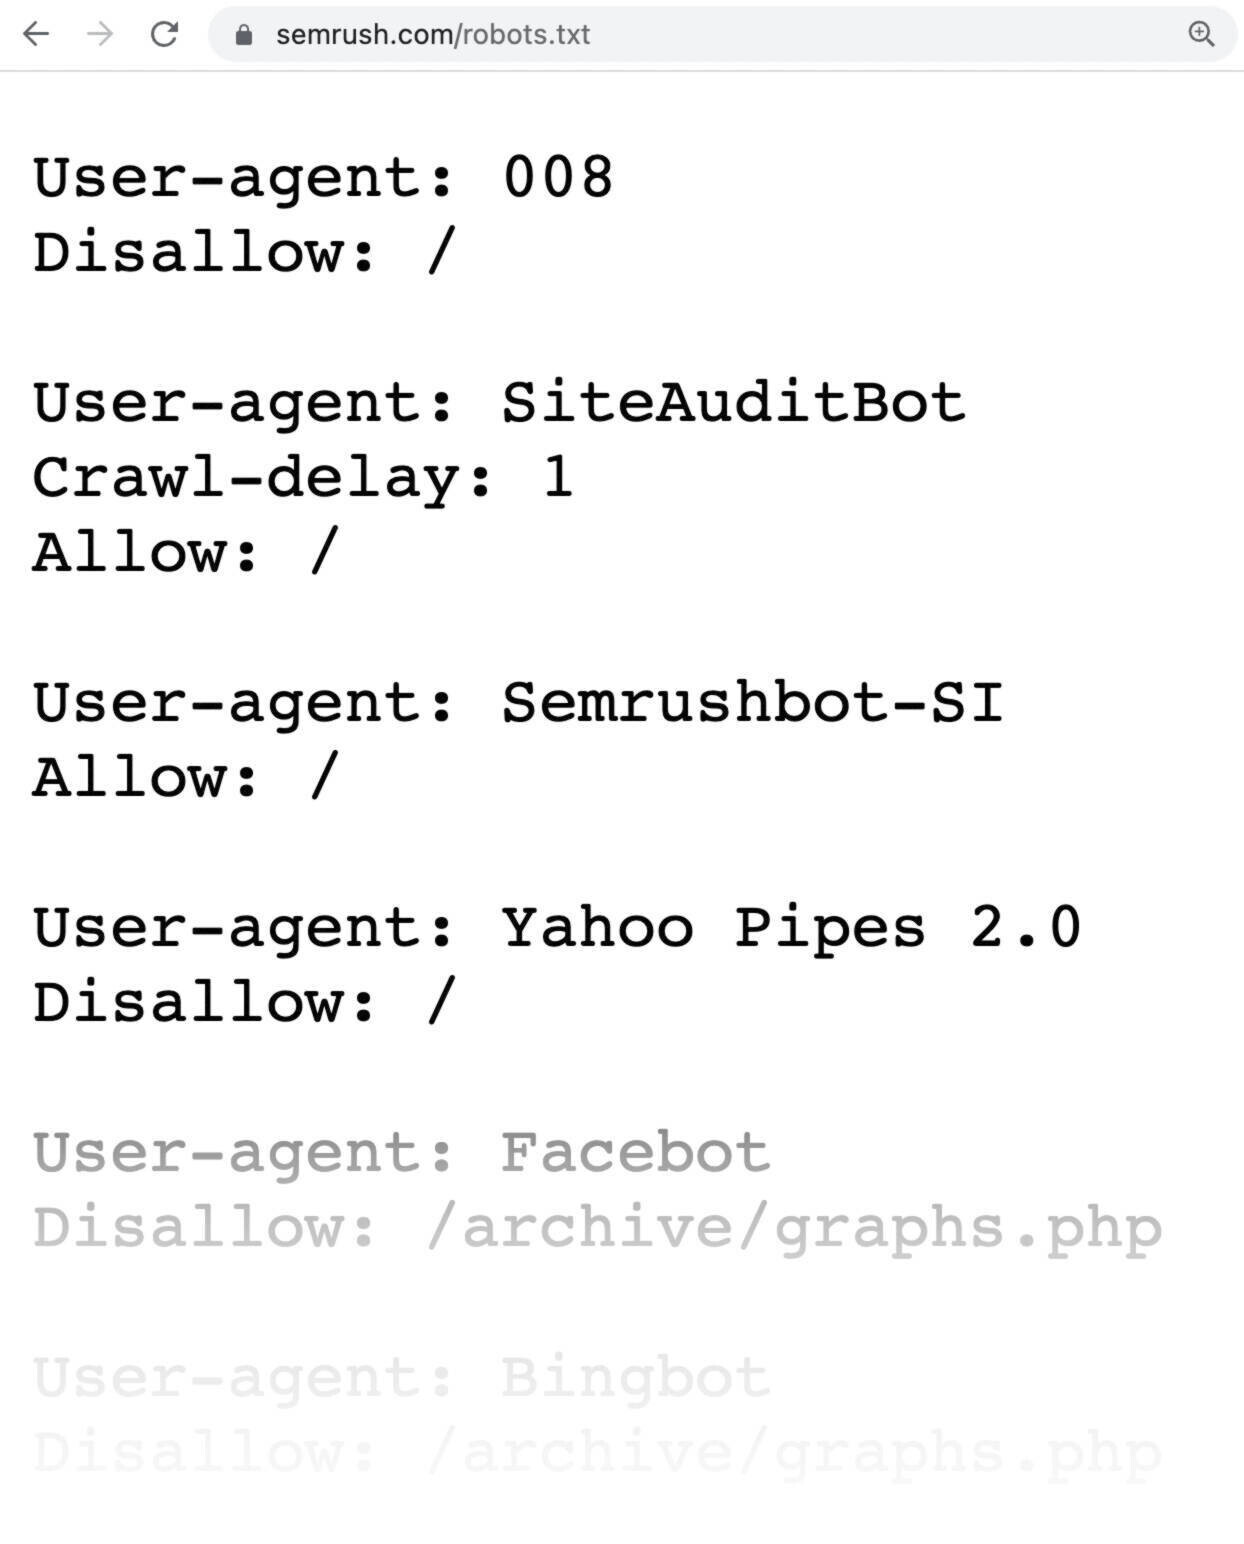
Your robots.txt file is available at your homepage URL with “/robots.txt” at the end.
Here’s an example: yoursite.com/robots.txt
Check it to ensure you’re not accidentally blocking access to important pages that Google should crawl via the disallow directive.
For example, you wouldn’t want to block your blog posts and regular website pages. Because then they’ll be hidden from Google.
Further reading: Robots.txt: What It Is & How It Matters for SEO
9. Implement Structured Data
Structured data (also called schema markup) is code that helps Google better understand a page’s content.
And by adding the right structured data, your pages can win rich snippets.
Rich snippets are more appealing search results with additional information appearing under the title and description.
Here’s an example:

The benefit of rich snippets is that they make your pages stand out from others. Which can improve your click-through rate (CTR).
Google supports dozens of structured data markups, so choose one that best fits the nature of the pages you want to add structured data to.
For example, if you run an ecommerce store, adding product structured data to your product pages makes sense.
Here’s what the sample code might look like for a page selling the iPhone 15 Pro:
<script type="application/ld+json">
{
"@context": "https://schema.org/",
"@type": "Product",
"name": "iPhone 15 Pro",
"image": "iphone15.jpg",
"brand": {
"@type": "Brand",
"name": "Apple"
},
"offers": {
"@type": "Offer",
"url": "",
"priceCurrency": "USD",
"price": "1099",
"availability": "https://schema.org/InStock",
"itemCondition": "https://schema.org/NewCondition"
},
"aggregateRating": {
"@type": "AggregateRating",
"ratingValue": "4.8"
}
}
</script>
There are plenty of free structured data generator tools like this one. So you don’t have to write the code by hand.
And if you’re using WordPress, you canuse the Yoast SEO plugin to implement structured data.
10. Find & Fix Broken Pages
Having broken pages on your website negatively affects user experience.
Here’s an example of what one looks like:
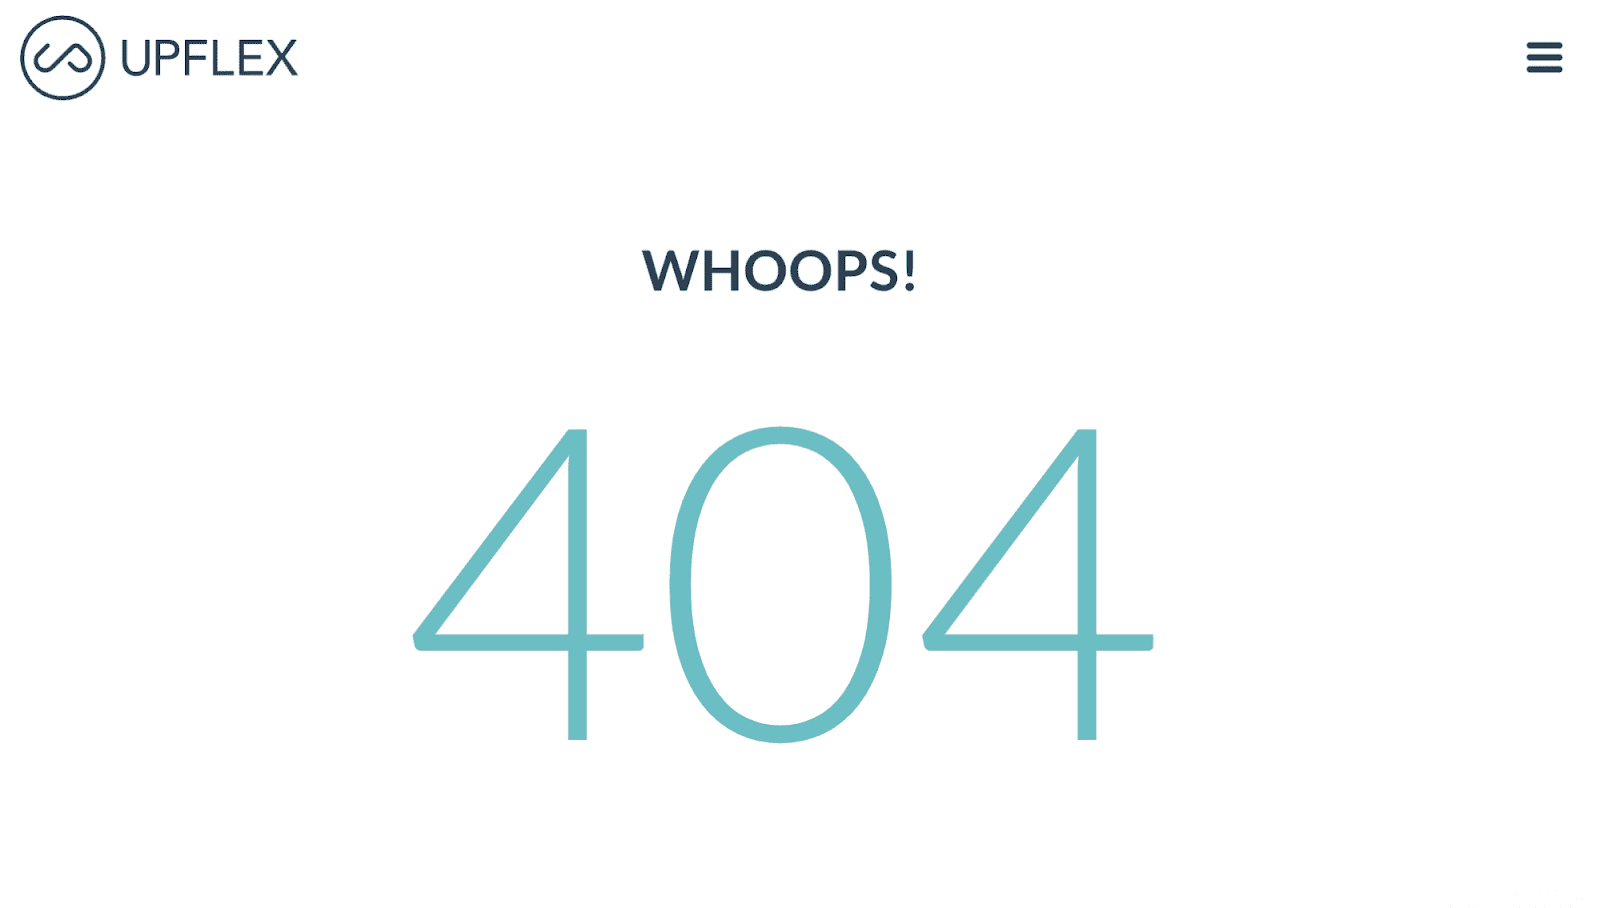
And if those pages have backlinks, they go wasted because they point to dead resources.
To find broken pages on your site, crawl your site using Semrush’s Site Audit.
Then, go to the “Issues” tab. And search for “4xx.”
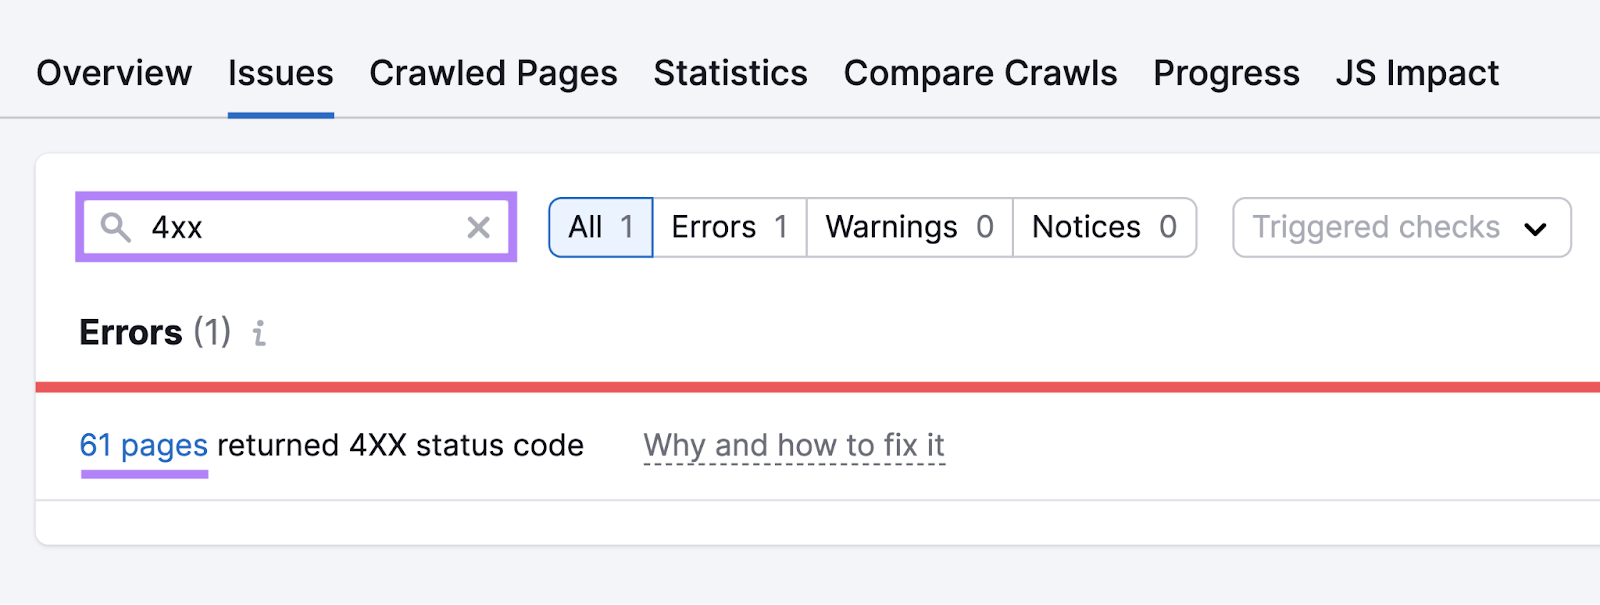
It’ll show you if you have broken pages on your site. Click on the “# pages” link to get a list of pages that are dead.
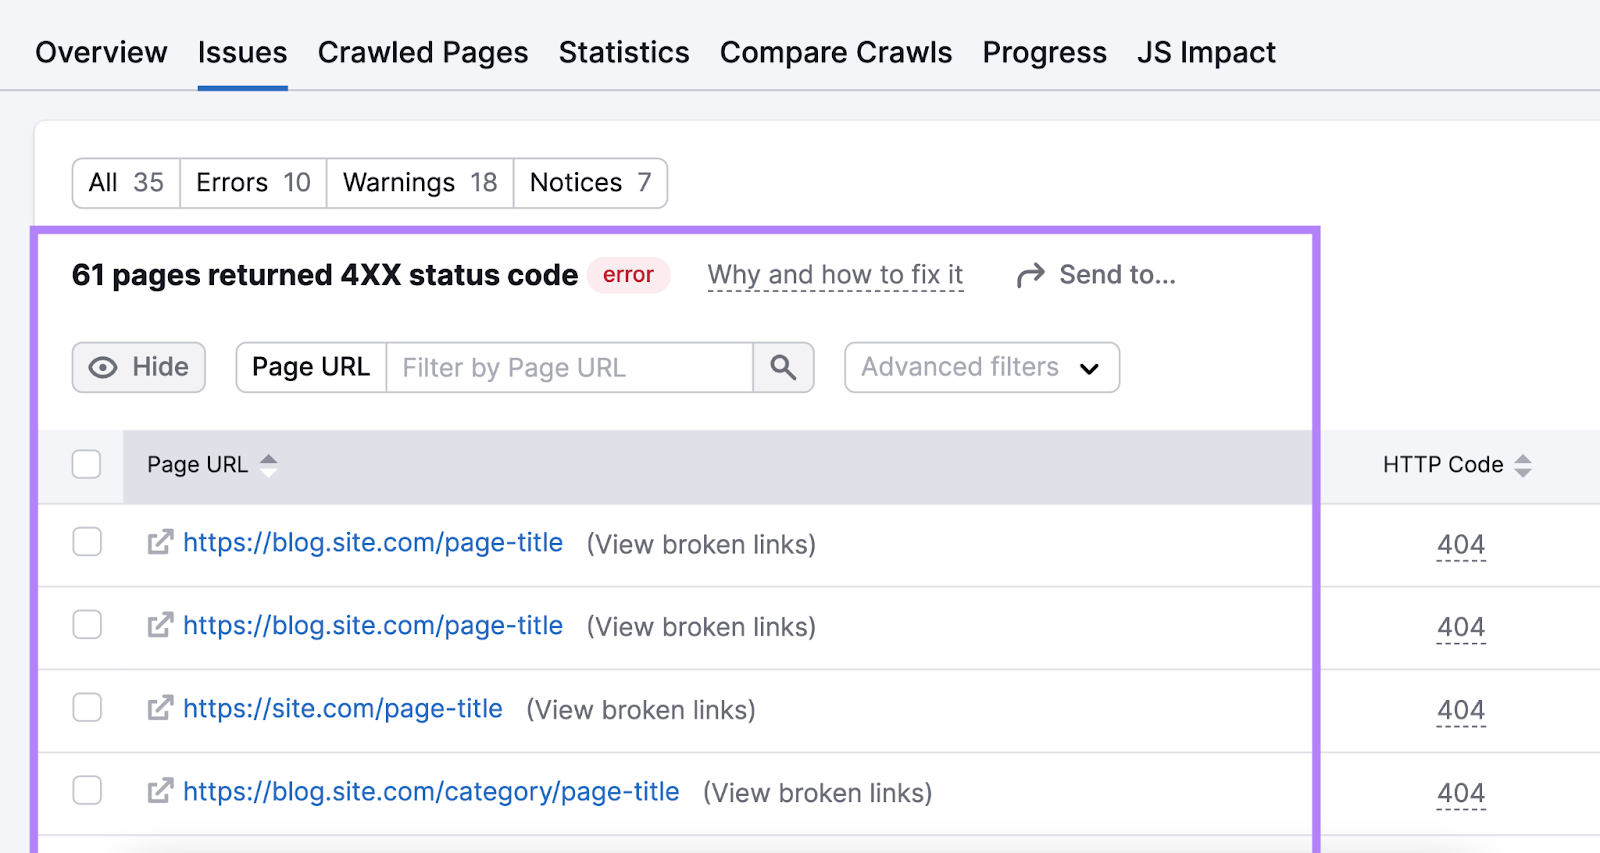
To fix broken pages, you have two options:
- Reinstate pages that were accidentally deleted
- Redirect old pages you no longer want to other relevant pages on your site
After fixing your broken pages, you need to remove or update any internal links that point to your old pages.
To do that, go back to the “Issues” tab. And search for “internal links.” The tool will show you if you have broken internal links.

If you do, click on the “# internal links” button to see a full list of broken pages with links pointing to them. And click on a specific URL to learn more.
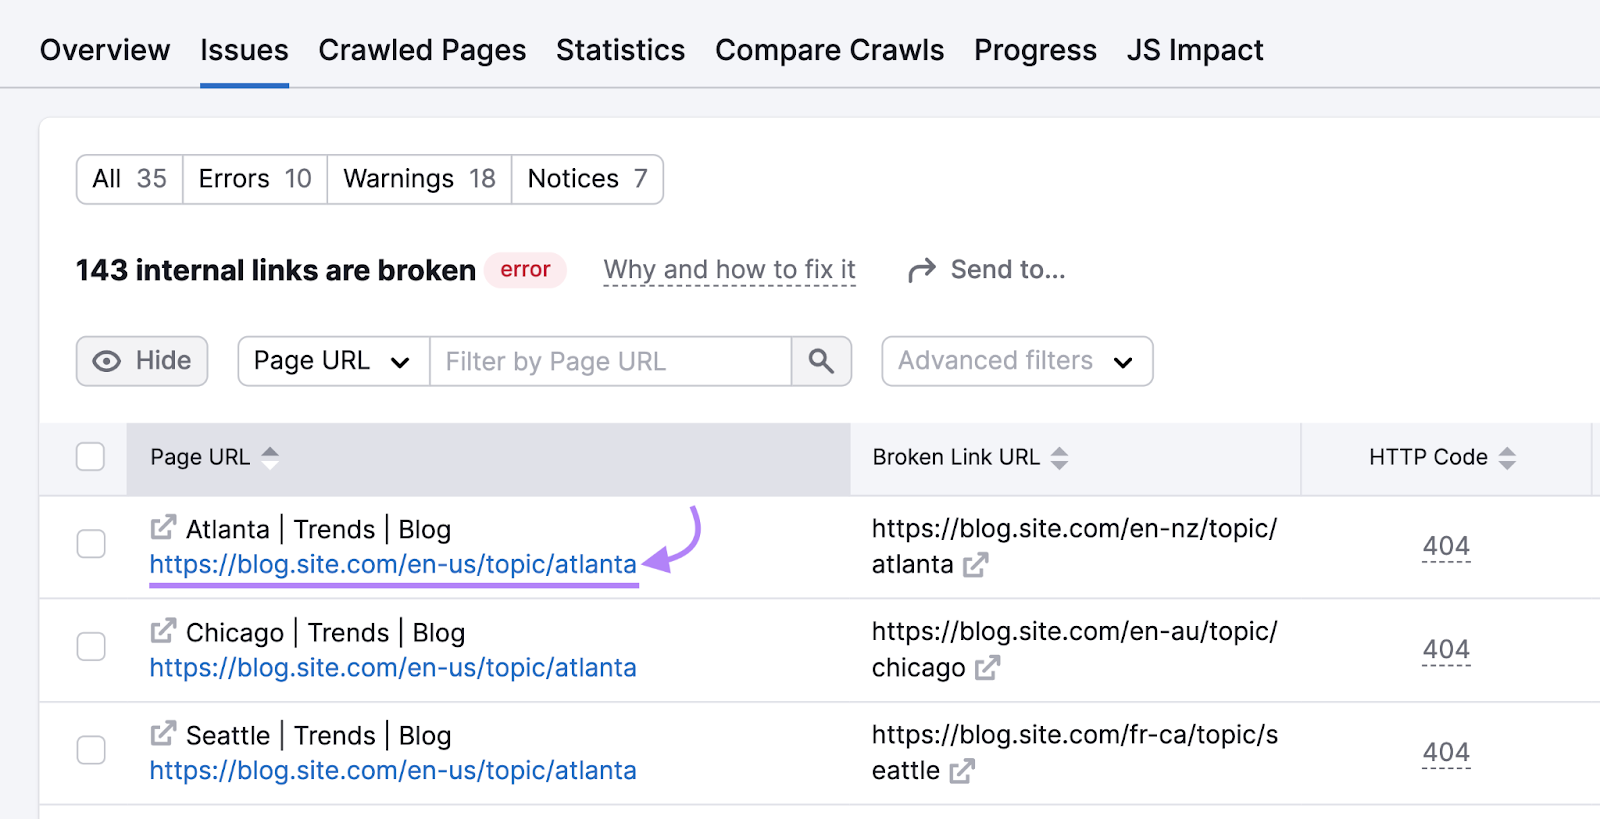
On the next page, click the “# URLs” button, found under “Incoming Internal Links,” to get a list of pages pointing to that broken page.
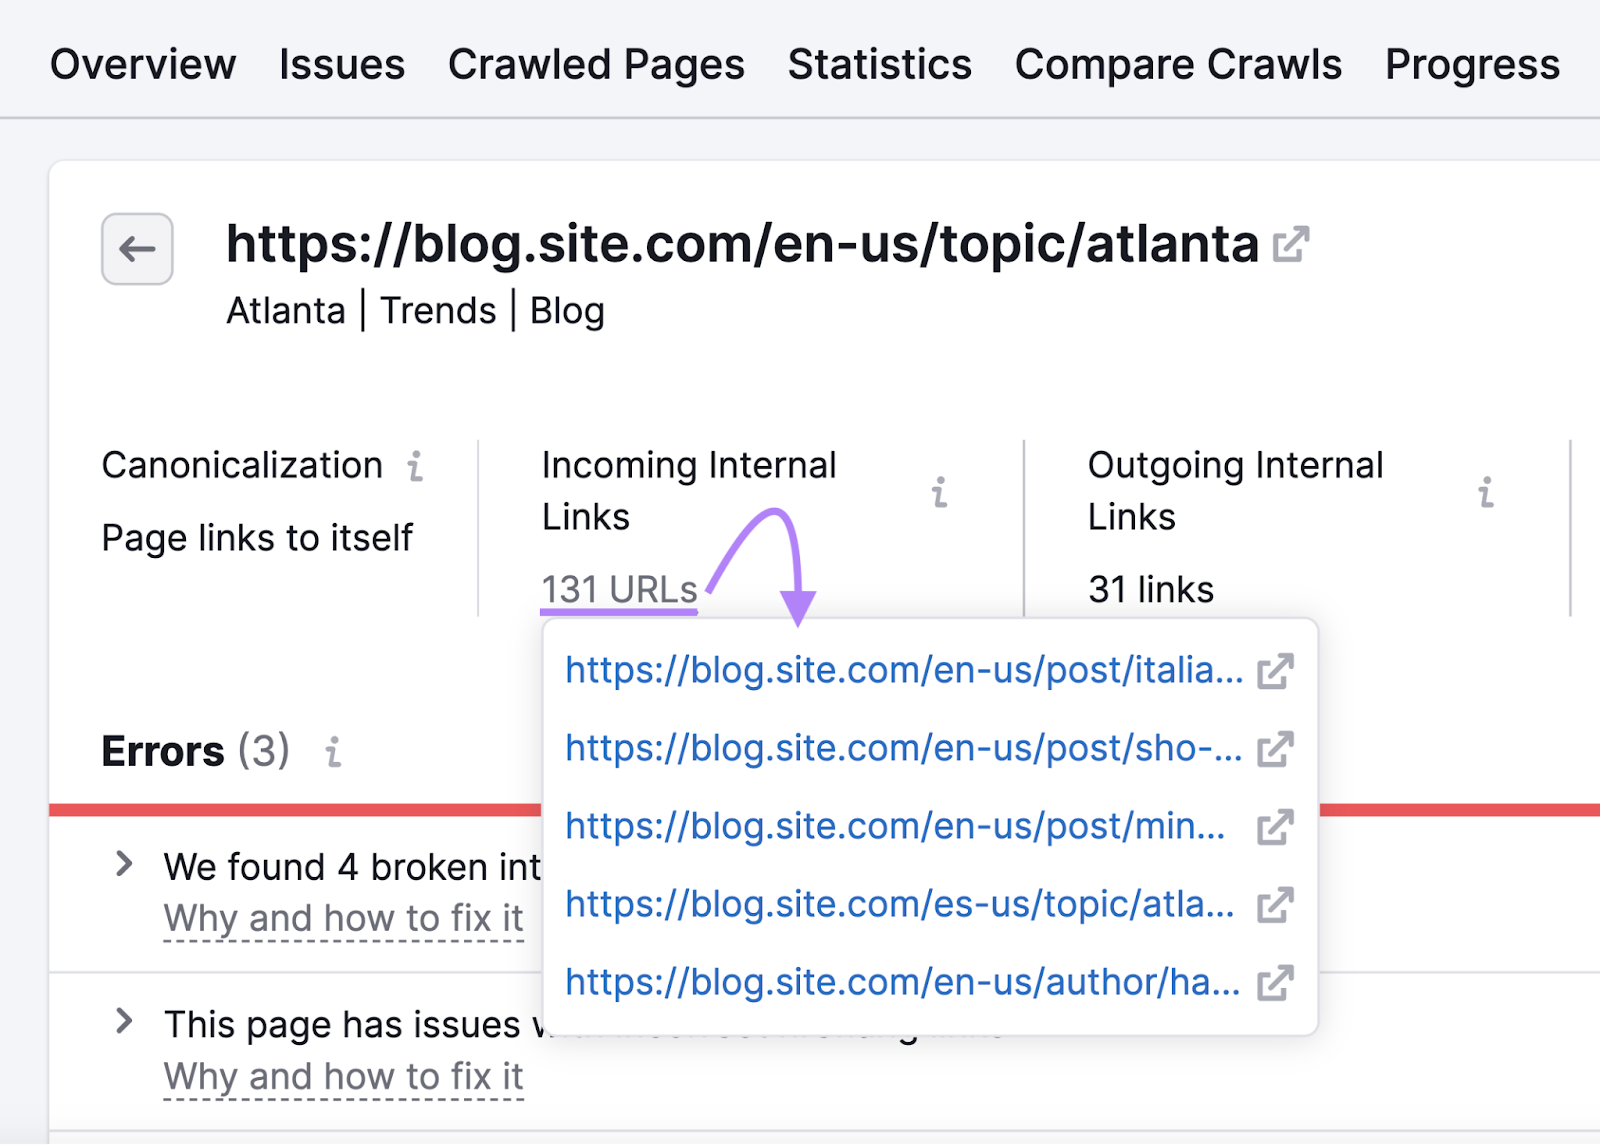
Update internal links pointing to broken pages with links to their updated locations.
11. Optimize for the Core Web Vitals
The Core Web Vitals are speed metrics that Google uses to measure user experience.
These metrics include:
- Largest Contentful Paint (LCP)—Calculates the time a webpage takes to load its largest element for a user
- First Input Delay (FID)—Measures the time it takes to react to a user's first interaction with a webpage
- Cumulative Layout Shift (CLS)—Measures the unexpected shifts in layouts of various elements on a webpage
To ensure your website is optimized for the Core Web Vitals, you need to aim for the following scores:
- LCP—2.5 seconds or less
- FID—100 milliseconds or less
- CLS—0.1 or less
You can check your website’s performance for the Core Web Vitals metrics in Google Search Console.
To do this, visit the “Core Web Vitals” report.
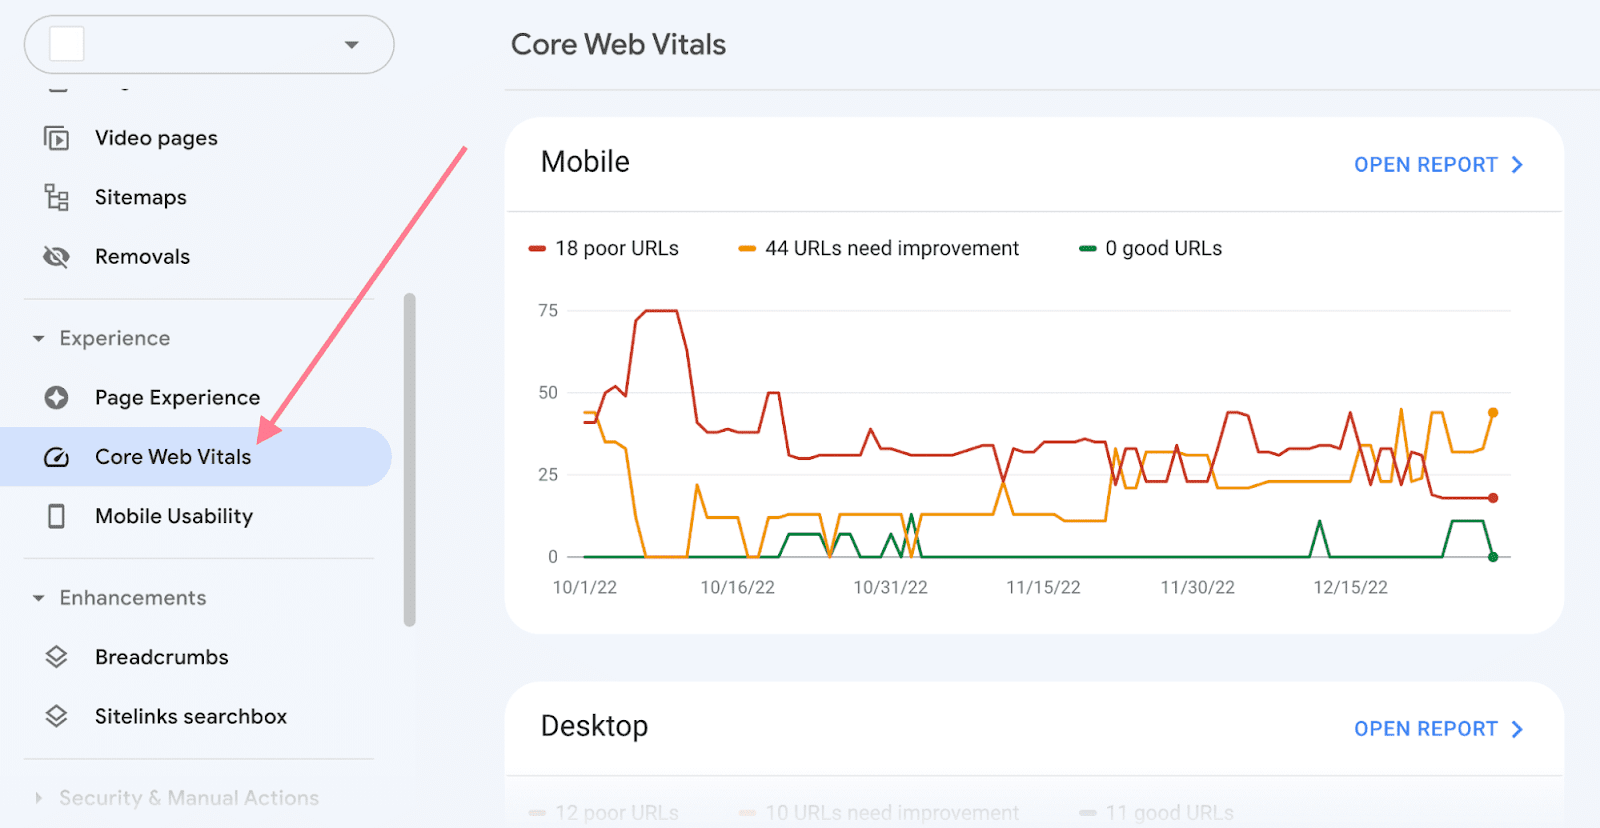
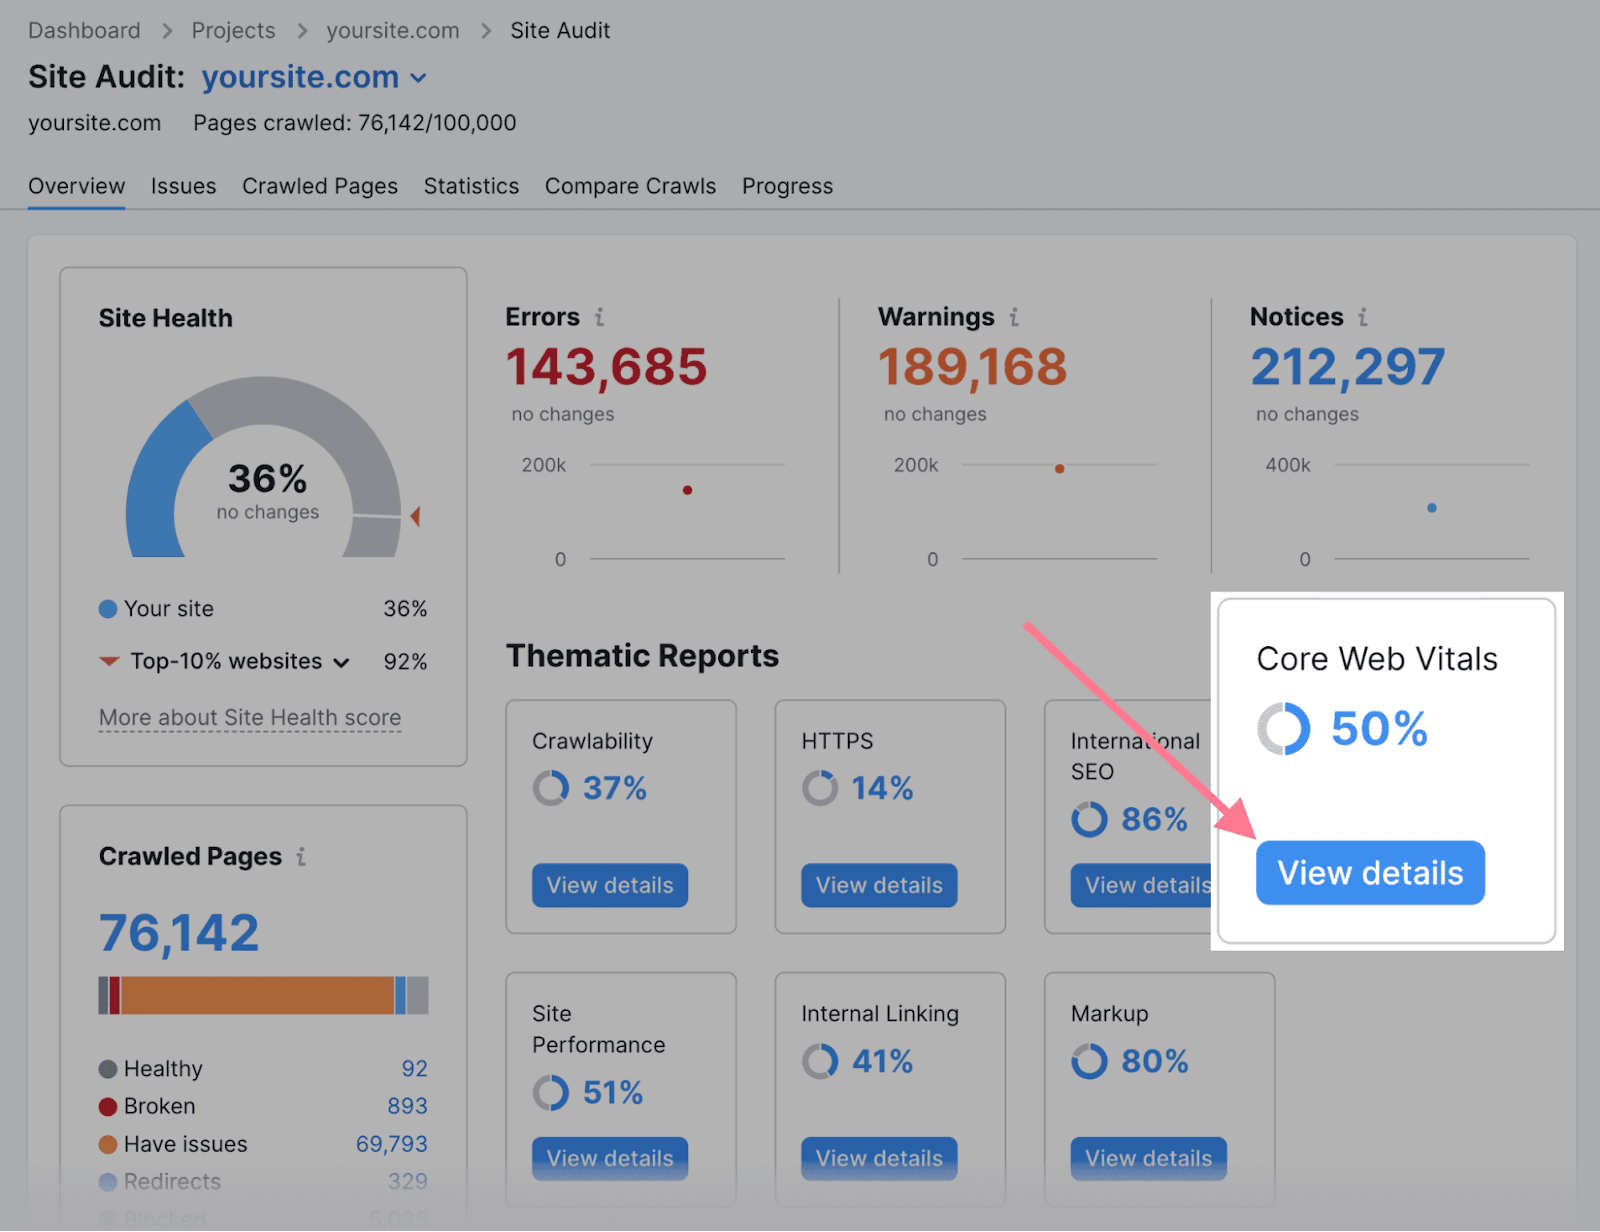
You can also use Semrush to see a report specifically created around the Core Web Vitals.
In the Site Audit tool, navigate to “Core Web Vitals” and click “View details.”
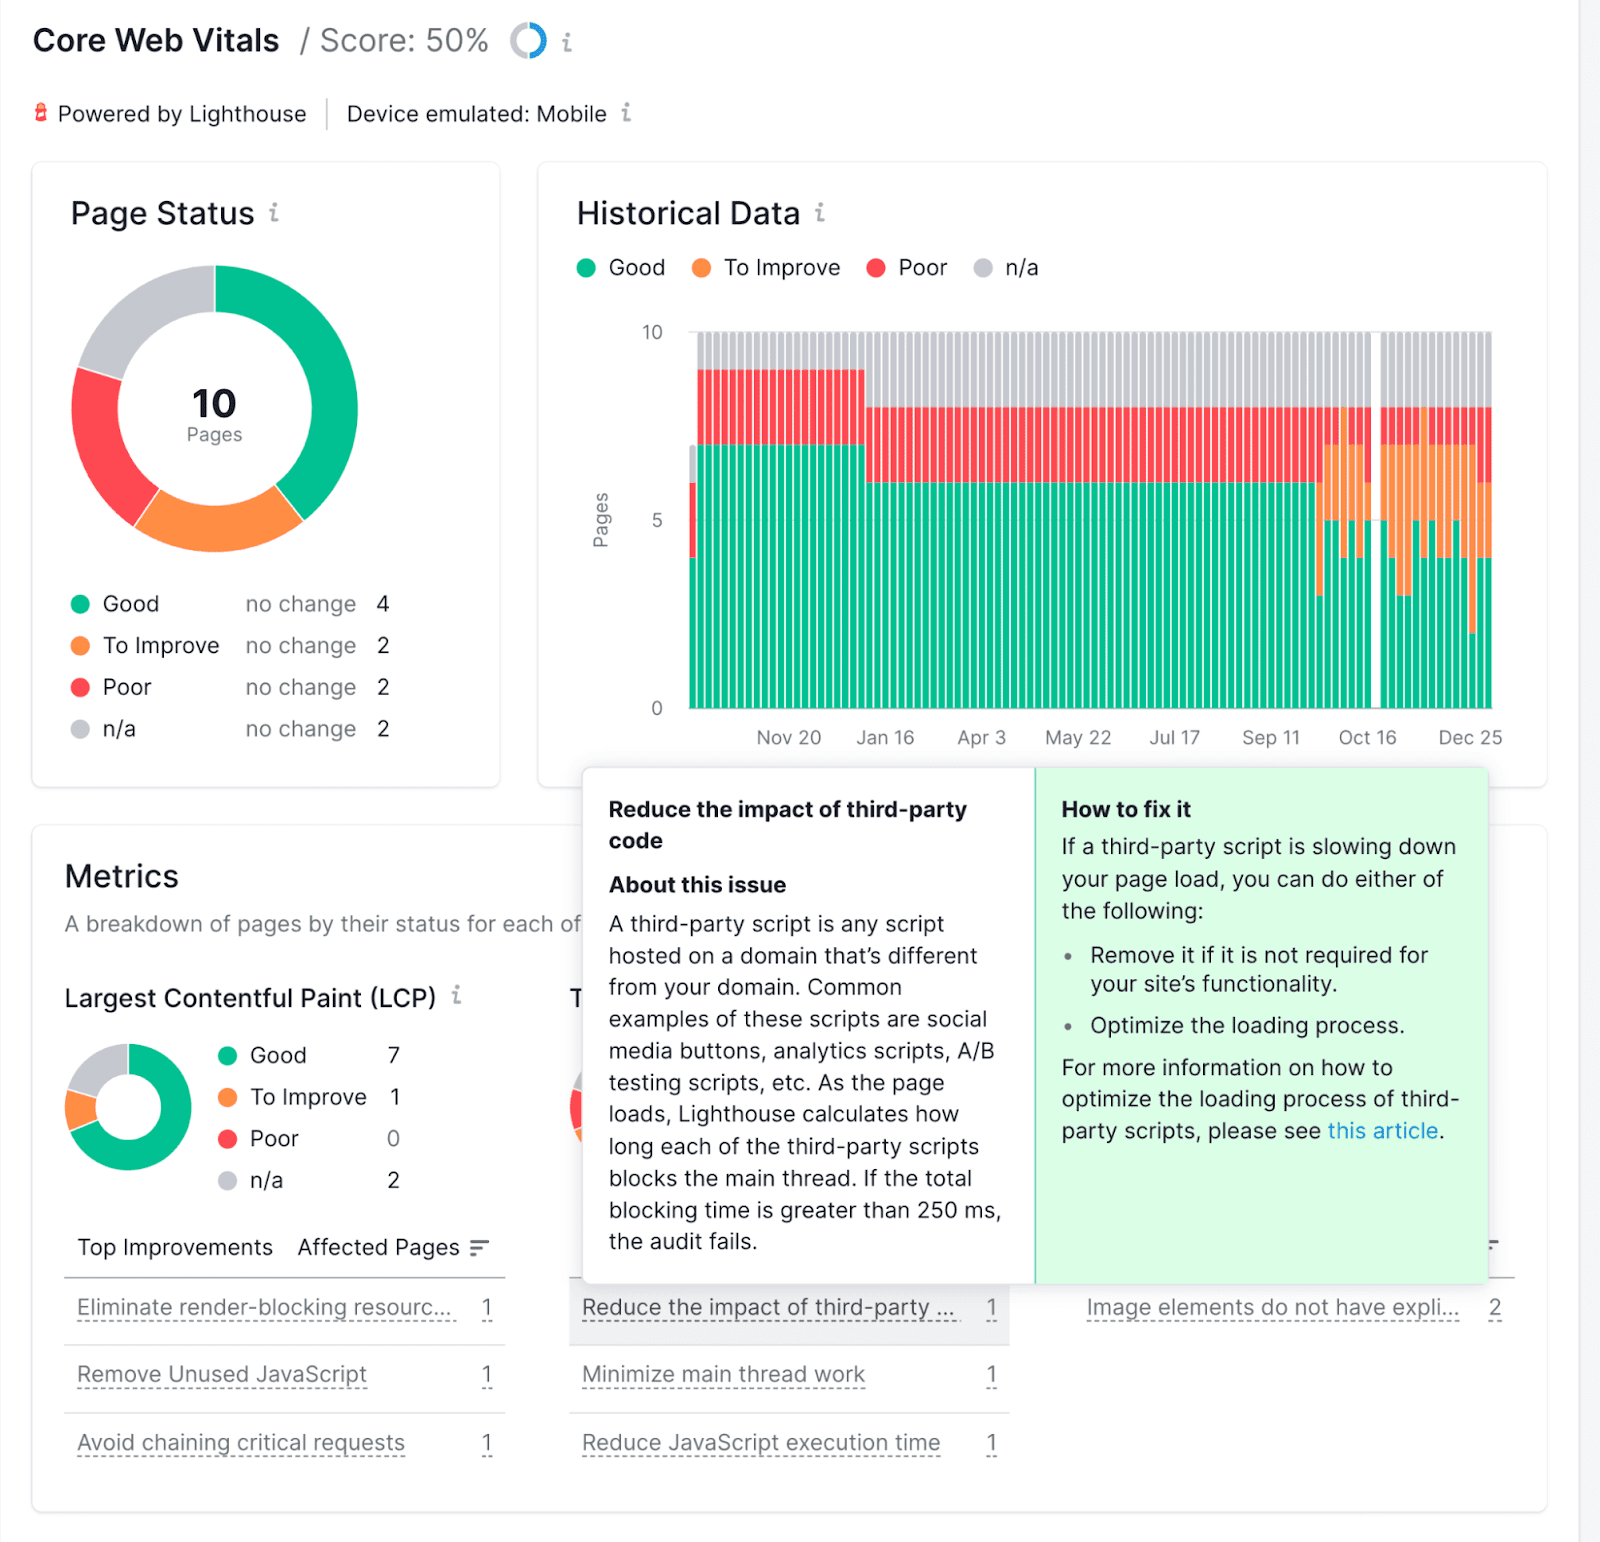
This will open a report with a detailed record of your site's Core Web Vitals performance and recommendations for fixing any issues.
Further reading: Core Web Vitals: A Guide to Improving Page Speed
12. Use Hreflang for Content in Multiple Languages
If your site has content in multiple languages, you need to use hreflang tags.
Hreflang is an HTML attribute used for specifying a webpage's language and geographical targeting. And it helps Google serve the correct versions of your pages to different users.
For example, we have multiple versions of our homepage in different languages. This is our homepage in English:

And here’s our homepage in Spanish:
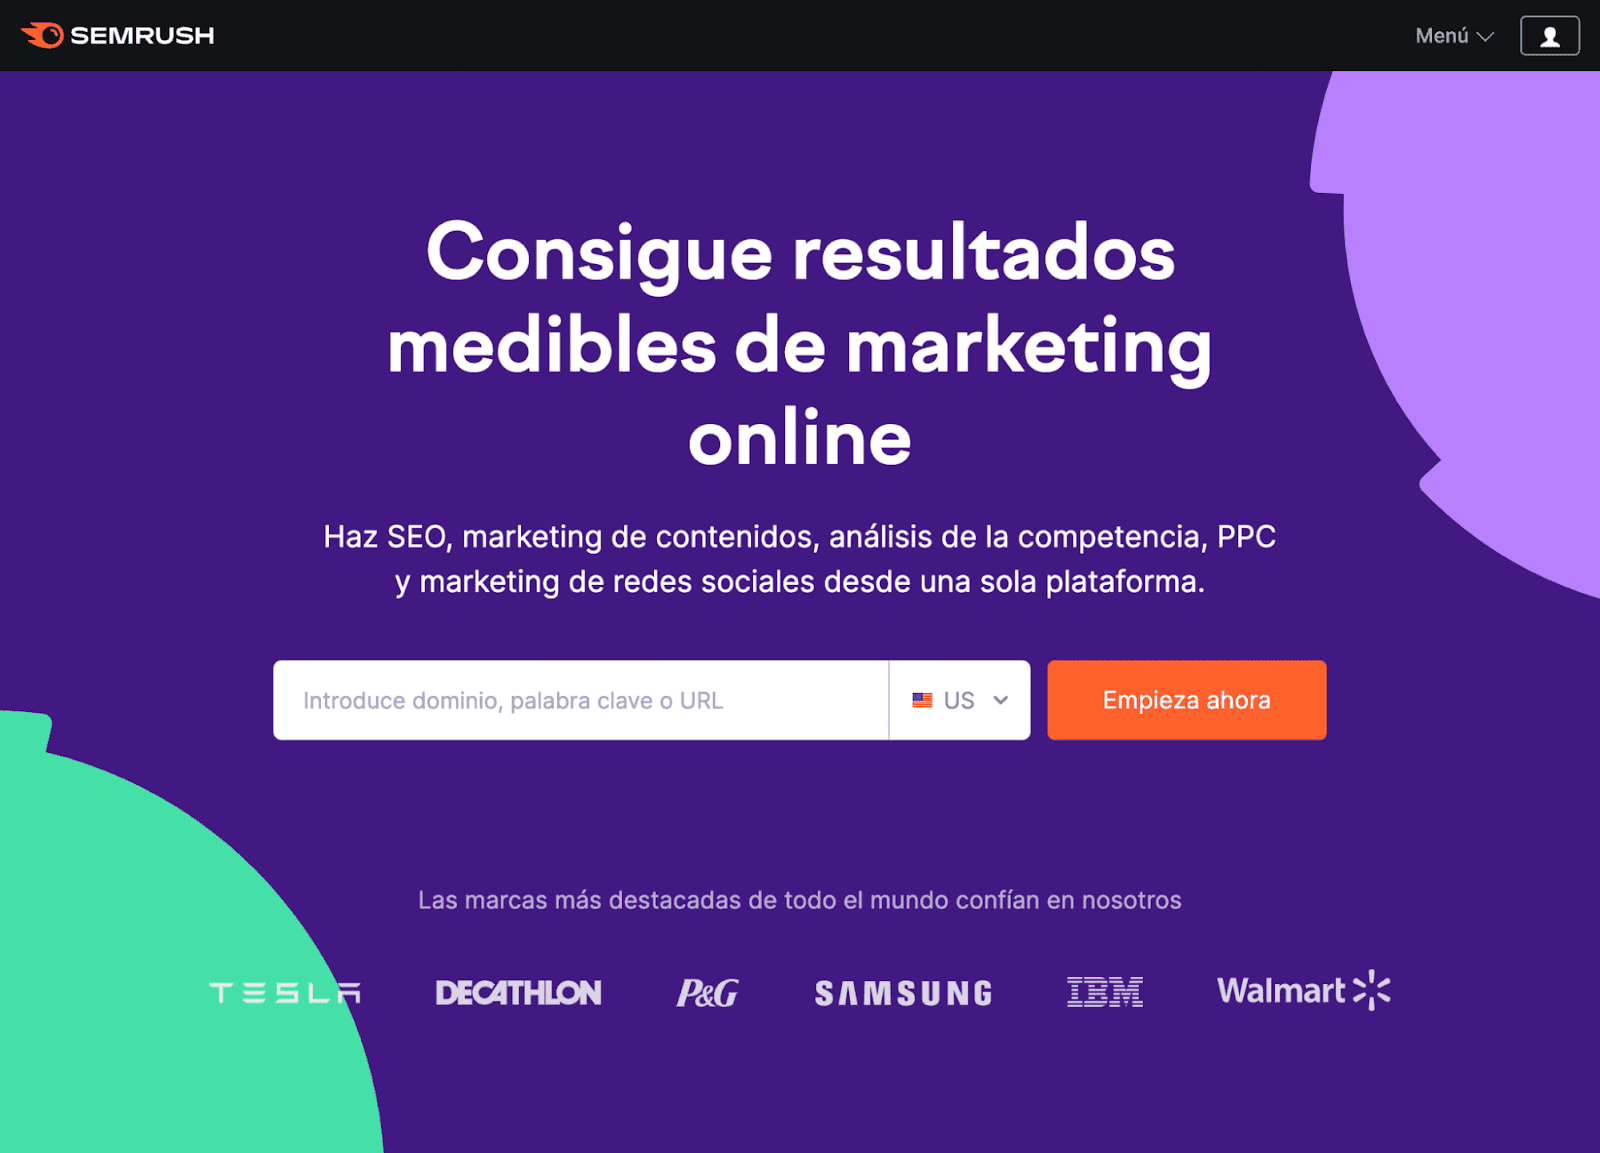
Each of our different versions uses hreflang tags to tell Google who the intended audience is.
This tag is reasonably simple to implement.
Just add the appropriate hreflang tags in the <head> section of all versions of the page.
For example, if you have your homepage in English, Spanish, and Portuguese, you’ll add these hreflang tags to all of those pages:
<link rel="alternate" hreflang="x-default" href="https://yourwebsite.com" />
<link rel="alternate" hreflang="es" href="https://yourwebsite.com/es/" />
<link rel="alternate" hreflang="pt" href="https://yourwebsite.com/pt/" />
<link rel="alternate" hreflang="en" href="https://yourwebsite.com" />
13. Stay On Top of Technical SEO Issues
Technical optimization isn't a one-off thing. New problems will likely pop up over time as your website grows in complexity.
That’s why regularly monitoring your technical SEO health and fixing issues as they arise is important.
You can do this using Semrush’s Site Audit tool. It monitors over 140 technical SEO issues.
For example, if we audit Petco’s website, we find three issues related to redirect chains and loops.
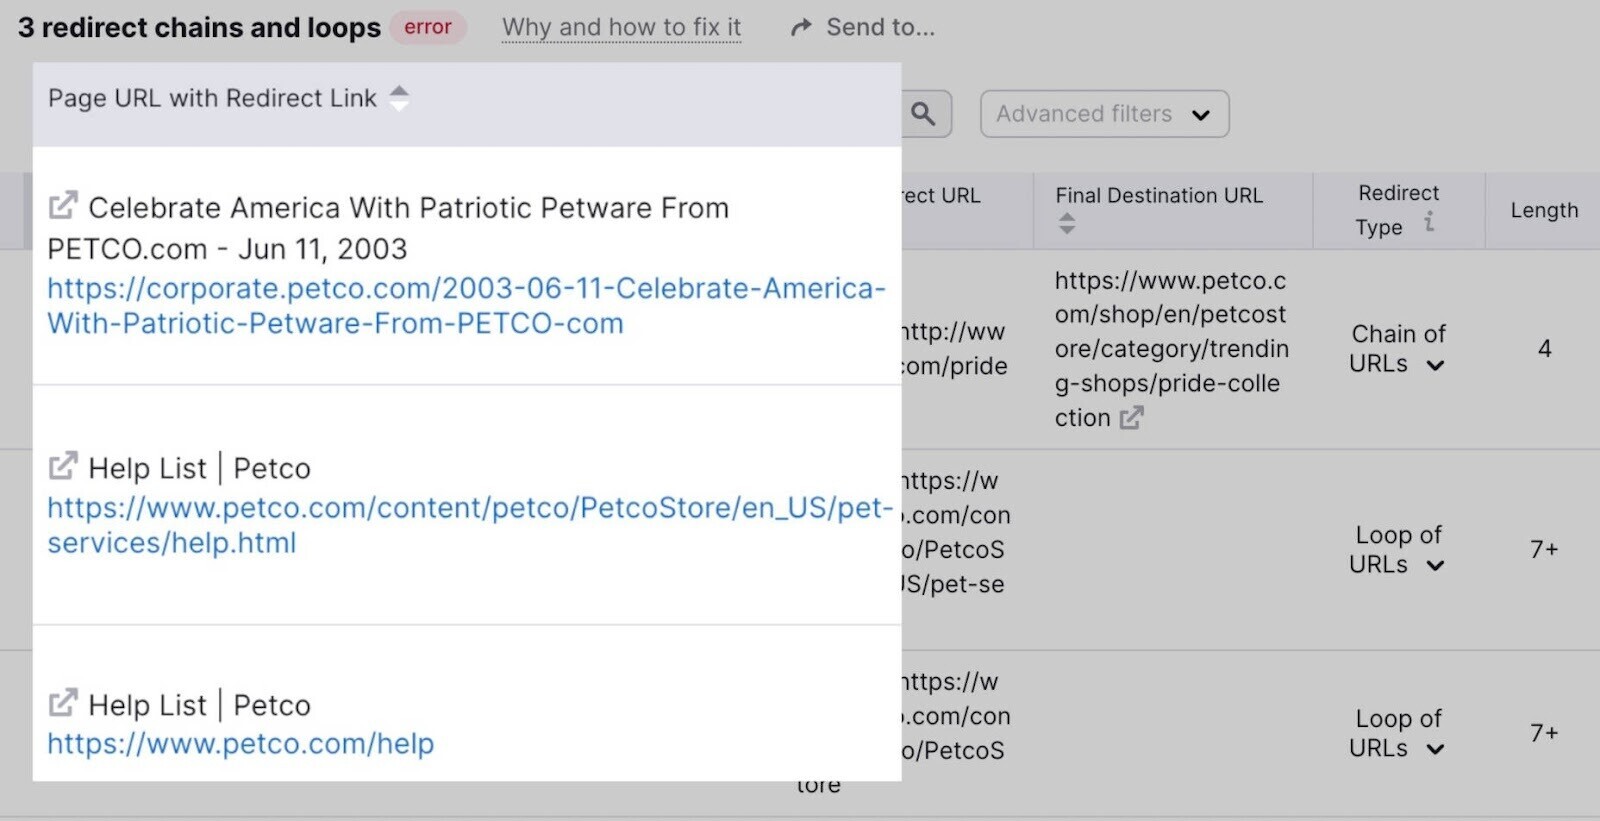
Redirect chains and loops are bad for SEO because they contribute to a negative user experience.
And you’re unlikely to spot them by chance. So, this issue would have likely gone unnoticed without a crawl-based audit.
Regularly running these technical SEO audits gives you action items to improve your search performance.
